For those who spend maximum time in the kitchen, every little detail is important to make cooking more convenient. In addition, it is important to maintain a cozy atmosphere in the kitchen interior, so you can make some accessories and useful items from fabric with your own hands.
For example, potholders, which should be changed from time to time: you can save money and sew something interesting yourself.
These potholders are very easy to make, and the process will be interesting even for children who are just getting acquainted with the basics of needlework.
Watch our videos and photos, delve into the tips - and choose from the patterns how and which ones to sew oven mitts for the kitchen with your own hands.
Do-it-yourself potholder, photo
Materials for tacks
Before deciding how to sew a pot mitten pattern or other forms of such accessories, select the basic materials for sewing. The choice of textiles and lining-filler is very important, since the quality of the materials will affect the wear resistance and ease of use of homemade potholders.
Attention! The best choice for oven mitts is natural fabrics like chintz, cotton or linen.
The thicker the fabric, the easier it will be to handle hot dishes., so try to find scraps of high-density fabric. Many people use pieces of felt or old jeans to create entire potholders or their individual parts. By the way, old jeans are very convenient precisely because they have ready-made pockets.
 How to sew oven mitts from old jeans
 At the stage of preparation for sewing, you should decide on the shape of potholders for the kitchen. If you still have little experience in such work, start with the simplest forms: make a pot holder in the form of a square or mitten.
Do not forget that potholders of different sizes and shapes will differ in functionality: think in advance what parameters and proportions will be optimal.
If a small potholder is sufficient for frying pans or teapots, then the potholder should be long enough (or there should be two of them).
 Original do-it-yourself potholders made of fabric, photo
 Based on the selected shapes and sizes, prepare the fabric for sewing. Do not forget that some models of potholders require the creation of both an outer and an inner layer of fabric. You will also need a filler: it can be a padding polyester, felt, drape or batting lining.
It is better to choose fairly thick and dense materials, as they will not deteriorate from high temperatures.
Advice: If you don't have suitable fillings, don't waste your money: make a lining from a folded terry towel.
So, you are almost ready to start sewing. All that remains is to stock up on accessories and decorative materials.
If you choose a patterned fabric, decorating the potholders is not necessary. But if you want to slightly diversify their appearance, you can use ribbons, ruffles, lace inserts, fabric appliqués and embroidery threads.
 Beautiful potholders made of fabric
 The simplest sewing methods
One of the most common options is a simple DIY mitten. This model of potholder is popular because of its convenience: you just need to put it on your hand to easily carry any objects heated to a high temperature. By the way, it is not difficult to sew.
Let's figure out how to sew a pot holder with your own hands using a pattern for beginners.
There are many options for sewing pot mittens with your own hands. As a rule, six layers of materials are made for the workpiece: you will need four identical cuts from fabric and two of the same from filler.
How to sew a potholder mitten:

 How to sew oven mitts for the kitchen with your own hands, photo
 After sewing the pattern for potholders and oven mitts, cut off any excess fabric on each edge, make small cuts on the rounded sides, and turn the potholder inside out. Decorate the sleeve with piping (satin, or better yet, cotton trim), an elongated piece of fabric or braid.
If you plan for the potholder to hang on a hook, sew a convenient loop made of a similar material to the edging.
We have told you the simplest way to sew a pot mitten. If desired, it can be made quilted: to do this, you should slightly change the sewing process itself.

To begin, stitch stitches on one piece of three layers using rectangular textile scraps folded in the correct order.
Attention! Try to choose a thread color that harmonizes with the chosen facing fabric or decorative elements.
Once you have two rectangular quilts, fold them over each other with the back facing outward on the top and bottom sides of the sandwich.
Machine-stitch or hand-sew these fragments using a prepared mitten-shaped pattern. Finish the edges and sew on a loop.
The potholder is ready!

Square potholder
The process of sewing a square potholder is simpler compared to the previous method. It is made from two batting and two fabric blanks. Moreover, it is not at all necessary to download patterns for potholders for the kitchen with your own hands: you can immediately give the material the required shape.

The pattern of a square potholder is simple, and you can’t go wrong with the size: the standard size of such a potholder will be 20 by 20 or 25 by 25 cm. To create a loop, you will need a strip with dimensions of 8 by 15 cm.
Start with the correct arrangement of all layers: the first will be batting, the next will be textile (face up), the third will also be fabric face down, the fourth will be batting.
Sew three sides of the multi-layer potholder together, then turn the product inside out, iron it - and carefully sew the fourth side, not forgetting to add a loop to the potholder.
To finish, you can use ribbons or other material that will give the edges a neater look.

A square-shaped potholder can also be quilted, decorated with a convenient pocket on one side, or made in such a way that it fits on your hand.
In a similar way, you can sew simple potholders of any other shape: we will talk about possible options below.

Sewing potholders using patchwork technique
We invite you to watch a master class on potholders in the patchwork style, as the patchwork technique is ideal for creating a cozy kitchen decor. Such products will look bright and festive, and due to the possibility of using any fabric scraps, they will help you save on purchasing materials. DIY potholders made from scraps, photo
 There are several ways to sew pot mittens in patchwork style or products of other shapes:

To create such potholders, it is better to use at least three types of fabric with different designs or shades.
Potholders made from elements with shades of the same palette, differing in the degree of saturation, will look stylish.
The production of patchwork potholders “Cockerel and Hen” - the symbol of 2017 - from scraps of fabric using the crazy patchwork technique is shown in the video below:
A standard patchwork tack master class begins with preparing the patches. By the way, you can cut various geometric shapes from small remnants of fabric. Sew the pieces together to create one side of the potholder.
The second front side should be designed in a similar way. Two fragments with patchwork decor are placed on batting or other filler - and the potholder is stitched along the edges.
If you are making your own pot mitt, don't forget about two fabric patterns for the inside.

Other craft ideas
These master classes on how to sew oven mitts for the kitchen with your own hands are suitable for creating similar accessories and other shapes.
We offer you several interesting handicraft options:


Potholders for the kitchen can be knitted or crocheted, using as many colored threads as possible for variety. Such products can be in the shape of a square or circle, as well as hearts, flowers, stars and many other figures that you find beautiful or funny.
Attention! You should not choose a knitting technique for potholders that involves creating three-dimensional patterns. It will be more convenient for you to use them for their intended purpose if the surface is as smooth as possible.

We hope that the photos of DIY kitchen oven mitts helped you make the right choice. All that remains is to look for leftover fabric for needlework and start sewing.
A video on how to sew oven mitts for the kitchen with your own hands and patterns for cutting will help you.


Video
Below, watch a wonderful MK - a video on how to sew an original heart-shaped pot holder from fabric in the shape of a heart step by step - this option is suitable for beginners:
The following video is a step-by-step master class on making a butterfly-like potholder:
Potholder “Leaf fall” using patchwork technique. Master class with step-by-step photos.
The master class is addressed to technology teachers, additional education teachers, educators, school-age children, as well as parents for joint creativity with children and everyone who loves handicrafts.
Tugareva Irina Vasilievna, teacher of GBS(K)OU "Suponevskaya special school - boarding school of the VI type."
Purpose: The potholder can be a gift for mother or grandmother with further use of the product in the kitchen.
Target: making potholders using the patchwork technique.
Tasks:
- introduce the technology of making products from flaps;
- promote the development of creative abilities;
- cultivate perseverance, the desire to make a useful thing for loved ones with your own hands.
We sew patch to patch,
We select colors and create a pattern.
The result is to our delight,
To our loved ones and friends!
Piece by piece - and before your eyes an exquisite, unique product created by the hands of craftswomen appears. Sewing from scraps takes its rightful place among the recognized and widespread types of needlework, such as embroidery, sewing, and knitting. This type of needlework is also attractive because it does not require large material costs: in almost every house housewives have scraps and scraps of fabric that can be used in their work. Almost all fabrics can be used for patchwork. But it should be noted that it is easier to work with cotton fabrics: chintz, satin, calico. These fabrics do not slip when sewing seams and iron well.
Patchwork makes it possible to create beautiful, bright, unique and useful things with your own hands. As proof of this, I will cite a parable about patchwork that seemed interesting to me. It says that one woman had everything: a home, a family, prosperity - but she lost the meaning of life, nothing made her happy. And she came to the sage for help. He advised her to select an appropriate, large or small, but always colored, scrap for each event that happens to her and sew them together. The woman worked for a long time, remembering and collecting pieces of her life. After finishing the work and looking at her patchwork quilt, she realized that her life was actually bright and varied.
Patchwork is a very exciting type of needlework. There are a wide variety of types of patchwork. Currently, many different patterns for patchwork have been created, according to which even inexperienced craftswomen can create their own patchwork products. In this master class we will look at the sequence of making a patchwork from triangles and one square.
This pattern is called "diamond". But it also has another name - a square within a square. And this name, in my opinion, speaks perfectly about the principles of manufacturing products using this technique.
Making a patchwork project using a sewing machine will be faster. If this is not possible, do not despair! The work can also be done manually.
For work we will need:
- scraps of fabric;
- padding polyester;
- threads;
- needles;
- scissors;
- bias tape or a strip of plain fabric for edging;
- a sheet of paper for making templates;
- pencil;
- iron.

Progress:
Construct a life-size diagram of the pattern. First, the central square. Then complete it with isosceles right triangles. This creates a new square. Then complete the pattern with the next row of triangles.

Complete the templates and number the triangles for convenience.

Cut out the details: central square and 4 triangles according to templates No. 1, No. 2, No. 3. Triangle No. 2 should be made of the same fabric as the square; triangles No. 1 and No. 3 are the same color, different from the color of the square.

Lay out the parts according to the diagram.

We begin to assemble the pattern. We apply and sew (stitch) the first triangle No. 1 to the central square. Don't forget about safety rules!


Iron the seams.

Then we sew the 2nd, 3rd and 4th triangles No. 1.


Having completed the first row of the pattern, we trim the resulting square.

Sew on the second row of triangles (No. 2).


This is what the work looks like from the reverse side.

In the same way we sew the next row (triangles No. 3), not forgetting to iron the seam each time.


When the pattern is assembled, we trim the square and cut out 2 more squares according to its size: one from padding polyester, the other from a plain fabric.


We put the parts together, connect (sweep away).

Now you need to edge the sections of our potholder with bias tape or a strip of fabric.

Then we go around the cut with tape and baste it on the other side. We leave a reserve for making a loop.
In order for handicrafts to begin to bring pleasure, you will have to work hard. Starting is never easy. You also need to learn patchwork sewing. Not everything works out right away: your hands don’t obey, your eye fails. This is what the experience of the masters is for. Having mastered video lessons, photo materials and a master class with their tips and secrets, you can safely bring to life any idea - from making a simple pot holder to a new sofa upholstery.
Quilting for Beginners
Patchwork is very popular today - a handicraft in which colored scraps of fabric are assembled into a whole product with a planned pattern based on the principle of a mosaic. The result of such a fascinating process can be a recognizable image of some objects, geometric patterns or fancy patterns. Ideas for patchwork can be taken from photo and video lessons, as well as master classes.
Initially, the patches were sewn together to save material, and the patchwork had very specific tasks. Now the patchwork technique is the desire to create beauty while enjoying this magical action. Quilted bedspreads, decorative panels, blankets and pillows, oven mitts, updated furniture, and clothes are pleasing to the eye.

To understand the basics of patchwork technique, you need to get acquainted with its main types in master classes and videos
Basicspatchworksewing:
- AccuracyAndaccuracy. The patchwork technique is not a complicated technology, but realizing the idea, as in MK, is not always easy. The guarantee of success in patchwork is accuracy and precision. Patterns for potholders or blankets must be precise and very neatly sewn. The fabric requires pre-treatment (decatation). It needs to be soaked or washed, dried and ironed, sorted by color.
- JobWithiron. The iron is an important tool in patchwork. During work, the seams must be ironed; when decatching fabrics, they must also be ironed. Ready potholders or bags are steamed from the front side and always in one direction. The seams also need to be pressed in one direction. Then they will not crumble and will be durable. Seam allowances are smoothed from the inside out so that no marks remain on the front side. In complex blocks where seams meet in different directions, the allowances of each next row are ironed in a different direction. On the front side, iron at the intersection points of the seams. If the strips are too long, they should be placed on the ironing board not horizontally, but vertically - they will not wrinkle or stretch. Fabric that is too thick is moistened and steamed. The fabric is ironed lengthwise at a temperature appropriate to the type of fabric.
- Secretssewing. Carelessly sewn fragments of a future potholder or napkin, uneven seams, even a slight discrepancy in sizes will destroy patchwork sewing for beginners. Therefore, the flaps must be sewn in very precisely. Beginning craftswomen will be helped by templates in the form of a frame, which are made on graph paper with a seam line printed on the fabric. Before starting a huge project, it is recommended to sew a sample block. It will help you check the cutting accuracy and adjust the operation of the sewing machine. It is easy to see all the errors on the sample - this will save both time and effort.

It is much more difficult to correct errors on a finished canvas.
In general, the patchwork technique should be taken seriously, considering all color combinations even for potholders - after all, they, like sloppy work, can ruin the item and discourage you from mastering such an exciting handicraft.
Master class: block of squares (video)
Where to start patchwork sewing
To begin with, they collect all the scraps of fabric, sort them by texture and color, and begin to create a pattern. You can do the opposite: come up with a pattern or find it on MK, photos and videos, and then cut blanks from purchased fabrics.

From all the abundance of fabric scraps stored at home, it is important to choose the right combination for the future product
The second step is to create a sketch of an oven mitt, pillow or napkin. It is better for beginning needlewomen to use ready-made patterns from magazines or MKs from the Internet.
The process of joining shreds into a whole canvas:
- Sewing the parts of a potholder or blanket;
- Connecting blocks into one whole;
- Sewing the lining
In addition to sewing, there is also knitted patchwork, where the flaps are connected to each other using crochet and contrasting thread.
In addition to threads, fabric and machines, the patchwork technique uses:
- Roller cutter or scissors;
- Pins, needles;
- Sewing machine;
- Pencil or chalk;
- Cardboard or soft plastic;
- Crochet hook.
In handicraft stores you can find patchwork kits - with pattern diagrams, MK.

Patterns for patchwork can be found in the kit or made yourself

Patchwork kit includes fabrics, necessary tools, templates and block diagrams
Patchwork: patterns, templates
You can create diagrams and templates yourself or take ready-made patterns from the Internet, books or magazines. Templates are cut along the contour of the part, taking into account seam allowances. The material for production can be cardboard, thick paper, plastic. For accuracy, you can stick graph paper on the cardboard, and then cut out the shape of the intended size. When making curved blanks, longitudinal cuts-notches must be made on the outer contour of the template - it is convenient to mark seams along them when connecting the flaps.
Photo and video tutorials on patchwork sewing offer diagrams, templates and MK
Cutting rules
The most convenient templates are frames. The inner part must correspond to the finished size of the fragment, the outer part takes into account seam allowances. The width of such a frame is the size of the allowances. When making a pattern, the frame must be circled twice and cut only along the outer contour. The inner outline will show the seam line. The pattern is transferred to the fabric with chalk or soap; any pen leaves marks on the front side. Cutting is done only along the grain thread, so that subsequently the sewn parts do not stretch or warp. Cut out the flaps with regular scissors or a special cutter. A roller cutter makes the process much easier, cutting long strips that are easy to cut into smaller pieces. You can't do without a cutter when the templates are curved.
Pattern selection
INtechnologypatchworkexists 3 kindproducts:
- Canvas, stitchedfromscraps, where the parts assemble the seam into a seam. The shape of the patches can be regular, geometric (traditional sewing) or arbitrary (crazy patchwork). Watch video lessons.
- Quiltedproducts(quilting) are sewn from a whole cloth, the pattern on which is created using stitches.
- Application– pieces of other fabrics are beautifully placed on the base, sewn and quilted.

“Frame” is the simplest and most convenient template for cutting
Patchwork technique for beginners
The pattern can be created based on one repeating figure, for which paper templates are cut out for each part and a flap is basted to it. The seam allowance is folded over the edge and basted again. This is a traditional English technique.
The block technique is more modern: pieces of triangular or square-shaped fabric are sewn into blocks, creating a geometric pattern. A simple block can be made from a small number of large parts. This kind of work takes less effort and time. It is often used by video lessons and MK.
The strip patchwork technique is also known. It differs from the previous version in that the fragments are collected into strips, then they are combined into a canvas. The block technique is convenient because the flaps are sewn together directly on a machine.
In crazy patchwork, the flaps are sewn on according to the applique type: individual flaps of arbitrary shape are beautifully placed on the canvas and sewn. Potholders, blankets, covers come out in two layers.
Patchwork: video lessons for beginners
Patchwork: master class for beginners
Special comfort in the interior is created by handmade items, in particular, beautiful and comfortable pillows. Let's try to sew a decorative pillowcase with a voluminous "Rose" application using MK. For work, you can take any scraps, the main thing is that they match well in color. Don't forget to prepare the fabric - wash it, iron it.
Master class “Pillow with applique”
Step by stepinstructions.
- It’s convenient to start by preparing squares. Their number and size determine the size of the pillow.
- Then you need to cut a circle out of the fabric. In the middle, put a piece of fabric and some filler for volume (cotton wool, padding polyester). Secure in a circle using a machine stitch. The middle is ready.
- Fold the squares from the flaps diagonally, as in the photo, sew around the middle piece in a circle - 3-5 pieces.
- For the next round you need to prepare large squares of the corresponding color. Continue until the end of the intended flower size.
- The sewn petals must be trimmed in a circle.
- The finished roses are beautifully distributed on a pillowcase and secured to the product with a zig-zag seam and a wide, dense stitch. The rosette has the appearance of a three-dimensional applique.
- If desired, the bouquet can be supplemented with leaves cut from scraps of a suitable color. Look at the photo for a step-by-step master class. The blanket in MK is made using the “crazy patchwork” technique (you can watch video tutorials), and it consists of 30x30 cm squares. For a single blanket you need 24 blanks, for a double – 36. Let’s say the pattern will be made up of 4 types of fabric.

The complexity of the ornament depends on the experience and skills of patchwork sewing
Master class “Patchwork for beginners - blanket”
Tools and materials:
- 1 m of fabric of each color (width 220 cm) - 6 or 9 squares 45x45 cm;
- For the lining - 170 cm or 220 cm (the margin at the bottom goes away after the blanket is quilted);
- Sintepon of similar sizes;

A blanket or bedspread can be sewn from simple squares or complex pieces
Step-by-step instructions for MK:
- Cut into squares and place in a stack, alternating colors.
- Cut this layer cake diagonally or randomly. It is convenient to cut with a roller knife.
- Take the part from above and move it down under a stack of similar elements. In a cut stack there will be 1 piece of the 1st color on top and 1 of the 2nd color.
- Machine sew all the squares along the cut line.
- On an ironing board, carefully press the seams to one side or press them flat.
- Fold the blanks into a neat stack in the same order - squares of the 1st and 2nd tones on top.
- Using a ruler and a knife, cut the entire stack again along any line (you can cross the first seam).
- Move one of the top fragments down under the stack. Sew and press, remembering to fold in order - now it’s better to match the seams.
- The operation is repeated until the last detail. The optimal number of seams is 6-10 horizontally and vertically.
- After ironing the seams, you need to trim the squares to get a figure with a side of 32 cm.
- You can assemble the blanket in different ways: first assemble the front part, then quilt it with padding polyester and lining. It's difficult on a typewriter. Or quilt each square separately, cutting padding and lining.
- Gather the quilted squares together, trim and cover the seams with narrow tape or strips of fabric. It is convenient to assemble according to the scheme: ribbons of 4-6 squares, then sew the strips.
- Along the edge of the blanket, you also need to trim it with a piping made of plain fabric or pieces of rags, as in the MK photo.
Congratulations on your new look!
Quilt technique (video)
Having learned basic concepts about this type of needlework, such as patchwork, and having mastered the simplest skills of putting fabric “puzzles” together into a single whole, you can create creative household items or interior decor from different scraps.
Patchwork: beautiful and easy for beginners (photo)


Master class on making potholders using patchwork technique.
DIY master class on the topic "Pot holder using patchwork technique"
Author: Zavarzina Irina Anatolyevna, technology teacher, MBOU Yenisei Secondary School No. 3, Minusinsk district, Krasnoyarsk TerritoryPurpose: an oven mitt or a hot stand, a gift for mother, grandmother, this master class is for students in grades 7-9, additional education teachers, technology teachers, parents. Making this product is a very good exercise when working with scissors, an iron, or a sewing machine; it develops fine motor skills of the hands, eye, and develops perseverance and accuracy in work.
Target: Making potholders using patchwork technique.
Tasks:
- develop children's creativity and fine motor skills;
- teach how to combine fabric of different colors.
- cultivate interest in work, accuracy
- consolidate skills and abilities when working on a sewing machine
Required materials, tools and equipment:
Remains of cotton or linen fabrics, bindweed for decoration, threads
iron, sewing machine, scissors, pins, ruler, pencil, chalk or soap

Templates: circle with a diameter of 9 cm, square 10x10 cm (you can make larger or smaller templates)

Before starting work, it is necessary to carry out safety training when working with scissors, needles and pins, when working with an iron and on a sewing machine.
Description of work:
1.Cut out a backing from a piece of thick fabric in the shape of a 23x23 cm square.
The substrate must be divided into 8 equal parts and draw lines with a pencil so that they intersect at one point, this will be the center of our product

2. Cut out the tack parts: round parts - 4 pieces, square parts - three colors, 8 pieces each. everyone
Iron the parts as shown in the photo: first fold them into a triangle, iron them, then fold the corners to make a square and iron them again (you need to very accurately and carefully iron the corners of all the parts)

3. Please note that the last row of squares needs to be ironed like this.

So, all the blanks are ready, you can start assembling. The upper part of the potholder will be assembled from scraps; the lower part does not need to be cut out yet.

4. Place the first row (4 parts) on the backing, align all 4 corners in the center, placing them along the lines, open the top folds and pin with pins. Sew the parts inside and close the folds; the stitching should not be visible.
5. Sew the first row in a circle, the width of the seam from the cuts of the parts is 0.5 cm.

6. Pin the second row of parts, moving no more than 1 cm from the edge of the first row, and stitch each part to the corner.
7. Close all the details of the second row, pin together and stitch all the details in a circle.

8.Pin and stitch the third row of parts in the same way

9.Remember to stitch in a circle and attach each row of pieces.

10.Lay out and pin the fourth row, stitch each piece, making a tack,

11. Sew the fourth row in a circle, thereby securing it.

12.Cut the potholder in a circle. It will turn out like this.

13.Now you need to place the top piece on a piece of fabric, trace around the edge and cut out the bottom part of the potholder.

14.Pin two pieces together and stitch along the edge

15. All that remains is to process the edges of the potholder. To do this, you need to cut out a bias tape 4-5 cm wide at an angle of 45. and iron it 1/3 with the wrong side inward

16.Now you need to try to sew the bias tape (without pulling it) along the edge of the potholder directly on the machine, stitch width 0.7 cm.

17. You can pre-baste the binding

18. We bend the edge of the potholder with the tape and adjust it along the front side along the edge, do not forget to insert a loop of braid - bindweed, you can use tape.

19.You can stitch a bindweed along the edge of the potholder for decoration.

20. This is the product I got.

21.Here are more photographs of my students’ products.
Before starting this master class, we recommend reading the article “Basic techniques and rules in patchwork”, which is of an introductory nature for sewing in the patchwork style.
We will be sewing a pot holder using the American Mystery block. This product can be used to clearly demonstrate all the basic patchwork sewing techniques. The techniques shown here are universal. Bedspreads are sewn using the same principle.
For this pattern we will need three colors of fabric. And the already familiar standard tools for patchwork: a roller knife, a ruler, a mat. You also need pins and matching threads.

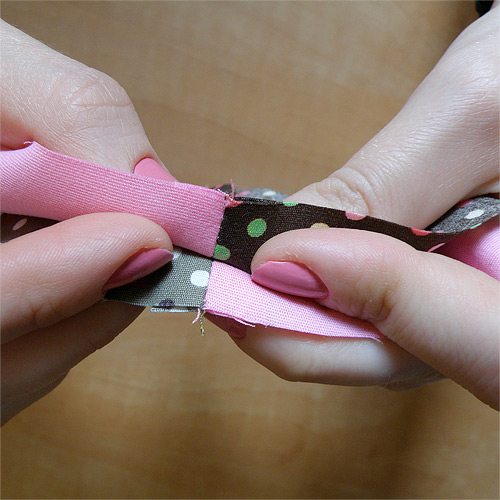
In the standard “American Mystery” pattern, the dimensions of the squares are indicated with a side of 10.86 cm. For potholders, we will reduce them a little by making them 10 cm each. We cut out four squares of pink color, and two of brown and green.

We apply a ruler to the fabric, measuring 10 cm on the horizontal side and 20 cm on the vertical side. The flap you are cutting is located under the ruler. If the fabric has a repeating symmetrical pattern, it’s easier to navigate. In our case, there is a drawing, but if you apply a ruler, you can see that the polka dots are located a little unevenly - so we cut out according to the ruler.
Important!
Hold the roller blade firmly at a 90-degree angle, then press the ruler firmly with one hand and firmly slide the blade along the edge of the ruler with the other hand. Remove the ruler and turn the rug 180 degrees and again, applying the ruler, cut off the excess to get a piece of exactly 10x20 cm. Using a roller knife, cut the fabric only in the direction away from you (from bottom to top). It is more convenient to cut while standing. The rug must be placed on a reliable, hard surface.


I deliberately cut out a 10x20 cm rectangle so that I could then cut it in half and get two 10x10 cm squares. To avoid unnecessary movements and to save time in patchwork sewing, strips of the required width are always cut out and then cut into squares. Applying a ruler diagonally, cut the square into two triangles. We apply similar actions to all squares.


Now we lay out all the parts according to the diagram in pairs.

And we pin two triangles together with pins, as shown in the picture. This should be done on a flat, hard surface, not in your hands. We apply this action to all pairs of triangles.


Now, finally, we proceed directly to the sewing process. Most often, the initial line has skipped stitches. Therefore, a test piece is sewn before the first part. Stitch length 2.5 mm, seam allowance 0.8 cm. The pins remain in the triangles, we sew along with them. We sew all pairs of triangles one by one, without securing the seam or lifting the machine foot.


We cut our garland and pull out the pins. Now we cut off the tip of the corner diagonally and press the seams. First the wrong side, then the front side.


Again we lay out the parts according to the diagram so that we can see the order in which the triangles are sewn together.

The triangles need to be connected as shown in the photo below - so that the joints in the middle coincide. Then we chop off the intersection of the joints with a pin, only then we align the corners and pin the long side with pins.

Sew all 8 triangles. Be careful not to roll up the seam allowances in the bottom triangle.

We repeat the already familiar steps: pull out the pins, iron them, lay them out as shown in the picture. And we connect the squares, turning them into two rectangles:

Iron it thoroughly again and get the finished upper part. The second photo shows what it looks like from the reverse side.


Now is the time to do the “stuffing”. We take interlining fabric, it should be the same size as the front side of the potholder. The second side will be plain. We cut it out in a slightly larger size because when turning it inside out, a small amount of material is needed for bending.
Another detail of the potholder is the loop. Cut out a piece 14x4 cm.


We fold it with the edges inward and stitch it.
Start sewing by stepping back a little, leaving a “tail” in front that you will hold with your hand so that the machine does not “chew” the fabric.


Let's move on to the final stage. We place the layers in the following sequence: first the lining material, place the back part on it with the right side up, then place the patchwork fabric with the wrong side facing up, as shown in the picture. We will place a loop in one of the corners, its “ring” will be inside and the ends will look out. Now we smooth out all the layers with our palms on a flat, hard surface, and pin them together, placing the middle layer in place.


We sew along the perimeter, leaving 10 cm between the beginning and end of the stitching to be able to turn out the potholder. After this, we sew the hole with a hidden seam.


