Hello, dear friend! Finally! It's finished!
I am posting my promised personal master class" DIY candy rose".
Lately, more and more often I have been asked “how to make a blooming rose from sweets and corrugated paper.”
According to your requests, my next one MK - Roses made from candies.
Step 1. Making the middle of the rose. To do this, cut out a rectangle of corrugated paper 7 x 7.5 cm.

Step 2. Round the top corners.

Step 3. We stretch the petal in the middle with two thumbs.

Step 4. We wrap the candy with a petal. Fix with hot glue.


Step 5. Preparing rose petals. We cut out 5 x 7.5 cm rectangles from corrugated paper. Depending on the number of petals, the rose can be made more open and lush or just blooming.
To make a standard candy rose, you need to prepare 8 petals. 3 petals for the first circle and 5 for the second.

Step 6. Round the upper corners of the petals.

Step 7 Use a skewer to round off one upper side of the petal.

Step 8 Exactly the same for the second side.

Step 9 Stretch the middle of the petal.

Step 10. Apply glue.

Step 11 Glue the petal to the bud with the candy.

Step 12 Glue the second petal.

Step 13 Glue on the third petal.

Step 14 We glue 5 petals around the second circle with hot glue.


Step 15 Prepare the sepals. To do this, take a piece of corrugation 1.5-2 divisions high. Cut out the sepals.

Step 16. P stretch the base. Glue it to the rose.

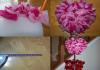
Our candy rose is ready.


Good luck in your creativity!
Hello again, my guests! I continue to take photographs out of my chest, as I did DIY candy roses and tell you step by step about each stage.
The simplest candy composition is a basket of roses, you can make buds, you can make open buds. So let's get started!
For the candy basket you will need:
Corrugated paper (red and marsh color)
DON'T FORGET ABOUT MY ONLINE STORE "Ermilova Decor", where you can buy everything at once, as we always have everything in stock!
Floral wire
Tape
Wicker basket (you can also buy a wicker basket in my online store)
Penoplex (or polystyrene foam)
Candy (I used "Autumn Waltz")
Satin ribbons
For pounds: organza, toothpicks, double-sided tape, stapler)
Tools (glue gun, pliers, scissors)
I always start by preparing a basket. I cut out the foam plastic for the basket, glue it to the bottom with a hot gun, and glue a handle if necessary.


We stretch the edges of the narrow workpiece, and in the second workpiece we stretch the middle. Next, fold the edges in with a skewer.

We wrap our candy in a narrow piece and secure it with tape. Next, we wrap our bud in a second blank and also secure it with tape.

We cut out the leaves from the greenish corrugation as follows, and also fix them with tape.

We cut the floral wire (I always use 1.2) into 3 parts. We cut the base of the bud with scissors, apply hot glue to the cut and insert a wire into the bud.

We take a strip of greenish corrugation and use hot glue to wrap the stem of our rose.

We trim the roses to the desired height and insert them into the foam. We insert COUNTIES between the roses. See. In my new Master Classes you will see how I make bouquets without using a single pound)))

We continue to insert pounds and roses!

Here are our DIY candy roses in a basket ready! Watch my new master classes, where I will explain step by step how to quickly make a bouquet of candies without a single pound!

I bring to your attention another master class on making roses from corrugated paper with candies. Thanks to Anna Martseva for sharing her method of creating beautiful flowers!


Source - http://stranamasterov.ru/node/554280
From corrugated paper we cut out 7 blanks measuring 6*9cm. 
Then we fold each rectangle as follows: for the first row of petals - five times, for the second and third - 4 times, and for the 4th row - three times. Then we give the resulting blanks the shape of petals, as shown in the photo. 
This is the preparation for the first row. 
And these are the blanks for all other rows. 
Then we separate all the petals from each other using scissors and slightly stretch them in several places. Only we stretch the petals for the first row in only one place - in the middle. 
We continue to shape the petals. We twist the edges of the petals of the first row using a wooden skewer only on one side and stretch each petal in the middle. 
For the second and third rows, we twist the petals on both sides and also stretch them in the middle. 
We do the same with the petals for the fourth row. 
Thus we make 5 petals for each row. 
We take one rectangular blank, fold it 5 times and give the upper part the shape of a semicircle. Then we open and stretch the upper part, making an “accordion”. Next, we make a small indentation, insert and wrap the candy. 
We fix the edge with hot glue, we also drip glue on the base, insert a skewer and press. 
The result is a bud like this. 
Now we begin to glue the petals. 
Glue the petals in a circle, overlapping each other. 
First row. 
Second row. 
Third row. 
Three rows are enough, but you can make the flower bigger.
Bouquets collected with your own hands are a good way to congratulate in an original way, give a gift, decorate your home and even save money. In addition, homemade sweets and flowers will delight the owner for a long time.
Materials and tools
Whatever bouquet you have to make, you will need almost the same materials. They are quite affordable. Some can be purchased at florist shops, some at sewing shops, and some at points of sale of live bouquets.
You will need:
- Glue gun and sticks. This is a device that heats up solid glue. It flows in drops from the “nose” of the gun, which is very convenient when working with small parts.
- Tape– adhesive tape similar to scotch tape, but colored and slightly stretchy. It is convenient to fasten parts and hide unnecessary cuts.
- Corrugated paper– the main material for creating flower petals. It is quite durable, stretches well, and keeps its shape.
- Wooden skewers- act as flower stems.
- Wire– in florist shops they sell a special one, green. It bends and holds its shape well.
- Organza– synthetic fabric with a characteristic shine. Available in rolls and strips. It drapes easily, and it is convenient to attach paper to it with glue.
Decorative details: beads, rhinestones, etc. are used optionally.
It’s easy to make bouquets of sweets and flowers with your own hands, the main thing is to understand the intricacies.
- Making bouquets is a leisurely activity. A job done hastily will not be successful. In addition, in a hurry, you can get burned by glue or pricked by wire.
- You should not skimp on materials, otherwise the entire work will look cheap and may fall apart.
- You should work carefully, hiding extra “tails”, pieces of thread, and protruding wire. Such details reveal an inattentive craftsman; the work looks untidy.
- In the same time, no need to try to recreate an exact copy of flowers, leaves from paper and candy wrappers. Artificial bouquets made with your own hands do not pretend to be an exact match with natural ones, but rather to successfully imitate them.
- Handmade gurus do not recommend using artificial leaves in a bouquet and other plastic elements. This deprives the work of its uniqueness; it takes on a noticeably cheap look.

You need to know when to stop when decorating a bouquet. A generous scattering of rhinestones, for example, will distract attention from the flowers, and due to too many petals, the flower will lose its grace and will simply be unrecognizable.
Bouquet of Pineapple candies for beginners
The “Pineapple” bouquet is made from a bottle of champagne. This way you can beautifully decorate (hide) inexpensive alcohol and, at the same time, make an impression.
Materials:
- pyramid-shaped candies in yellow-golden tones – about 60 pieces;
- a bottle of champagne or sparkling wine;
- glue gun and rod;
- double sided tape;
- organza;
- aspidistr;
- sisal fiber.
The more potbellied the bottle of champagne, the more pineapple-like the bouquet will be. The organza needs to be glued to the bottle with tape - this way the candies will stick more firmly. Wrap the candies tightly in candy wrappers, glue the tails to the candies so that they do not stick out in different directions.
This can be done with regular tape or double-sided tape, but without tearing off the protective tape. There is a temptation to simply “plant” the candy on the tape without using a gun, but this way the bouquet will not last long. You need to glue the candies using hot glue - “butt”, avoiding staggered spaces.
You shouldn’t press down - you can crush the sweetness, because the chocolate will already melt a little from the hot glue.

Fill the surface of the bottle up to the point where the container narrows and meets the neck- about 3/4 of this height. If you cannot completely avoid gaps, you can use sisal fiber, or “gossamer.” Several threads are slightly crumpled and glued with a gun between the candies, filling all the joints or randomly.
The neck is decorated with pineapple “leaves”. To do this, the aspidistra is cut into pieces of 13-15 cm, and one edge is shaped into an elongated leaf with scissors. The tape itself will bend at the edges, but you can use scissors to add additional roundness - in this case, you need to do this right away, and not on the bottle when the “leaves” are glued.
The first pieces need to be glued onto the cork itself, closing it completely. Next, glue the “leaves” overlapping so that the glass is not visible. If there is a gap between the layer of candy and the aspidistra, you can close it with regular twine, carefully rolling it into a spiral.
Or tie a bow with a satin ribbon.

If desired, you can sprinkle the entire composition with shiny varnish. This will not affect its strength, but it will look more beautiful, especially if the wrappers are not very bright. You can also glue beads (white or transparent) onto the “leaves” of the pineapple - this will create an imitation of water drops. 5-6 are enough for the whole bouquet.
Bouquet of sweets and flowers made of corrugated paper
Materials:
- small (up to 1.5 cm in diameter) round or semicircular candies - 15-20 pcs.;
- corrugated paper - 3 rolls: green and any two that match each other (preferably different shades of the same color);
- wire, wooden skewers from 20 cm high - according to the number of colors;
- double sided tape;
- glue gun and rod;
- sewing thread to match the color of the paper;
- sisal fiber;
- container for the bouquet (round cardboard box, tin or glass jar);
- satin ribbon (from 1 m).
Caramels, milk candies or small truffles are ideal. It will be beautiful if the candy wrappers are transparent.

- The tails of the wrapper need to be folded together so that the round side of the candy is on top (if the candy is semicircular). Using double-sided tape, attach to the wire, unwinding a piece of 20 cm. Attention! Stripes on corrugated paper indicate length, that is, along the short edge (hereinafter referred to as the width) the paper should stretch.
- Cut rectangles 6 by 4 cm from corrugated paper. Make a wavy cut from one short edge with scissors. Tighten this edge with a pencil and fasten it so that it bends inward.
- Wrap the attached candy with a petal, holding the paper at the base and stretching it slightly. You need to completely wrap the candy with 2 of these petals and secure it at the bottom with tape or thread. The bud is ready. You need to make 5 of these. two different colors and 3 more green.
- They begin to make the roses themselves according to the same principle, only the candy needs to be attached not to a wire, but to a wooden skewer, or, as an option, a sushi stick.
- After making the bud, cut pieces of paper, also cutting off the edge and twisting it, in sizes: 6:6, 6:5, 5:5 cm.
- Start wrapping the smaller ones, stretching them at the bottom, and secure them with tape, but they should bend outward.
- Tie the last petals with a thread, and cut the lower edges of the finished flower and secure it at the base with double-sided tape to a skewer.
- From such a number of petals you will get a lush, blooming flower. If you do not use the last 2 and do not curl the edges so much, the rose will come out more elastic and dense - as if it had not fully blossomed.
- Sepals are made from pieces of green paper the same size as the outer petals. Cut it wide into several strips of 3-5 mm, not reaching 1.5-2 cm to the edge. The strips are twisted into strands with your fingers and secured in the same way as petals. 1 strip – 1 flower, if not enough, you need a wider strip.
- Tie the construction with thread. For buds they do the same.
Bouquets of sweets, handmade flowers of this type are attached to a round box.
Alternatively, you can use a glass jar, painted with acrylic paint or pasted over with organza, and also a tin can (if you choose a beautiful design, you don’t even have to decorate it). It should be wrapped in wrapping paper and a bow tied with a satin ribbon around the edge. The height of the flowers should be 1.5 times the height of the container - the buds should rise above the edges.
Flower fasteners need to be placed in the box. Styrofoam, foam rubber or a sponge will do.
You need to cut the material to the shape of the container like this: so that it fits into it, but does not fall out. A composition is formed outside the container: roses are arranged evenly over the area, with buds between them. To balance the color and fill the space, add a spider web to the hot glue.

Take a couple of caramels out of the packaging and “plant” them on top of the web, also gluing. After this, place the bouquet in a box, having previously measured the height and trimmed the stems. The sisal fiber should extend slightly beyond the edges. The bouquet is ready.
Tulips
Materials:
- candies "Raffaello";
- corrugated paper - several rolls of different colors;
- double sided tape;
- satin ribbon;
- tape;
- wrapping paper;
- wire or wooden skewers;
- glue gun and stick.
Unfold the roll of corrugated paper and cut it into 8 equal strips lengthwise. Then divide each one in half and bend it slightly. At the fold, scroll the strip by 180 0 and turn one tail by 90 0 - so that the 2 sides are parallel to each other. Bend them slightly in an arc with the front side of the paper facing out.
You will need 6 such strips - these are the tulip petals.
Attach the Raffaello candy in the package to the end of the wire with double-sided tape. Attach the petals one at a time: fold them upward, hold the tails of the folded strip together and wrap them around the wire, gluing them to tape, give the petal itself the shape of a hemisphere, wrapping it around the candy.
Place a strip of tape on the base. And so - all 6 petals, under them the “raphaelka” should be completely hidden. Wrap the place where the petals are attached with green tape. The tulip is ready. For leaves, divide the paper roll lengthwise and in half crosswise.

Cut one side of each strip into a leaf shape. If desired, they can be made of different lengths. Attach to a wire 3, 5 and 7 cm from the bud: Glue a thin strip of adhesive tape or tape onto the flat edge of the leaf so that the adhesive edge protrudes 5 mm, and wrap the wire in a circle.
When collecting a bouquet of such tulips, you need to fasten them one by one with double-sided tape in a checkerboard pattern. Having collected everything, wrap the attachment point with tape. Bouquets of sweets and homemade flowers look especially elegant in wicker baskets.
Before placing the bouquet there, you need to trim the stems.
Poppies
Ferrero Rocher candies are best suited for poppies. You can take any large round candies, but then you will have to twist the tails and hide them. A poppy bouquet with candies consists of 3 types of poppies: a blossomed poppy, a bud and a dry box with seeds.
 Bouquets of sweets: flowers with sweet filling, made by yourself, will be a pleasant gift at any celebration
 | Poppy head type | Materials | Manufacturing |
| Blooming Flower |
|
|
| Bud |
|
|
| Box with seeds |
|
|
Collect the poppy bouquet together (there should be more open flowers) and tie it with twine or a rope of the same paper. Tie it in a bow.
Roses
Materials:
- “Truffles” candies;
- red thick double-sided cardboard - 1 sheet per 1 rose;
- dry long twigs;
- glue gun and rod;
- twine or tape.
Cut a circle from a sheet of cardboard. Cut it in a spiral, starting from the edge. Start twisting the resulting ribbon, starting from the edge, into a spiral in a circle. Having received a more or less dense bud, drop hot glue onto the flat side of the candy (after attaching a piece of cardboard there with double-sided tape).

Place a flower on it and roll it in the same way until the end. Secure the edge in the same way. The result is a fairly abstract version of a rose that does not require any special additions. It is enough to attach the sharp edge of the candy to the branch and wrap it with color-matched tape.
You can wrap twine around the candy and the branch. Use it to tie several roses into a bouquet.
Crocuses
Materials:
- round candies;
- corrugated paper;
- tape;
- double sided tape;
- wooden skewers or wire.
Cut corrugated paper of 2 colors into strips 3 cm wide and 15 cm long.
Video of a master class on making crocuses for decorating sweets:
Prepare the strips: mark the middle, turn 180 0 in this place. Fold in half and shape into a hemisphere, slightly stretching the tails wide. Attach the candy to the skewer with tape. Overlap the candy in a circle with petals, trying to cover the candy wrapper with them as much as possible. Secure at the base with thread, cut off excess paper, and decorate with tape.
For the leaves, cut strips twice as long as the finished flowers. Fold in half and roll in the same way as the petals.

Twist the lower part of the leaves into a bundle around the wire, bend it in a smooth wave. The leaves do not need to be attached to the stem; it is enough to tie them together with the flowers with ribbon. Such flowers look good in a wicker basket or in a bottle, which has previously been wrapped in a thick twine in a spiral. The bouquet is ready.
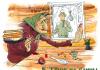
Ship
Bouquets of candy, flowers - you can make anything with your own hands, even a real frigate! This bouquet is suitable for a magnificent celebration.
Materials:
- candies without “tails” on the wrappers;
- chocolate “medals”;
- penoplex (Styrex) – 1 sheet 5 cm thick;
- glue gun and rods;
- a block of sandpaper;
- organza;
- wooden skewers;
- toothpicks;
- metallized tape;
- edging harness;
- pins.
The first stage is the manufacture of the ship's hull. You need to make patterns from paper: a triangle 14:14:14 cm (2 pieces A1, A2) - the bow of the ship, a rectangle 14:21 cm - the deck (B). The height of these parts depends on the height (thickness) of the Styrex sheet, in this case the calculation is 5 cm. Rectangle 21:5:5 cm (2 pieces, the last number is thickness - C1, C2) - walls, and 14:5:5 - posterior wall (C3).
Cut out Styrex (this is the material used to insulate walls, can be found in hardware stores) according to templates.
You need to fold the structure in this way: glue 2 triangles to the front of the deck with hot glue - the nose - A1, A2. On the deck on both sides - the walls of the ship C1 and C2. At the back is the back of C3. If desired, smooth sharp corners, especially joints B and A1, A2, with sandpaper.
Cover with organza, draping the fabric with pins.

You can cut corrugated paper using the same patterns and stick it on. Finish the sides with edging cord. For the sail, cut the organza with a trapezoid: 20:5:20:10 cm. Cover the edges with metallized tape on both sides, bend it twice across to divide the flap into 3 parts, and glue wooden toothpicks in place of the folds.
Insert wooden skewers (thin) along the center, stringing sails on them in the place where the toothpicks are glued. Bend them to one side. Make 3 sails this way. Place double-sided tape on the candies and pieces of cardboard on top for better adhesion to the organza.

Place two wooden skewers with sails on the deck, one on the stern. Cover the outside with candies using hot glue. Candies in shiny golden foil and chocolate medals will look best– they can be wrapped in a circle with an edging cord.
Fill the deck of the ship with sweets, and you can also hide a small gift there.
Bouquet of candies "Raffaello"
Materials:
- candies "Raffaello";
- matte wrapping paper in pastel colors;
- wooden skewers;
- double sided tape;
- glue gun and rod;
- organza to match the wrapping paper.

Attach the candy to the wire with hot glue. Cut the organza into 15:15 cm flaps, fold in four and thread through the free edge of the wire. Gather the fabric around the candy and tie a tail at the top with thread. Straighten the edges of the organza. Collect the finished flowers into one bouquet and secure with tape.
Wrap in wrapping paper so that its edges do not cover the flowers. Fold the edge of the paper outward, use a clamp and secure with hot glue.
Bouquets of flowers with lollipops
In fact, any of the above methods are suitable for Chupa Chups candy. This will even make the task easier, because you won’t need to attach the candy to a wire or skewer. But there is another way that has not yet been discussed.
Materials:
- Chupa Chups candies (or other candies on a stick - the larger the better);
- corrugated paper (black, yellow),
- tape (green);
- wire;
- double sided tape.
Wrap the lollipop in a square of black crepe paper, securing the edges with tape at the base of the candy.

Cut 10 cm of yellow paper across the entire roll. Cut the flap into strips of 1 cm, not reaching the edges 3 cm. At the ends, twist them into flagella. Wrap the resulting ribbon around the lollipop, secure with tape, and cut off the edges. Decorate the bottom of the bud with green tape. For a bouquet it is better to lengthen the candy stick with wire, taping it to the base with tape.
Wrap the stems together with thin twine, leaving 3-4 cm at the bottom. Tie a bow.
Christmas tree
With your own hands, you can create 2 main options for the base of a New Year tree bouquet: a cardboard cone and a bottle of champagne. Making a cone is simple: cut out a semicircle from thick cardboard, its radius will be the height of the finished spruce. Roll it into a cone and secure the edges with hot glue.
You can decorate the spruce with paper flowers, sweets and tinsel.

There are many options, but the materials are basically the same:
- sweets in bright wrappers;
- glue gun and rod;
- threads of artificial beads;
- green tinsel;
- figured caramel for the top.
The bottle should be wrapped in organza for better adhesion, and a piece of paper should be glued to the place where the sweets are attached with double-sided tape.
- The easiest option is to take a bottle and candy in a green wrapper. Starting from the bottom, attach them in a circle using hot glue. Place a caramel or a Santa Claus figurine on top.
- Place candies on a cone or bottle in the same way, alternating them with layers of green tinsel, which also needs to be placed on glue. It should look like this: a circle of sweets - a circle of tinsel.
- Attach the candies to the cone in a chaotic manner. Wrap the tinsel in a spiral around the cone, slightly covering the candies. Decorate with a string of artificial beads. Place the “Christmas tree” on top of a decorative bucket, the hole of which will be a couple of centimeters wider than the base of the cone.
- Take the jelly candies and remove them from the wrapper. Using an awl, make holes in the cone at a distance of one and a half times the diameter of the candy. Place the jellies on toothpicks at one end and secure them to the cone with the other. Do not use glue or tape.

Using the same scheme, you can make a Christmas tree from lollipops.
Wedding bouquet of sweets
For a DIY wedding bouquet, a bouquet of peonies is best. Volumetric flowers will highlight a fluffy dress. You can make 2 or 3 bouquets in reserve - in case one ends up falling apart. It is not advisable to use chocolates if the wedding is in hot weather - the chocolate may leak.

You should not make peonies from single-color paper; it is better to take several rolls of pastel shades and white, and alternate the petals - this will turn out more naturally.
Materials:
- candies in sealed wrappers (Raffaello, for example) or large lollipops;
- wooden skewers or wire;
- glue gun and rod;
- white mesh;
- white tape;
- satin ribbon;
- corrugated paper in pastel shades and white.
Wrap each candy in a piece of white mesh.
Attach a wooden skewer or wire so that it looks like a lollipop. Wrap the attachment point with double-sided tape or tape. Cut the corrugated sheet into strips wide: 3 x 2 cm, 3 x 3 cm, 3 x 5 cm. Then cut each strip crosswise into 5 parts. On average, you should get 30-35 scraps from one roll.
On each rectangle, make notched cuts on one side, slightly stretching the edges, and cut the other side into a triangle 2-2.5 cm from the edge. Bend the petals with a question mark so that the sharp edge is at the bottom and remains smooth. Bend the notches inward with a pencil.
You need to attach the petals starting with the smallest ones. Place a drop of hot glue on the “leg” of the petal, secure it on a skewer, and so on in a circle, slightly overlapping.

One layer will require a different number of petals, depending on the size of the candy. But for each next circle you need to take 1 more petal than the previous one - this creates pomp. For the lower petals, cut a corrugated ribbon 5 cm wide, divide it into 3-4 flaps. Trim into a heart shape.
Stretch each edge of the heart slightly with your fingers and twist it with a knitting needle. Give the petal a hemispherical shape. Attach at the base of the bud so that the petal bends outward. Decorate the place where the petals are attached with the same green corrugated paper or tape.
Gather the flowers together and tie them with a satin ribbon bow to match the flowers.
Bouquets can be placed in small baskets and placed on tables for guests, or used to decorate a photo zone or arch for a ceremony. Made in the same color scheme, such flowers will set the tone for the entire holiday, and the cost of materials and sweets is much lower than fresh flowers. Plus, DIY peonies are available all year round!
Article format: E. Chaikina
Useful video about candy bouquets
The story is about which sweets are best used when making a bouquet, and how to get sweets while maintaining the composition: