When winter ends, the anxious time of anticipation for Women's Day comes; I want to somehow transform my home like spring. For those whose hobby is some kind of needlework, it will not be difficult to make their own decor for March 8th. The main thing is a good idea and seasonality. If you want each holiday to be different from the last, it is better to choose something new each time. This could be decorating an apartment that will maximally emphasize the style of the interior. A good option is to find a room decoration that will become an independent accent that creates a festive mood.
You can decorate the bottle and stick flowers, beads, feathers on it


The lampshade can be decorated with artificial flowers
- spring;
- flowers;
- present;
- nature coming to life;
- motherhood and femininity.
You can take one thematic direction or all at once into development, if it fits well with the overall concept.

Flowers will perfectly complement the festive design

On such a holiday you just need to put flowers in a vase
- older children;
- men;
- the whole family together;
- a woman for herself - as a pleasant pre-holiday preparation.
This could be the first handicraft experience to create an original surprise or another interior design for March 8th. It makes sense to learn a new technique for working with paper or take your favorite master class as a basis. Don’t think that men won’t be interested in this; this is a great opportunity to do something more than buy a traditional bouquet of tulips and a box of chocolates.

You can put flowers on the napkins, thereby decorating the table setting

Lots of different flowers will look very romantic

The bottle can be decorated in a festive style
There is no problem for a home craftsman to spend a couple of evenings on simple home decorations for the spring holiday. If children don’t know how to please their mother, one of the adults can give a good hint.
What to use to decorate the interior for March 8 with your own hands is another important point. The easiest way is to use what you always have on hand and buy a few necessary little things. Depending on the technique and material used to implement the idea, you can presumably calculate the costs of interior decorations.

Pots of flowers will pleasantly complement the festive atmosphere

You can decorate a paper bag and put flowers in it
- Yarn, threads, fishing line, clothesline, twine, cords.
- Colored paper, thin cardboard, boxes, corrugated and colored packaging, foil, self-adhesive.
- Glass containers of unusual shapes, bottles and plastic containers.
- Bulk products, cereals, pasta.
- Satin ribbons, lace, scraps of leather and fabric, colored elastic bands, sparkles, stones and other haberdashery decor.
- Interior paints, gouache, markers, spray paint, varnish.
- Twigs, steel and copper wire.
- Polystyrene foam, plywood, scraps of tin cans, plastic and plasterboard.
The amount of decor is also important. Someone decided to limit themselves to one thing, for example, a decorative inscription or a bouquet in an original vase made from a glass or plastic bottle. And someone will want to make sure that the personal space of the woman who is to be congratulated on the holiday is buried in flowers, balloons and exclusive apartment decor for March 8th.

Pink color will give you a great mood

A good idea would be to decorate a wine bottle with paper flowers.

Decorating a room in this style will give you a festive mood.
The best decor ideas for March 8
In one short article it is impossible to describe all the souvenirs with which you can decorate your home on the eve of the spring holiday. But it’s worth taking a closer look at what is available and pleasant for women to receive.
Every lady will be pleased if she is relieved of the duties of preparing a feast. Setting a table with decor is a practical idea.
During the preparation process, there is no need to engage in long cooking without practice and proven recipes; it is quite enough:
- make hot sandwiches;
- put beautiful slices (cheese, sausages, fish);
- open canned food (can be purchased);
- organize plus a “sweet table”.
But the main thing is the table decor for March 8th. It’s better to buy a beautiful tablecloth in advance or just a bright fabric that is 20-30 cm wider than the tabletop on both sides. You can put beautifully folded paper napkins for each participant in the feast. For a solemn or romantic atmosphere, put candles. The surroundings will be complemented by your favorite flowers in an original vase or their imitation in the interior.

A basket of flowers will perfectly complement the festive atmosphere

Wine bottles can be decorated with flowers
|
Dry ikebana |
Performed at random from branches, dried immortelle flowers, spikelets, herbarium, palm trees |
|
|
Classical ikebana |
Flowering plants are used, symbolizing 3 elements, directed in different directions |
|
|
Unusual bouquets |
flowers of a rare shade (blue, purple, green, black) or a special composition |
|
|
Artificial flowers |
From colored, crinkled and corrugated paper, vinyl stickers, foil, plastic |
|
|
Origami crafts |
Planar and volumetric flowers, centers from modular origami, techniques vary |
|
|
Drawings and applications |
In original frames, in wall panels as seasonal decoration |
|
|
Children's drawings |
Interesting when performed by young children |
|
|
Exclusive hand-made |
Performed using any technique, according to hobby, artistic taste or skills |
Wine, sweets and romantic candles are indispensable attributes of the interior on March 8th. Candles can be placed inside wide glasses decorated with your own hands.

You can decorate the bottle and stick artificial flowers on it

Baskets with flowers will perfectly decorate your holiday design

Small pots of flowers can be placed on the table
Lamps made from glass vessels, decorated in a festive way, will surely please every woman. Small glass coffee jars decorated with lace or mesh look good. You can take any containers and tie them with a ribbon with branches of fluffy willow, mimosa, or surround them with small artificial flowers. Covering lamp jars with artificial buds or flowers using the origami technique is also an option.
Every woman will surely appreciate a vase made from scrap materials, especially when there is only one flower. A sprig of mimosa, an orchid, a rose or a spring primrose will bring much positivity when presented in an original design.

Baskets with flowers perfectly complement the interior

You can make daisies out of paper and hang them in your room
Some ladies are against being given cut flowers, preferring indoor exotics in beautiful flower pots. It is advisable to know what a woman likes and add a new variety of indoor violet, another cactus or succulent to the collection. The more original the containers with flowers are decorated, the more joy they will bring to their new owner.
Vases made from scrap materials are the most popular spring room decor on March 8th. If there is only one vase, and it is not very impressive, it may get lost in the interior. Several vessels will look much more attractive, especially when they are all different, but united by a common idea.
The decoration of bottles with ribbons, yarn or colored twine is done from the neck or from the bottom, gradually winding circle after circle along the walls coated with glue. Having completed the first stage, they move on to volumetric decor, which can be made from anything - fabric, artificial flowers, pebbles, beads, etc.

You can put flowers on the wall

You can make a heart from branches and flowers

Room decor can be decorated with balloons
If you have doubts about your abilities, then a champagne bottle that has been cleared of stickers can be “golden.” Coating the container with spray paint is not difficult, but you will have to do it very carefully so as not to get dirty and create problems with cleaning. It is better to spray in an open space, wearing work clothes. The decor of the “new” vase can be completed by gluing sparkles or stones.

You can put flowers in bottles

Bottles can be decorated with beautiful designs
A flower (live or artificial) in a homemade vase is not only an excellent interior decoration for March 8, but also a great homemade gift. All that remains is to put a rose or an orchid in this vase, decorate the room with balloons and garlands with colored paper hearts, as well as everything that you have long wanted to do and give to a loved one. Then after the holiday you will want to leave everything as is for a longer time - all these embodied decor ideas for March 8th.
Video: Decor for March 8
50 photos of decor ideas for March 8:


Publication date: 03/27/2016 18:29:00
We invite you to familiarize yourself with various decorating methods that will give you the opportunity to decoupage bottles yourself. Simple glass containers for alcoholic beverages, any vases, jars will turn into true works of art in your hands.
The topic of the master class is step-by-step decoupage on glass with your own hands, using different materials in different styles. And in order to make it easier to understand this video master class, we have provided you with 3 video lessons and 60 photographs. Decorate the bottles with your own hands, and we will help you. 

Decoupage of bottles for March 8 and for weddings
At any festive table, no matter whether it is March 8 or an even more serious event such as a wedding, open champagne. Here you can use your imagination and decoupage bottles using appropriate thematic themes.
 This is a technique in which a suitable picture is pasted onto a particular surface. First, select the required image. In this case, you can use a plot on a napkin, rice paper or a card. Floral arrangements, some plant patterns, as well as interesting ornaments are well suited for the celebration of March 8th. Such images are good for decoupaging a bottle of champagne for a wedding, especially if you add some decorative details to the finished product. This kind of work can be done quite easily with your own hands.
You need to degrease the surface and then prime it with light acrylic paint. Afterwards, the fragment is glued to the selected areas and secured with acrylic varnish. This method is an easy option for beginners who have decided to perform decoupage on glass, and who are generally interested in this technique. This is how the base coating of a bottle of champagne is made for a wedding, March 8, etc.
Experienced needlewomen use craquelure as decoration to give the product a retro touch. We bring to your attention a photo for inspiration, which depicts decoupage of champagne bottles, especially for March 8 or for a wedding.


DIY decoupage on glass
Decoupage on glass is a common option for beginning needlewomen, giving the opportunity to get excellent products to decorate the interior with taste and ease. With its help, ordinary glass is transformed into original objects of art.There are a variety of methods that are proposed in this matter. There are mainly reverse and direct decoupage on glass. We have an interesting article on our website, accompanied by relevant video lessons. Our instructions will help you evaluate and study the intricacies of the work. You can try making decoupage on a glass vase.
Video step-by-step master class decoupage on glass
DIY vase decor
Let's move on to another decor option, where you will learn how to decoupage a vase. Many people have vases with a clean glass surface in their home. Try to repeat the presented glass decoupage; the object for flower arrangements will sparkle with new colors.Decoupage of a vase begins with preparing the surface by degreasing it. For these purposes, you can use acetone. After this, the product is painted with white acrylic paint. It is convenient to apply paint using a foam sponge.
This master class suggests applying an uneven layer of paint. Apply more layers on the top and bottom parts, since the selected floral motifs will be glued here. In the step-by-step photos, you can see what the decoupage technique looks like on a vase.
Glue the prepared pictures onto the dried object, as in the photo.


As an additional decoration, you can use an interesting technique by using thread for this purpose. To do this, 20 cm pieces of thread are moistened first in water and then in PVA glue.
After this, with your own hands, form spiral-shaped elements on the surface of the object. Having filled the space at your discretion, leave the product to dry. Then, cover it with several layers of acrylic-based varnish, drying each of them in between. This completes the master class and decoupage of the vase. Let's admire the wonderful result shown in the photo.


To create decoupage, various auxiliary methods and techniques are sometimes used. The next master class will show you an idea based on volumetric decoupage with eggshells. The prepared bottle is degreased and then coated with white acrylic paint. Next, a small piece of paper with a rice texture is glued onto the dried object.
The next step is to cover the bottle with eggshells, which must first be cleared of the film.


Now prepared fragments from a napkin are glued onto the volumetric decor using eggshells.
The surface of the egg crackle itself is tinted with light paint, and the contours of the rice material are tinted with pink. In some areas between the eggshells, you can paint on certain details with your own hands, as in the photo. You can use crushed crayons to tint cracks. Finally, the resulting volumetric decoupage is coated with acrylic-based varnish in several layers.


In addition to the interesting decoration with eggshells, another interesting option with which to decorate  products are volumetric decoupage of bottles with fabric, as well as tights. Before we consider the master class, we will consider the list of materials and devices that will be useful to you for your work.
So, prepare:
Let's consider the first option. This will be decoupage of bottles with napkins using partial fabric decoration. Take the prepared bottle and rid it of all kinds of paper stickers. They are easily removed with warm water. Then, degrease the surface.
Now decoupage with napkins in the center. Next, apply acrylic-based varnish. Leave the bottle to dry. At this point, start preparing a solution that will help you saturate the fabric. Take a small amount of putty, glue and water (in a one to one ratio). You will also need light-colored acrylic paint. The paint color is selected to match the selected fabric.


The amount of fabric needed is determined by the turnaround capacity of one half of the bottle. The prepared piece of material is dipped into the adhesive solution, thoroughly soaked and squeezed out of excess. After that, wrap the bottle with your own hands, draping the fabric at your own discretion or as shown in the photo.
Allow the created decor to dry thoroughly during the day. At the final stage, fix the various decorative elements with glue and apply varnish to the bottle to secure the created work.


In addition, you can do complete decoupage with fabric. To do this, the selected material is washed and dried.
Next, the fabric is cut into separate pieces, moistened in a solution, the composition of which is presented above, and each of them is sequentially glued to the surface of the product. Carefully straighten each of the segments with your hands, forming folds on them.
The finished volumetric decoupage using fabric is coated with varnish as usual. Decoupage with tights is done in a similar way. But in this case, working with this material is much easier, since such fabric is much easier to drape and can dry quickly. Therefore, you will not spend much time on such decor.
Oddly enough, you can also make decoupage with toilet paper. Since the main topic of our article  are the glass surfaces of the bottles, let's look at another master class with step-by-step photos, as well as a video on decor in the sea. To work you will need:
Prepare the surface: remove labels, degrease, dry. We cut out the necessary fragments for decoupage from a napkin and separate the top colored layer. PVA glue is diluted with water in a ratio of one to one. Now, cover the bottle with toilet paper using glue. An interesting texture on the surface is obtained due to folds. Apply white paint over the pasted paper. Glue the pictures prepared from napkins onto acrylic varnish in the center and onto the lid.
Next, a layer of blue paint is applied to the dried product, and then, with a sponge, a golden tint is applied along the folds. From the remaining parts of the napkin, form ropes and paint them with a golden tone. The resulting parts can be used as decoration for a bottle, as shown in the photo. The final touch is to coat the finished decorative bottle with two layers of acrylic varnish.


Video: Decor on a bottle with a marine theme
The craquelure technique is used to give products an aged look with characteristic cracks. Making decoupage in a retro style is quite easy even for beginners, if you first study the master class with photo examples.
Required decor kit:
The product, degreased with acetone, is coated with acrylic-based paint of a dark shade. To speed up drying, you can use a hair dryer. To make craquelure, take a special varnish, apply it to the bottle and wait until it dries for at least 15 minutes. Now, mix the paints to obtain the shade you need.
The presented master class uses a golden tone, which is formed by mixing yellow, brown and white colors. Dried craquelure produces original cracks on the bottle.


The pictures prepared in advance are glued in the desired area, after which the main background is tinted gold. In order to give the desired three-dimensional appearance to the printed images.


All fragments of the images are outlined using a contour to match the main golden background, and at the end the craquelure with decoupage is covered with acrylic varnish. Next, we invite you to study the final master class using a video example on decorating jars using the decoupage technique. Any housewife can use this equipment by filling it with a variety of bulk products available in the kitchen.
Video master class on how to decorate glass jars
Useful tips
If you are preparing for a holiday, be it a wedding, birthday, anniversary or New Year, a bottle of champagne must be present on the table.
At the same time, by decorating such a bottle, you will also decorate the festive table, which means you will add another zest to the holiday.
How to decorate champagne as a gift with your own hands
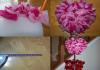
In this master class you can learn how to make a pink lady from a champagne bottle.
You will need:
Bias binding(10-11 m)
Glue (preferably construction glue)
Scissors
Fabric for bows
1. To make the top of the dress you can use silver braid. You just need to glue it, covering the emblem on the bottle.


2. After you have made two overlapping rows, prepare a pink ribbon. Use just a little glue to stick the tape to the bottle. Do it a little obliquely.
When you have reached the middle of the bottle, you should have something like this:


3. After you have wound the fabric to the end, its end needs to be glued in the place where it will be approximately covered by the skirt. This way you will hide all the seams.
4. It's time to make the skirt. To do this, prepare a ribbon for the bow and gather it onto a thread. In this example, the tape is 1.5 meters long, but you can choose it yourself, make it longer or shorter.


5. The skirt can be attached to the bottle using glue or thread tied around the bottle.
How to decorate champagne. Hat for a lady.

In this example, you will be able to make a hat for the lady that you prepared earlier. The only difference is the color chosen to cover the bottle. In this example it's blue, but you can leave it pink, or choose a color that you like best.
* Prepare the bottle by decorating it as in the previous example.
Cooking the hat
1. Cut a circle from a plastic bottle. The size of the hat will depend on the diameter of the circle.
2. Inside the cut out circle, cut out another circle - you will get the part of the hat that is attached on top of the champagne. This means that you need to measure the diameter of the neck of the bottle, and make the inner circle a little larger so that the hat is a little larger.


*Remove strips one at a time.


*Use a stapler to attach the cardboard to the plastic. Next, use your imagination to decorate the hat. In this example, satin ribbon and lace were used.


The photo on the left is a top view, the photo on the right is a bottom view.


How to decorate champagne with sweets

You will need:
Quiet paper (2 orange sheets, 1 green sheet)
*Tissue paper is thin paper, also known as tissue paper. You can find it at gift wrapping racks, as well as in specialized art stores.
Candies (in this example there are 48 pieces)
* Raffia is a long fiber that can be found on the leaves of the raffia palm tree. They are popular among florists and are used in arts and crafts.
Hot melt adhesive
Hot glue gun
1. Prepare some orange tissue paper and cut it into 7 x 7 cm squares.
2. Apply glue to the flat side of each candy. Now you need to glue the candy into the middle of the paper square.


* It is better to decorate the bottle with candies from the bottom up in a circle.
* Try to glue the candies tightly to each other.
4. Making leaves. To do this, prepare green tissue paper and cut out long narrow leaves from it.
5. The leaves need to be glued together in several layers. Next, you need to decorate the neck of the bottle with them.


6. Your bottle will look even more like a pineapple if you wrap some raffia around the neck.
How to beautifully decorate a bottle of champagne
It is customary to decorate weddings with beautifully decorated bottles of champagne. In this master class you will learn about another original way to decorate a bottle. A satin ribbon and your imagination will help you.

It is worth noting that such a decoration is suitable not only for a wedding table, but also for any other holiday, such as March 8 or a birthday.
You'll need:
Silk fabric
Satin ribbons (2 colors, the width of each ribbon is at least 4 cm)
Golden braid
Bias tape
Lining
1. Preparing a dress pattern. It consists of a bodice and a skirt.


First you need to do it on paper. Take the dimensions of a champagne bottle as a guide and then transfer it to the fabric.
* It is best to use thick satin and silk.
2. Sew along the edge of the satin ribbon, loosening the thread tension on the sewing machine in advance.
* It is advisable to put fasteners at each end so that when working with ribbons, the tightened edges do not come apart.
3. Using tailor's pins, you need to attach the ribbon to the bottom edge of the skirt. Make a zigzag stitch using a machine.


4. Decorate the entire skirt by alternating ribbons of two different colors (in this case, white and burgundy).
* Leave no more than 3 cm between rows.
5. When you sew the ribbons, you should make sure that the top row completely covers the joint seam of the bottom row.


*If you want to hide the stitching on the wrong side, you can use a lining. It is worth placing the skirt on the fabric, drawing the outline of the part and making a lining.
6. Fasten all the parts using pins. It is also worth securing the edge with machine stitching (see picture).


7. Now you need to edge the edge of the product with bias tape.
8. Decorate the bodice with ribbon. To do this, you need to put the tape on the bodice and then grind along the edge, i.e. fasten the two parts together and then twist them out.
9. The seam must be hidden by sewing the bodice and skirt with ribbon.


10. Start decorating the dress with a bow (brooches, sequins).
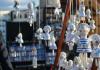
How to decorate champagne with your own hands for a wedding

For the wedding table, you can prepare 2 colorful bottles of champagne and tie them together with ribbons.
You will need:
Champagne (2 bottles)
Spray paint (white)
Satin ribbons (color white and lilac, length 2 meters)
Contour on glass (in this example, lilac)
Pastel
Stationery glue, electrical tape or tape
Cyanopane glue
Polymer clay flowers
Double sided tape
1. Remove the stickers from the bottles by soaking them in cold water. Degrease the surface with alcohol or window cleaner and dry.
2. Using office glue, glue paper decorations onto the glass of the bottle. You can use duct tape or duct tape instead, but in this case no glue is used (obviously). When you paint the bottle and remove the decorations, you will be left with clean glass.

In this example, patterns were used in square shapes, wavy stripes, blades of grass and butterflies.
3. Now the bottle needs to be painted. Using a can of white paint, paint the bottles in 3 layers (read the instructions for using the can carefully). You can try replacing the spray paint with acrylic paint.

Make sure that after applying a new layer, the previous layer is completely dry. To do this, you may have to leave the bottles to dry for a day.
4. Carefully remove the pieces of paper (insulating tape, adhesive tape).

5. Time to decorate - glue flowers onto clean glass, paint them with pastel and outline. The latter can also draw arbitrary patterns.

6. You can fill the empty spaces with beads glued with cyanopane glue.


7. Tie the bottle with a satin ribbon. You can use double-sided tape under the tape to keep it in place. You can tie the ends with a knot and a bow.


The ends of the tape can be singed over a candle. They can hang down to the bottom of the bottle.
How to decorate a bottle of champagne with your own hands

You will need:
Satin ribbon (1 chocolate color, 1 white color; length 2m, width 3cm)
White satin ribbon (length 60cm, width 6cm)
Base fabric
1. First you need to cut out a dress, focusing on the size of the bottle.
2. You need to make shuttlecocks from satin ribbons. To do this, sew a stitch along the edge and pull it together to create ruffles.


3. Sew ruffles onto the skirt.
4. The first row should consist of the widest strip that needs to be stitched.
5. From the center of the waist line you need to draw an isosceles triangle (see picture).


6. Sew white ribbons, 3cm wide, around the perimeter of the triangle.
* In order for everything to work out neatly, you should secure the product with pins, and only then start grinding.
7. Cover the edges of the triangle with a frill made from chocolate-colored satin ribbon.


9. Use wide white tape (6cm) to cover the gaps in the drapery. On top of this ribbon also apply a narrow chocolate ribbon (3cm) and stitch.


* If you pull the end of the thread, you will be able to tighten the ribbon and distribute the folds beautifully and neatly.
* With this detail you can hide undraped areas.
10. Prepare a satin ribbon (6cm) and sew it onto the bodice of the dress. You can add sequins for beauty and sew on ties.


11. At the bottom you can decorate the dress with white ribbon bows.
How to decorate a bottle of champagne with ribbons


For a wedding or anniversary, the following champagne bottle decor will also suit you.
You will need:
Satin ribbon (3.5 m)
Gold brocade ribbon (1.5 m)
Glue (preferably moment)
Scissors
Champagne bottle with gold foil
1. Prepare a bottle and tape and measure its approximate length for the first layer. To do this, attach the tape to the neck of the bottle.

2. When you have measured the length, cut the desired piece of tape and mark several points on it with glue.

4. Measure out the second piece of tape. It will be longer.
5. Proceed with the second piece as with the first piece of tape, i.e. Mark the dots with glue and glue. It is advisable that the ends of the ribbons be positioned equally, this will ensure a beautiful and neat pattern.
6. Continue gluing the next two layers (3rd and 4th) in a similar manner.
7. Now prepare the gold ribbon. It also needs to be measured and glued. Make 2 rows (see picture).

8. Another piece of gold tape needs to be glued to the bottom of the bottle.
9. Prepare the blue ribbon again. Measure and glue to the bottom of the bottle so that the seam is at the back.


10. Now we cut 7-8 blue ribbons of the same length and glue them too - so that the seam is at the back.
11. Here's the rear view. A not very neat seam has formed that can be easily closed. To do this, prepare a stationery knife and use it to make a slot for the end of the tape, which needs to be inserted there.


12. Apply a little glue to the tip of the blue tape and push it through the gap.


14. Pay attention to the middle of the bottle, there is an open space there. This is where we attach another piece of golden ribbon. The corners that stick out from the front need to be cut off.


15. Now you can decorate the front of the bottle - add bows, lace, beads, etc.


How to decorate champagne for the New Year

You will need:
Thick aluminum foil
Medium thickness wire
Decorations (artificial or natural spruce branches, tinsel, small New Year's toys, ribbons, beads)
1. First you need to wrap the bottle in foil. It is advisable to cover in several layers (from 2 to 4 depending on the thickness of the foil). Try to press the foil tightly against the bottle.
2. Now you need to attach the wire. Wrap it around the bottle, but not tightly, so that you can then remove it when you want to open the champagne.


3. Proceed to the most important thing - the actual decoration. In principle, there are many options and they depend on your imagination and available materials.
You can take a few Christmas tree branches and use glue to attach them to the foil. This can be done in a spiral (see picture), and it is advisable to start from the base of the bottle.
In those places where the foil is visible, you can attach ribbons, fabrics, wide braid or decorative paper. Places where glue may be visible can be hidden with tinsel.
4. Add beads, pine cones, toys, candies, small Christmas tree decorations, etc.


How to decorate a glass bottle (video)
How to decorate a bottle of champagne (video)
How to decorate a bottle with your own hands (video)
Spring handicrafts are gaining momentum. The days are getting longer and the mood is improving. Let's get down to spring decoupage and decorate a bottle of champagne for March 8th.
First of all, the labels are removed from the bottle. Soak it in a bowl of water, then the paper will peel off easily. Then, wipe the glass with any degreaser (alcohol or acetone).

For spring decoupage, you need to choose a design that matches your mood. A napkin with small bouquets of lilies of the valley will be very relevant. You need to remove the top layer of the napkin; only this will be used for decoupage.

We paint the bottle with white paint using a special foam sponge.

Apply two coats of white paint to completely cover the surface. This layer of paint is the main one and the following stages of decoupage will be applied to it.

While the paint dries from the napkin, you need to tear out several small fragments of lilies of the valley.

Place the fragment on the white surface of the bottle and coat the top with special glue for decoupage. It will saturate the thin napkin and stick it. Apply glue with a small brush and smooth the napkin so that no wrinkles appear.

After the decoupage glue has dried, you can paint on the background of the bottle. The lilies of the valley were painted on a complex background in yellow-green shades, so for painting we took acrylic paints: white, yellow and bright green. Mix paints to create tones similar to the color of the napkin.

Using a small foam sponge, apply a light yellow color to the bottle, between the bunches of lilies of the valley.

Then, use a green tint to draw shadows around the lilies of the valley (the location of the shadows should match the napkin pattern).

When the background painting has dried, varnish the entire decoupage with several layers of acrylic varnish.

If there are some wrinkles on the glued fragments, sand them down with sandpaper.

To make decoupage “Silver Lily of the Valley” you need to use silver glitter. Apply small dots of glitter to each lily of the valley bell and wait for it to dry.

Apply a transparent gel contour on top of the silver bells. After it dries, the bells will become voluminous and shiny from the inside.

You can varnish a bottle of champagne in several more layers. However, make sure that the varnish does not level the surface. Small bells of silver lily of the valley should stand out in volume on the bottle.

Tie a satin bow around the neck of the bottle to match the color of the underpainting.

And you are guaranteed a bright, spring mood. Decoupage of champagne for March 8 “Silver Lily of the Valley” is ready. To decorate another bottle, you can use
International Women's Day is approaching - March 8, so it's worth thinking about gifts in advance. On this day I want please a loved one a truly original gift, but what if there is nothing suitable in the stores or you want to give something really special? You can always make a gift yourself, with your own hands.
There are many different techniques for making crafts, from applique to scrapbooking. Most of them are quite easy to learn, just a little bit of diligence and patience is enough.
Decoupage is rightfully recognized as one of the most popular techniques for creativity.
Decoupage is a way of decorating various objects by gluing drawings, patterns or ornaments onto their surface and then covering the top with varnish. The advantage of this technique is that, if desired, you can decorate things with almost any surface, be it wood, metal, plastic and other materials.

What materials are usually required to make any decoupage craft? Mainly acrylic paints of different colors(for processing the background and details of the object), synthetic brushes of different sizes (for applying paint and varnish), napkins for decoupage (drawing), scissors for cutting, sponge or sponge (for shading), primer (for priming the product for paint), glue for decoupage (special gel varnish or regular PVA), varnish. Even a beginner will definitely need the above. More experienced people use additional elements for decoration, such as gold leaf (foil imitating gold), relief varnish, stencils, etc.
The main stages of working with decoupage: preparing everything necessary for production, preparing and priming the surface of the object, applying a design, securing it with glue, and varnishing it.
Of course, this is a general approximate procedure; when working with decoupage, more details and nuances should be taken into account
Kitchen board using decoupage technique as a gift for mother or grandmother
There are many options for making a souvenir using the decoupage technique as a gift for the eighth of March. For example, the simplest of them is to make a kitchen board using the decoupage technique.
For this you will need:
- blank board,
- sandpaper,
- napkins for decoupage,
- decoupage glue,
- acrylic paints,
- priming,
- brushes,
- scissors.
First, the board must be cleaned with sandpaper so that the surface of the workpiece is smooth and then treated with a primer.

Soil layer Apply with a wide brush; for greater smoothness, you can apply it in several layers. The primer must be completely dry before proceeding to the next step. The next step is preparing the napkins. For direct application, you need the topmost layer of a napkin with a pattern. It must be carefully cut along the edge with scissors and applied to the board.
Note: you can fill the entire board or some part with a drawing. The number of napkins depends on this
The applied drawing must be coated with glue using a brush. . You need to work carefully and Make sure that the napkin does not wrinkle into folds. After this, you need to let the glue dry. You can speed up drying by using a hairdryer.
The background of the board can be left white or painted in the desired color. After all the manipulations and when the surface is completely dry, the board must be varnished. It is better to take acrylic and lay it in several layers, drying each layer thoroughly. Tablet for March 8 ready!
In a similar way, you can give as a gift not only a kitchen board, but also jars for storing spices, a box, a frame for a photo or a small mirror, and so on. You can take any motif for the drawing, but on the eve of the March 8 holiday, it is better to use a floral theme.
In addition to the board and other things for the kitchen, you can present your mother or grandmother with a pair of silver teas.

Silver tea pair, Argenta(price on the link)
Decoupage bottle of champagne as a gift for March 8
An interesting and unusual do-it-yourself decoupage as a gift for March 8th can be made from a bottle of champagne or wine.
To work you will need:
- bottle,
- acrylic paints,
- varnish (acrylic),
- decoupage glue,
- surface degreasing agent (acetone or alcohol),
- decoupage napkins with floral print,
- brushes,
- sponge or sponge,
- scissors.
The labels must be removed from the bottle; the foil on top can be left. To remove labels, the bottle can be soaked in warm water. Then the surface must be degreased and cleaned of glue residues by wiping it with alcohol or acetone. After the bottle is dry, A layer of primer is applied with a sponge.

After the primer layer has dried, the surface is covered with a layer of white paint. If desired, you can reapply a layer of acrylic, but on an already dried surface.
Now you can start drawing an image. To do this, you need a top layer of a napkin with a pattern. It must be carefully applied to the bottle, making sure that the design covers the entire bottle. If one napkin is not enough, you need to add more, but so that the pattern matches.
If large flowers are depicted on the napkin, then they can be cut out separately along the contour and glued to the surface in the desired order
After the design is applied, it must be thoroughly coated with glue and allowed to dry. Bottle background needs to be painted with acrylic paint to match the background of the napkin. Let the surface dry again and finally cover everything with several layers of varnish.
After final drying, you can make a congratulatory inscription on the bottle with acrylic paint and tie it with a ribbon. Bottle as a gift ready by March 8th!

They decorate everything with decoupage: trays, cups, candles, vases, culinary spatulas and spoons, covers, plates and even jewelry (bracelets and pendants). Watch a video on this topic.
Now in craft stores you can easily find everything you need for decoupage, including wooden blanks for most crafts (key holders, chests, trays and boards, flat and three-dimensional figurines, nesting dolls, etc.).
11 February 2018, 10:44