Showing publications 41-50 of 137.
All sections | Drawings for February 23. Drawing on the theme Defender of the Fatherland Day
Abstract of GCD in the senior group Artistic and aesthetic development Subject: "Postcard for Dad" (Applique with elements drawing) Target: Form children’s ideas about the holiday 23 February. Tasks: 1. Educational: - Teach children to cut out details for a postcard and carefully...
 Master class “Do-it-yourself postcard for 23 February. Tank using plasticineography technique" for children of middle preschool age. Prepared by the teacher of MBDOU Kindergarten No. 40 Fayzrakhmanova E.V. The goal of the master is class: Train master class participants in working methods...
Drawings for February 23. Drawing on the theme Defender of the Fatherland Day - Summary of a GCD lesson on drawing in the middle group on the topic “Portrait of the Pope”
Educational area: Artistic and aesthetic development Program content: Introduce children to the upcoming holiday. To consolidate children's ability to depict the structure of a flower in a drawing using a variety of form-building movements, working with the whole brush and the end....
 Image library "MAAM-pictures"
"Holiday fireworks for dad." GCD summary for February 23 using non-traditional drawing techniques with cotton swabs SUMMARY OF GCD on artistic and aesthetic development using non-traditional drawing techniques (with cotton swabs) Educator: Spiridonova S. V. Topic: “Holiday fireworks for dad” Age group: 2-3 years Form of joint activity: GCD Form of organization:...
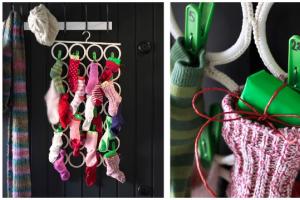
 Tsikhotskikh Elena Alexandrovna. Teacher of the MKDOU "Kindergarten of the state farm "Second Five-Year Plan". On the eve of the holiday "Defender of the Fatherland Day", an exhibition of drawings "Glory to the Native Army" was organized in our middle group. Parents were invited to participate along with...
 The holidays are over, for which our “preparators” prepared with special trepidation. On Defender of the Fatherland Day, sports competitions were held with the participation of family teams and musical breaks between relay races. And for the holiday of March 8, the guys and I prepared a festive...
Drawings for February 23. Drawing on the theme Defender of the Fatherland Day - Summary of a lesson on plasticineography in the junior group on making a postcard for dad “Airplane”
 Objectives of the lesson: 1. To strengthen the ability of children to divide a block of plasticine by eye into two equal parts, roll it out with straight movements of the palms. 2. Teach children to assemble an object consisting of several parts on a plane, to achieve an accurate representation of the object’s shape, its structure,...
 Olga Zavalishina Photo report "Defender of the Fatherland Day" On February 23, our country celebrates Defender of the Fatherland Day. This holiday is considered a men's holiday, since on this day we all congratulate our defenders: present and future - our men. Our Army Vladimir...
In this lesson we will look at what you can draw for February 23, Defender of the Fatherland Day, and how to draw February 23, Defender of the Fatherland Day, with a pencil step by step. Previously, this holiday was called differently, in the USSR - the Day of the Soviet Army and Navy from 1943 to 1993, and was first established in 1922 as the holiday Day of the Red Army and Navy. Now let's look at the drawing we will draw for February 23rd. It is not very complicated, elements of which are in separate lessons.
Before we start step-by-step drawing, let's look at the options for drawings for Defender of the Fatherland Day.
Here is a similar picture, only slightly different.

Eternal Flame, there is a separate lesson.

Another attribute of the holiday is, below are two options.


Now let's begin. In this lesson we will use a protractor to divide a circle into five equal parts. If you don't have one, there is a tutorial where you can draw a star without it - .
So, draw a circle and divide it in half. Mark 72 degrees from the vertical line and draw the line completely, because we will need them.

Measure it at 72 degrees, also, so as not to get confused, I marked our divisions with dots.

Now mark the lines on 1/2 of the line that are not marked and draw a shape like this, the corners of which are slightly rounded.

Erase the circle and what is outside the star. Make another outline of the star on the outside, the sides of which should be at equal distances from each other.

Let's draw


Here is a schematic drawing of February 23rd. Now you can color it.
Today we will create a thematic drawing for Defender of the Fatherland Day. On this holiday, all women try to congratulate their men and boyfriends. An illustration drawn by yourself is always more valuable than any expensive gift.
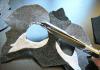
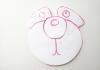
Photo 1. Draw a circle with a simple pencil. Inside it, draw another smaller circle. Let's write two numbers - two and three.
Photo 2. Let's add a star at the back. Only the edges will be visible; 
Photo 3. Behind the star we will draw another figure with pointed edges, on which we will draw a weapon crosswise. Between the two circles below we will write the word “February”. 
Photo 4. Let's draw the back figure. Let's make sharp edges; 
Photo 5. With a black pen we outline the weapon, the word and partly the numbers; 
Photo 6. For numbers, outline and weapons, use a yellow and red pencil; 
Photo 7. Using two shades of gray we will draw the back figure; 
Photo 8. We will paint the star and the inner circle with two shades of red; 
Photo 9. Let’s draw a ribbon in the background and make markings; 
According to established tradition, on Defender of the Fatherland Day it is customary to congratulate not only military personnel and combat veterans, but also all men and even boys. It is especially gratifying that this wonderful tradition is instilled in children from an early age. Postcards and drawings with pencils and paints with congratulatory inscriptions are prepared in kindergartens and schools to give to beloved fathers and grandfathers on February 23. Thematic competitions for children's creativity are often held, where participants demonstrate their artistic talents. But a child’s drawing for February 23 is not just an image of holiday symbols with congratulatory inscriptions, but also a sign of respect. A sign of respect for the defenders of the Motherland, brave warriors and real men! Next, you will find simple step-by-step master classes on drawings for Defender of the Fatherland Day on February 23, which are suitable for kindergarten and elementary school.
The first thematic pencil drawings for dads and grandfathers in the form of symbolic tanks and airplanes on February 23. Children learn to draw step by step in kindergarten. There they will learn for the first time what kind of holiday Defender of the Fatherland Day is and why it is so important to congratulate your close men on this day. And symbolic drawings help them get a correct idea of the holiday as a whole. Next, we offer you a simple master class on step-by-step pencil drawing for dad in kindergarten “Tank” on February 23, 2017, which even the youngest pupils can master.
- album sheet
- black thin pencil or gel pen
- colored pencils
- eraser
Initially, February 23 was the Day of the Soviet Army and Navy, so the image of a warship can be safely used for a congratulatory children's drawing for school. Just like a tank or an airplane, a drawing of a warship can be an excellent stand-alone gift or design for a greeting poster. Learn more about how to master the “Warship” drawing for children on February 23 to school step by step from the next master class.
- album sheet
- black felt-tip pen
- pastels or colored pencils, paints
A variant of a themed pencil drawing for February 23rd for children called “Defender,” which you will find in the master class below, is perfect for the competition. It can also be used to design a DIY greeting card or a wall newspaper at school. A detailed master class on drawing “Defender” on February 23rd for a pencil competition for children below.
- album sheet
- colored pencils, felt-tip pens
- simple pencil
- eraser
- ruler
Now you know that it’s not at all difficult to create a festive drawing for February 23rd with your own hands as a gift for dad, for a competition or an exhibition. And our simple step-by-step master classes on drawings with pencils and paints for Defender of the Fatherland Day can easily be used for kindergarten and school. And if you want to draw a funny themed drawing dedicated to February 23, then pay attention to the option for children from the video below.
Good day everyone! Following February 14 comes another holiday, which is celebrated in our country annually on February 23. Last time we talked about what, and also did with the children
Today we continue and will, together with the children, congratulate our defenders and make them interesting and original cards.
This type of work is the most common for school students or kindergarten students. Because it is not so difficult to make such a miracle, you just need to listen to the teacher’s instructions and everything will work out.
So, if you haven’t yet decided to do this and give it as a gift, then perhaps you will stop at this option.
On this day, all mothers, daughters, grandmothers, and indeed the entire female half of the population congratulate the male half on this celebration. It is so customary that the symbols of this holiday are state flags, military equipment and other vehicles, as well as stars on shoulder straps.
Therefore, all drawings or pictures are directly related to this. I propose to make the first option out of paper - this is a tie, using the origami technique.

I also really liked the idea with a dollar bill, or you can take our rubles and roll them up, like this, it looks pretty cool, and as they say, a small stash at hand.

For the smallest craftsmen of the second youngest group of kindergarten, you can make work from plasticine.

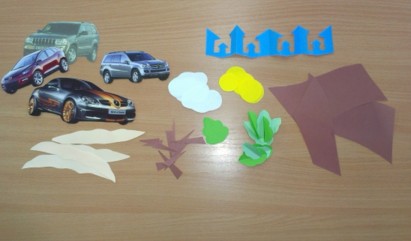
Now we will make a postcard with a car depicted on it. You can make such a charming and funny creation with children in the senior and preparatory groups, or use it in primary school.

Stages of work:
1. Prepare everything you need for work, this is paper, glue, scissors and pictures of cars.

2. Cut out the necessary details to complete the plot.
3. Then, to make the machine seem three-dimensional, make a cut, while folding the sheet of paper in half.

4. This is such an interesting and cute plot.

5. You can decorate the outside as you wish, using various decorations and decors.

6. You can either make an applique or simply draw with colored pencils or felt-tip pens.

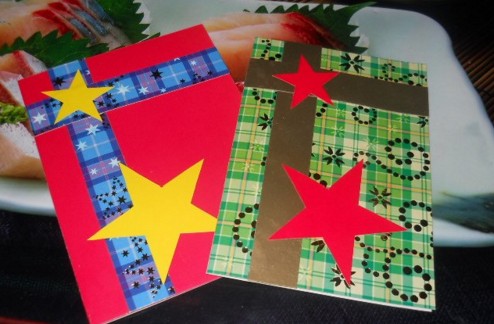
Cool design using scrapbooking technique
I’m giving you a few ideas that impressed me, you can take them as the basis for your work and create your own plot. See how bright you can make a star.

The cutie is very talented, even the flower is not at all out of place.

Wow, a message or a little surprise).

In general, it looks wonderful and not primitive.

So, create for the joy of everyone!

And surprise, in general, act.

I also offer you step-by-step instructions that you can take for your creative work in the scrapbooking style, here:
Original ideas for greeting cards for schoolchildren on February 23rd with templates
I would like to make and decorate a card in a special way, I know that many are interested in options for volumetric products, because they look great and amazing. Moreover, if there are step-by-step instructions, then you and your children at school can do such a miracle.
Or you can create this creation at home, and then your son or daughter will give it to dad.
Stages of work:
1. First of all, you will need to find double-sided cardboard, preferably blue or light blue, this will be the background of the sea. Then fold the blue sheet in half and glue a boat-shaped base to it.

2. Accordingly, in order to glue the base from the ship, you first need to make it, to do this, find an image of the ship or ask me for a template, I will send it to you for free by email. So, print it out on A4 sheet and cut out the desired image along the contours using a stationery knife.


4. Carefully glue the white one to the blue base.

5. This is how it should work out for you.

6. Looks simply fantastically beautiful and charming.

You can make a simple applique from colored paper and geometric shapes; to do this, draw templates and glue the composition using them.


You can take another simple route, print this sample and then color it or applique it.

I liked another type of postcard, I’m happy to show it to you.
We will need:
- colored paper or cardboard
- scissors

Stages of work:
1. Draw templates, approximately how you should get it, I showed you in this picture, it’s nothing difficult, even a beginner can handle it. But decide for yourself what color to make for each workpiece; this is a creative work that can be done in a craft lesson.

2. For the base, it is best to take colored cardboard, either double-sided or plain. Fold the sheet in half and cut a circle on one part.

3. Now all that remains is to design the product. Find a suitable text or write your own by hand.

4. Glue the greeting inside the card.


6. And the front side will look like this. It's like a ship floating on the waves.

I also saw this cute guy yesterday, I suggest you build him too.
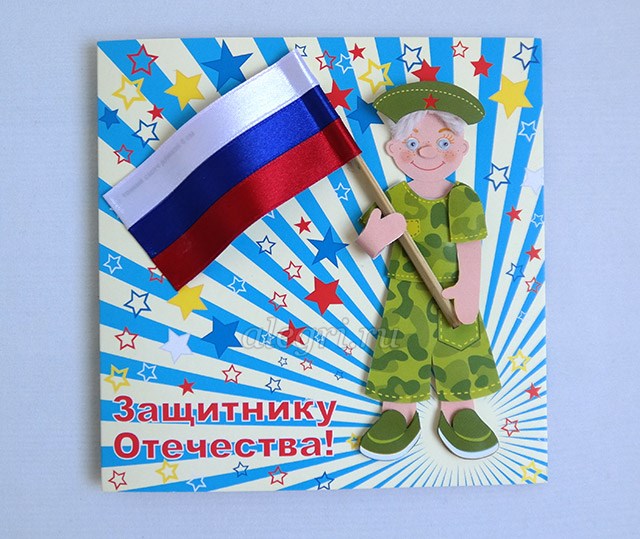
To create such beauty, cut out the blanks with scissors.

Glue everything you have planned onto the background you need. The flag can be made from satin ribbons and a match, or use a cotton swab instead of a stick.

If you really want a masterpiece, take a look here, it’s stylish and a very cool idea for children of any age.

We make cards with children in kindergarten from paper for dad and grandfather
An excellent option would be a fairly simple postcard with a picture of a bear cub in military uniform. You need to make such a background on a sheet of paper using a printer.

Cut out the stencils according to the sample.

Then glue them onto the background.

And on the reverse side write or print a congratulation.

Well, I also found such a simple idea for very small young talents.
We will need:
- multi-colored cardboard with embossing
- colored paper
- scissors
- ruler
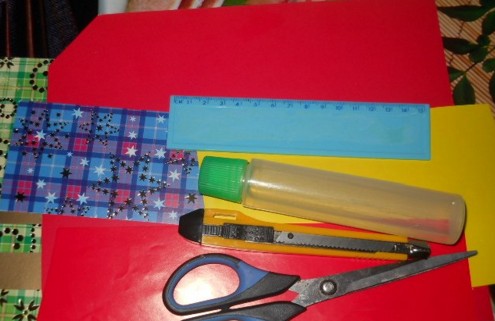
Stages of work:
1. Print the stars on A4 sheet, or make stencils, and then draw them on colored paper and cut them out.

2. Fold a sheet of embossed cardstock in half. Cut two strips from colored paper and glue them overlapping. And also decorate with a star.
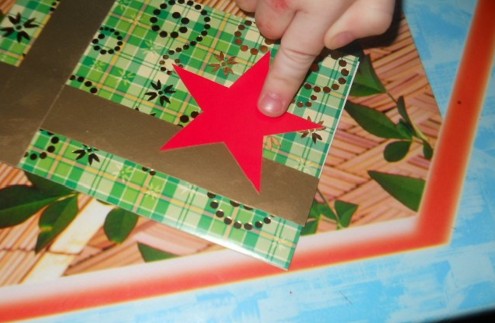
3. Such a very beautiful and sweet result, write your wishes on the other side.
Unusual gift in quilling style Tank
It will be really cool if you make a postcard and, in addition to everything else, give it a small souvenir in the form

Anyone familiar with this technique will easily create any plot).

And for those who are not familiar yet, I found a video from which you will learn how to do this:
You can deviate from the topic and make it out of numbers, but in the same style.

Master class on how to make a shirt with a jacket
The easiest option can be a souvenir using the origami technique; use colored double-sided paper or a white A4 sheet.

It turned out to be a small shirt with a tie.

In addition, since this is a postcard, you will need to come up with a poem or congratulation and read it with expression.
Or you can also go another way by first making a tie from a blue or light blue sheet, and decorate it with all kinds of stickers, sequins, rhinestones, etc.

And then glue it and you get the simplest gift option.

And if you want to do something more serious, then use these instructions.

It is necessary to make a mock-up of the product as shown in the figure.
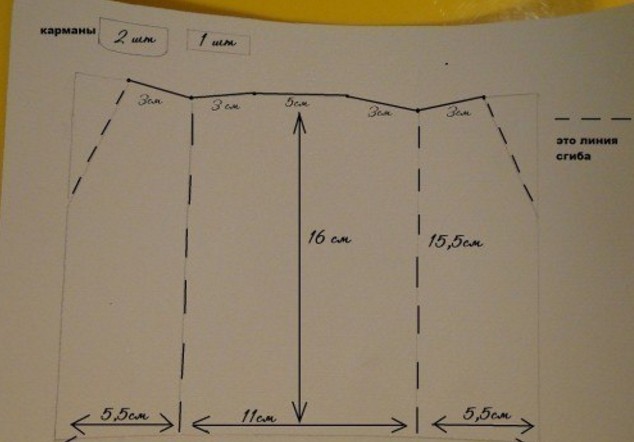
Then use a ruler to fold along these lines. Of course, draw the lines with a pencil, not a felt-tip pen; a felt-tip pen is shown here to make it easier to see.
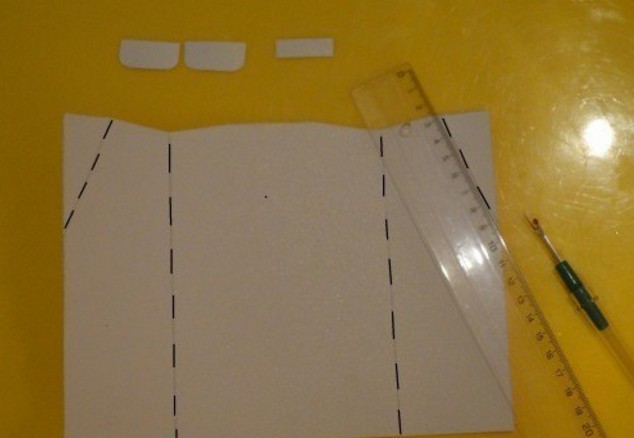
This is how the jacket looks like.

All that remains is to make the collar, make it according to the diagram.

Then cut and roll.

Finish the work by gluing on the necessary finishing touches, a tie made of satin ribbon or paper and a poem.

You can also make a card with a little secret.