It's simple, interesting and fun to make crafts from cones. This is because the most ordinary cone can turn into any toy, animal, bird, or funny object. By attaching various parts to the cone, as well as fastening the cones together, you can create a whole collection of crafts, such as toys, souvenirs and quite useful items.
To create a cone, draw a circle using a compass and divide it into 4 parts. Then all these sectors are cut, and the resulting quarters are rolled into a cone. Such a cone will be narrow, but if you cut off more than a quarter of a circle, the cone itself will become wider.
What kind of crafts can be made from cones?
Dog

Roll half of the brown paper circle into a cone and the body is ready. Add dog ears, muzzle, paws and eyes and you will get a cute dog, and most importantly - very easy to create.
Elephant

The base, that is, the body of the elephant, is a gray thin cone from the fourth part of the circle. Plus a head with large ears, smoothly flowing into the trunk, legs and tail. Everything is simple and fast, especially since a head template is included to help.
Simple paper cat

The simplest craft consists of a black cone and a small cylindrical head attached to the top of the cone. You will also need protruding ears, elongated eyes, a nose, whiskers, paws and a tail. Cats using this technique look original and are beautiful in various colors.
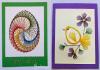
Lion

The work is interesting not only for its conical body, but also for its head, the mane around which is made of thin paper strips glued into loops. Flowers are often made this way.
Crow

You can make a funny crow or crow from a cone. Moreover, the work is very simple. The base is a black cone, the wings are one piece and the head is in the form of a circle. You will also need a wide beak made of yellow paper and paws in the form of strips of paper folded into an accordion.
Paper penguins

The work is so simple that in a matter of minutes you can make a whole family of penguins, with mom, dad and babies. Children quickly remember the sequence of actions and cope with the task with ease.
Dragon Toothless

In the continuation of black characters, I present to you the handsome Toothless from the cartoon “How to Train Your Dragon.” It also consists of a conical body and complementary paper parts, for which there is a template to help create.
Frog

An excellent craft made from a cone, as simple as possible. The body is a wide green cone, plus a minimum of complementary details in the form of four identical paws, eyes and tongue. All.
Bee from a cone

Bright butterflies

The craft is very similar to the previous one, differing only in the shape of the wings and colors. Such a butterfly is extremely easy to make, the main thing is the availability of colored paper of various shades and your own imagination.
Pig from a cone

The simplest craft for children, even the smallest. They may need a little help in creating the cone, but they can handle the rest of the components with pleasure and without problems.
Cone chickens

Here the cone is not in its original form, since when rolling it you need to leave the ends. But the technique is still the same, chickens are easy to make, like all crafts from cones.
Ladybug

Most likely, this is a surprise bag in the shape of a ladybug, with which you can put sweets and present such a gift to your mother. Using a cone as a basis, you can make such a surprise in the form of a variety of characters.
See step-by-step instructions.
Witch

You can make more than just animals from a cone. In this version, it is a witch, but it can also be any little people, fairy-tale characters, for example, an astrologer, forest fairies, gnomes, and even a snowman.
Hedgehog

Look what a wonderful hedgehog you can make! Moreover, the hedgehog consists entirely of cones, only some of them are cut to form something like needles. And he himself is not in a vertical position, like previous crafts made from cones, but horizontal.
Instead of the word “pattern,” “reamer” is sometimes used, but this term is ambiguous: for example, a reamer is a tool for increasing the diameter of a hole, and in electronic technology there is the concept of a reamer. Therefore, although I am obliged to use the words “cone development” so that search engines can find this article using them, I will use the word “pattern”.
Creating a pattern for a cone is a simple matter. Let's consider two cases: for a full cone and for a truncated one. In the picture (click to enlarge) Sketches of such cones and their patterns are shown. (I should immediately note that we will only talk about straight cones with a round base. We will consider cones with an oval base and inclined cones in the following articles).
1. Full cone
Designations:

Pattern parameters are calculated using the formulas:
;
;
Where  .
.
2. Truncated cone
Designations:
Formulas for calculating pattern parameters:  ;
; ;
;
;
Where  .
.
Note that these formulas are also suitable for a full cone if we substitute .
 Sometimes when constructing a cone, the value of the angle at its vertex (or at the imaginary vertex, if the cone is truncated) is fundamental. The simplest example is when you need one cone to fit tightly into another. Let's denote this angle with a letter (see picture).
In this case, we can use it instead of one of three input values: , or . Why "together O", not "together e"? Because to construct a cone, three parameters are enough, and the value of the fourth is calculated through the values of the other three. Why exactly three, and not two or four, is a question beyond the scope of this article. A mysterious voice tells me that this is somehow connected with the three-dimensionality of the “cone” object. (Compare with the two initial parameters of the two-dimensional “circle segment” object, from which we calculated all its other parameters in the article.)
Below are the formulas by which the fourth parameter of the cone is determined when three are given.
4. Pattern construction methods
- Calculate the values on a calculator and construct a pattern on paper (or directly on metal) using a compass, ruler and protractor.
- Enter formulas and source data into a spreadsheet (for example, Microsoft Excel). Use the obtained result to create a pattern using a graphic editor (for example, CorelDRAW).
- use my program, which will draw on the screen and print a pattern for a cone with the given parameters. This pattern can be saved as a vector file and imported into CorelDRAW.
5. Not parallel bases
As for truncated cones, the Cones program currently creates patterns for cones that have only parallel bases.
For those who are looking for a way to construct a pattern for a truncated cone with non-parallel bases, here is a link provided by one of the site visitors:
A truncated cone with non-parallel bases.
Sheets of paper allow you to create a wide variety of objects. These can be complex crafts, like a high-quality notebook or a model of a ship, or they can be very simple. For example, some people are interested in how to make a paper cone with their own hands. Such a simple figure can be used for various purposes, including to create a Christmas tree decoration.
First, you need to understand the basics of creating cones. Then, with the help of various additional elements, it will be possible to construct original decorative elements from them, even in the form of animal faces. The most common craft made from a paper cone is a small Christmas tree.
How to make a paper cone with your own hands?
The materials used are completely determined by why the cone is being made. The simplest options from a regular sheet of paper don’t even need to be glued together - just fasten them with some kind of clamp. If you have to build a beautiful Christmas tree decoration or decorative element, then it is better to find suitable colored paper or cardboard.
To create an even cone you will need a round sheet. It can be made in different ways, for example, cut out from a regular A4 format, marking the required area with a compass. If you don’t have a compass at hand, you should use a pencil and string. The thread should be equal to the radius of the future circle. It is held taut with a finger in the center of the sheet, and a circle is drawn with a pencil.
How to make a paper cone with your own hands:
- On the finished circle you need to draw two lines to make a cross dividing the sheet into four even parts.
- Then one of the quarters is cut off.
- All that remains is to fold the desired shape and secure it with glue or clothespins.

After this, the cone is ready, but, if desired, you can make a bottom for it. To do this, place the resulting figure on a sheet of paper. A circle is drawn around it, but before cutting it out, about another centimeter is added to the shape. From this distance you need to create teeth with which the bottom will be attached to the cone. They are coated with glue and attached.

When working with thin paper, you can make a cone from a regular rectangular sheet. To do this, it is twisted, as shown in the photo below, and then the excess edge is cut off. Sometimes it can be used to create the base of a cone, or it may be enough to simply bend it inward.

Creating a Christmas tree
You can create an excellent Christmas tree decoration from a finished paper cone. A wide variety of materials are used, but the overall manufacturing system remains common.
- Tape or cling film is glued to the paper cone.
- Thick woolen threads are attached on top of them, using PVA or other suitable glue.
- After they dry well, you need to remove the cone from them. The threads must retain its shape.
- All that remains is to add elements for decoration. These can be small knitted balls, stars made of shiny paper, or any other materials that are at hand.

To create a Christmas tree, you can use a completely different technique. Papier-mâché will come to the rescue, with which you can also make a paper cone. Of course, much more material and time will be required, but the finished structure will be durable and stately.
- For work you will need newspaper or magazine trimmings. Almost any paper will do. A base is also needed. You can take any plastic cone, for example, from children's toys. It will not be damaged during the manufacturing process.
- The selected base is coated with PVA and a layer of paper is placed on it. When it dries, you can apply the next one. In this way, the process continues until sufficient thickness is gained.
- Now you need to remove the base. Sometimes you have to cut the shape to do this.
- Then, instead of the base, you can mark a rod inside, which will act as a frame.
All that remains is to glue the cut halves back together, and you can start decorating the future Christmas tree. For example, you can actually paint it or wrap it with threads, as in the photo below. This scheme will allow you to create any variants of Christmas trees, depending on your desire and the existing base.

What else can you make from a paper cone?
A paper cone blank can be used to make packaging for a sweet gift. To do this, add pieces of double-sided tape to the edges, on the inside, or simply coat them with glue.

- Sheets of corrugated paper are then placed over these areas.

- To make it fit beautifully, you need to make small folds.
- After this, the blank with paper is glued into a cone.
- Sweets or other items are placed inside the craft, and the corrugated sheet is tied with a ribbon on top, forming a bag.
- You can add other decorative elements to the finished packaging.

The paper cone can be used for other crafts as well. For example, if you make it from thick cardboard, then, using fabric, you can create such animal toys or Christmas tree decorations.


Video instructions
Small Christmas trees made from scrap materials are very suitable for New Year's decoration of an apartment. One of the main advantages of such Christmas trees is the ease of production and a wide field for imagination when decorating them. In addition, you can make many of these Christmas trees at once - different in appearance and decoration - and place them throughout the apartment, thus decorating it in an original way. The easiest way is to make a Christmas tree-cone out of paper. On specialized websites there are many ideas for decorating such Christmas trees, to which you can always add your own creativity. With all the variety of models, all Christmas trees have the same base - a cone made of paper or cardboard.
How to make a cone for a Christmas tree with your own hands?
To make such a spruce you will need cardboard, plain and colored paper, scissors and glue. And of course - more imagination. The best material for making a base cone for a Christmas tree is cardboard. Only for small, delicate and airy Christmas trees, a cone can be made from paper.
The cone can be rolled in two ways
- A sheet of cardboard is rolled up in the most basic way, like a bag for seeds. The excess edges protruding from the wide part of the cone are cut off, and the cone itself is glued together. The bottom edge is cut so that the cone stands straight and does not slant to one side.

- An even circle is drawn on cardboard (preferably with a compass, but you can circle a plate or basin, although in this case it will be difficult to find the center) and divided into four equal parts. One of these parts is cut out, after which a cone of the required tapering is twisted from the remaining figure. The edges are secured with glue. The cone is balanced, similar to the first method.
After this, you can make “needles” or “branches” in any way you choose, and then decorate with garlands of light bulbs, small toys, etc. Such Christmas trees are suitable not only for home decoration, but also for New Year's gifts.
Video
Knowing how to work with paper is important for both children and adults. This is the easiest way not only to develop fine motor skills, but also to awaken artistic taste in yourself. Among the basic required knowledge and skills are, of course, simple geometric shapes.
How to make a cone from cardboard or soft paper, and where to subsequently use it? How not to make a mistake with sizes?
Paper cone: step-by-step instructions
First of all, you need to choose good working material - it depends on the purpose for which you need such a craft. In any case, it must be able to bend and hold a given shape without being damaged. If you take regular soft paper, it should not tear, and the cardboard should not be too hard, otherwise it will be difficult to deform. To check the quality of the material, try twisting the sheet into a tube: if this does not cause you any difficulties and does not lead to rupture, you can work.
In order to make a cone out of cardboard or paper with your own hands, in addition to the main material you will need:
- ruler (length depends on the length of the product);
- pencil;
- compass;
- stationery knife or scissors;
- glue.
The principle of operation is very simple, the only thing where difficulties sometimes arise is preparing the template. Creating a cardboard pyramid takes no more than a quarter of an hour, excluding the time for drying the glue. If you are in a hurry, you can fix the shape with tape (for options when the cone is the base that is not visible) or with a stapler (for small crafts).

Since the issue of using a cardboard cone as a headdress (relevant for children's costumes) was raised, it is necessary to remember how to make the necessary calculations. Of course, if you have the required height of the product, which cannot be changed, you will simply have to set aside the length of the head circumference along an arc and cut out the resulting part. However, if you just need to prepare a sharp cone (when the angle of the template is 60 degrees), you will need to make calculations. The formula from the school curriculum is that the length of the arc of a circle with an angle of 60 degrees is equal to the product of the radius by 3.14, which is divided by 3. For an angle of 45 degrees, you need to divide the product by 4.