Converting a plastic pot. Master class in craquelure and decoupage techniques
I decided to show how you can change appearance an ordinary plastic plant pot. In this thread we will look at two techniques at once - craquelure and decoupage.
1.We have a regular plastic pot.
At first I didn’t plan to change its appearance, so I bought a glossy one, but for craquelure-style processing it is better to use pots with a rough surface.
2. Be sure to make a drainage hole.
We can use any heated metal object, but then we will have to breathe fumes from melted plastic, and this is very harmful to our health. For these purposes, I specially purchased a set containing drills of different sizes, they are easy to change and very convenient to use. When assembled, the hand drill looks like this.

The main thing is not to press too hard, so as not to burst the plastic.

3. If you do end up with a glossy pot, it must be treated with sandpaper before painting. We take sandpaper No. 120 or 125. Carefully rub the entire outer side and the inner one from the top 1.5 - 2 cm from the edge and do not forget about the saucer.
4.Now wipe off dust and degrease with alcohol.
Alcohol can be bought at any pharmacy and poured into a container with a spray bottle. I used a hand sanitizer bottle, very convenient.
5. Let's start painting.
My pots will be exposed to direct sunlight in the summer, so to prevent the roots of the plants from overheating, I used bright hues(gold and white).
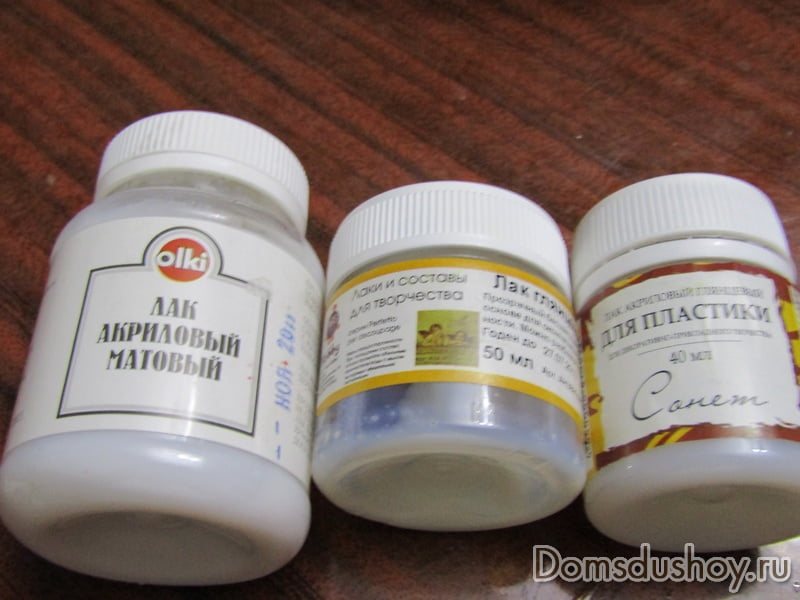
And so, in a regular construction supermarket we buy acrylic paints in gold and white colors, an antique intermediate varnish, waterproof varnish and, of course, brushes.
6. Paint the entire surface of the pot gold, don’t forget about the inner top edge.
There is no need to try to paint the pot with one layer, the paint dries quickly and after 20-30 minutes we apply the second layer. Despite the fact that my pot is dark in color, I was able to paint it in two layers, but if this is not enough, I will have to apply another layer.

7.After complete drying, we take on the antique varnish. Apply the varnish in one layer and only in one direction, in in this case apply vertical strokes.
After 15-20 minutes. gently try it to the touch with your finger. The varnish should not dry completely, otherwise there will be very few cracks, the varnish should cling a little.
Now let's take white paint and apply strokes with a brush perpendicular to the varnish, in this case horizontally. Don't forget to take into account that white paint is applied in one layer.
Over the course of half an hour we can observe how cracks appear.

We can also apply white paint not with a brush, but with a disposable bag. We take a plastic bag, crumple it, dip it in paint and apply it to the pot with patting movements. Then the cracks have a slightly different pattern.

Decorating the pots using the craquelure technique didn’t seem enough to me, so I also used the decoupage technique.
8.Now take any napkins and cut out the element you like best. Usually a napkin consists of three layers, but we only need the color layer on the top, so we layer the napkin. Glue the pattern to the surface with PVA glue or any other and carefully smooth it out.
To protect our pots from exposure to water and moisture, we must apply a waterproof varnish and it will be better if we apply it in two layers.
And now our pot is ready.
Here everything depends on your imagination.
Decoupage of a flower pot is a great way to give an old product as a gift. new life. Moreover, beautiful and unusual designer flowerpots cost a lot of money, and many housewives probably want to have them in their home. Thanks to the following master classes on decoupage of pots for indoor flowers, you can decorate them yourself.
DIY flower pot decoupage: materials and equipment
To decoupage a pot for indoor flowers with your own hands, you will need the following materials and equipment:
- plastic flower pot;
- decoupage napkin or card with a suitable design;
- acrylic paint white;
- artistic acrylic paint in green, beige and brown shades or dyes;
- craquelure varnish;
- decoupage glue or PVA;
- acrylic lacquer;
- wide and thin brushes;
- sandpaper;
- sponge;
- scissors.
Decoupage of a plastic flower pot: step-by-step master class
Having prepared everything necessary materials, start working on decoupage of a plastic flower pot with your own hands:
- Take a flower pot made of plastic and sand its surface to make it rough. This treatment will significantly improve the connection of the material to the plastic surface.
- Then cover the surface of the products treated with sandpaper with a layer of craquelure varnish.
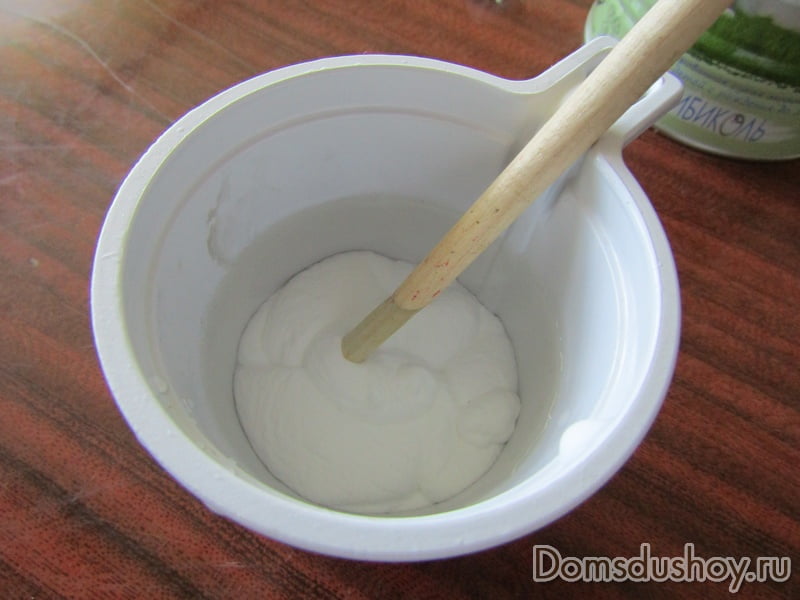
- While the varnish layer dries, prepare the paint for the next stage of decoupage. Pour the white paint into a plastic glass to create a layer of about 1 cm. Add a drop of green and beige dye there. You should end up with a nice light greenish-yellowish paint color. This amount of paint is enough for a medium sized pot. If the product is large enough, you can mix the paints again.
- The varnish has not yet completely dried, but you should carefully apply paint to it so that its layer does not move. When the craquelure varnish dries, a pattern in the form of cracks will appear on the product, reminiscent of birch bark. Leave the product for half an hour to an hour so that the paint dries completely. The same principle should be used to cover the pallet.
- Cut out drawings from napkins, in our case these are bunnies.
- Add beige dye to the paint to create a nice light beige color. Apply a layer of this paint to the flower pot, it will serve as a background for the bunnies.
- Use a new dish sponge to blot the paint, creating a spray effect.
- Now take the cut out elements from the napkins and separate upper layer with an image. Glue the napkin to the product using a brush. At this stage, it is important to ensure that the napkin does not crumple, but remains smooth.
- Next, add green dye to the white paint, take a brush and draw grass on a white background near the hare. Using a sponge or thick brush, you can also paint on the foliage. Apply the design to both the pot and the tray.
- Take brown paint or add dye to white Brown, and with a thin brush paint the trees at the top of the pot. Paint the edges of the pot and tray with the same color. Leave the product to dry completely, preferably for a day.
- Cover the top layer of paint with acrylic varnish so that the product does not lose its attractive appearance for a long time.


With the help of this step-by-step master class By decoupaging a plastic flower pot, you can turn an inconspicuous product into a stylish designer item.
Flower pots made of clay look more solid and noble than products made of plastic. However, they lose their attractive appearance much faster and require replacement.
Decoupage of a clay flower pot will help extend the life of the product and turn it into an interesting interior element. Both experienced and just beginning craftswomen can do this work with their own hands; you just need to use the tips presented below.
For work, prepare the following tools and materials:
- clay pot;
- PVA glue;
- acrylic primer;
- acrylic paints of different colors;
- sandpaper;
- thin and wide brushes with soft bristles for applying paint;
- a hard flat brush for gluing elements;
- foam sponge;
- stationery scissors;
- file;
- napkins, decoupage cards, beautiful pieces of fabric or wallpaper with an interesting pattern;
- decorative elements - rhinestones, beads, ribbons, braid.
Follow this master class on how to decoupage flower pots with your own hands for beginner craftswomen:
- Wash the clay pot in warm water and detergent. Do not wipe it, but dry it in the open air.
- When the surface is dry, sand it with fine-grit sandpaper. It is advisable to perform such work outdoors wearing a medical mask. After this treatment, wash the pot and tray again in hot water using detergent and dry it in the open air in the same way.
- Prime the container for growing flowers and the tray using a sponge and acrylic primer.
- Allow the primer to dry completely and then apply a coat of white, beige, milk or any other paint that matches your interior.
- Cut out suitable elements from napkins and separate the top layer along with the design.
- Place the file on the bottom of the plate, place the cut out element on top of it, pattern down, and pour in some warm water.
- Apply a little PVA glue to the surface of the paint in the places where the drawings will be located. Remove excess moisture from the picture with a cloth and lift up the ornament along with the file. Press the element with your hands and carefully remove the file without damaging the ornament.
- Using a dry brush and a clean cloth, smooth out the image and remove any air bubbles that have accumulated underneath. Apply an additional layer of glue on top again.
- Decorate the borders of the picture with paint of the same color that was used to paint the pot.
- Apply several layers of acrylic varnish to the surface of the product.
You can decorate a container for growing flowers this way for your home or as a gift to loved ones and friends.
Decoupage is very interesting and exciting activity, it’s not at all difficult to learn. Before you start decorating furniture or appliances, we advise you to practice on things that you don’t mind spoiling. One of the starting points into the world of napkin decor can be flower pots. Plastic options do not have a large area and are relatively inexpensive, therefore, such plant houses are an excellent option for beginners. Carefully planted in a pot decorated with your own hands, the plant will be an excellent gift for family and friends.
Indoor plants decorate almost every apartment; they complement the interior and saturate the air with oxygen. It happens that the design of the room has changed, but the flower pots remain old and no longer fit into the interior. It is undesirable to replant plants often, and you don’t want to spend money on buying new flower containers, so decorating using the decoupage technique, which is the art of gluing drawings and ornaments on objects, comes to the rescue.

What tools are needed to decoupage pots:
- Ceramic or plastic flower pot;
- Decoupage glue or PVA;
- Acrylic primer or white acrylic paint;
- Acrylic paints of different colors;
- Fine-grained sandpaper;
- Thin and wide soft brushes for applying paint and finishing elements;
- A hard flat brush for gluing decorative elements;
- Sponge for washing dishes;
- Stationery scissors;
- File;
- Napkins, decoupage cards and pretty pieces of fabric;
- Additional decor in the form of beads, rhinestones, twine and ribbons.
At the moment, multi-layer napkins are most often used to decorate products using the decoupage technique; they are not expensive and have a very diverse and interesting design. They can be purchased both in a specialized store and in the department food products for kitchen. Decoupage cards are also available for sale; they have one layer and are often printed on the thinnest rice paper, so you do not need to perform any additional actions with them.
Clay pots: decoupage
Clay pots are more expensive and look more noble than their plastic counterparts, but over time the paint on them can peel off, which does not have the most favorable effect on their appearance. If you don’t want to throw away this “house” for flowers, you can always repaint it and decorate it with napkin pictures.

Master class on decorating clay pots with decoupage:
- Wash the pot in a solution of hot water and detergent. Leave it to dry outdoors.
- After drying, the workpiece should be thoroughly cleaned with sandpaper. It’s better to do this dirty work outdoors, protecting your respiratory tract with a medical mask.
- Wash the pot and saucer again under running water using the product and leave it until completely dry.
- Prime the surface of the pot and saucer using a dish sponge and acrylic primer.
- After the primer has dried, apply a layer of milk-colored paint or any other shade that matches the interior.
- Cut out the pattern with which you are going to decorate the pot from the napkin. Separate the top layer with the pattern.
- Place a file on the bottom of a deep plate, place a napkin on it with the front side of the ornament facing down and pour in a little warm water.
- Grease the pot a small amount glue in the place where the pattern will be located, and, having blotted the excess liquid from the picture, press the file to the pot. Remove the file so that the ornament is glued to the pot.
- Using a brush or dry cloth, smooth the picture, removing any air bubbles that have accumulated underneath it, and apply an additional layer of glue.
- Decorate the borders of the picture with paint of the same color as the pot.
- Apply several layers of acrylic varnish to the surface of the pot.
You can easily give new life to a peeling pot using the napkin technique. If all points are followed, such a clay product will serve you for many years.
Decoupage pots made of plastic
If you bought a plastic pot and came to the conclusion that it does not have a very attractive appearance, then decorating using the decoupage technique will save you.
Such small pots are not very expensive, which means you can practice on them before decorating larger and more valuable items.
With proper decoration, you can make a clay container for flowers, similar to a clay pot.
Decorating a plastic flower pot:
- Sand the surface of the pot and tray with coarse sandpaper. This is necessary for better adhesion of the paint to the plastic.
- Cover the pot with white primer in two layers and leave until completely dry.
- We apply a layer of paint on top, which will peek out from the cracks formed due to the craquelure varnish.
- Now you can apply a layer of paint of a different color.
- We cover the not completely dry paint with craquelure varnish.
- We dry the pot with a hairdryer and watch how the paint cracks.
- Separate the top layer with the desired pattern from the napkin.
- Soak the napkin in a deep plate, first placing it face down on the file. We transfer the motif to the product and cover it with a layer of glue, straightening it with a hard brush.
- We cover the pot with several layers of decoupage varnish.
By carefully completing all the steps described, you will receive a beautiful flower pot with an antique effect.
Interesting options for decoupage flower pots
Pots decorated using decoupage can be used for absolutely any interior. There are a huge number of options for decorating these products.
Using the glaze effect in decoupage of a clay pot, you can get interesting product with a gentle color transition.

Even a child can decorate a pot using the napkin technique, and the resulting product will delight your eye for many years.
Some interesting options decoupage flower pots:
- Using craquelure and yacht varnish will help give the product a retro look. If you apply these compounds to brown paint, then plastic pot“magically” will turn into clay.
- For a Provence style interior, several small pots painted in one pastel shade and decorated with delicate floral motifs are suitable.
room in African style complement flower pots with animal print
Decoupage of a flower pot (video)
List possible options You can endlessly decorate flower pots, it all depends on your preferences and imagination. Get creative and enjoy the results!
I’ll tell you one little secret: that evening when I was studying, I was so carried away by this task that I also wanted to urgently decorate something. The choice fell on
For work I used:
- an old table that you don’t mind dripping with glue or paint
- flower pots, plastic and ceramic, new and empty, as well as with already planted indoor flowers.
- three-layer napkins with floral pattern
- PVA glue
- plastic cup for diluting glue
- scissors
- brush
- acrylic varnish (glossy)
- a soft microfiber cloth (for timely removal of dirt)
So, I decided to start with a ceramic pot with a flower already planted in it. It is covered with green paint, monochromatic.

I chose a napkin that, in my opinion, could go well with it. I tore out a fragment, not forgetting to first remove the two bottom layers of the napkin.

I tried this piece of napkin on the pot.

It became clear that four of these roses needed to be glued.

I diluted PVA glue one to one with water in a plastic glass. Let it sit for a few minutes for the glue to mix with the water.
And finally, I started gluing the napkin onto the ceramic surface of the pot. I carefully dipped the brush into PVA glue and sequentially glued the fragment to the pot.

I thought it would be very inconvenient to have a flower growing in a pot. But it’s okay, I did it. I bent the pot slightly and glued four roses on all sides.

Here is the finished pot. The napkin lay well on it and the wrinkles are almost invisible.

I set the ceramic pot down to dry and picked up the plastic one. It's new, white. I decided to stick the same roses as on the previous pot.

She did everything slowly and with pleasure. I also glued several fragments on all sides of the pot.

At the bottom I folded the edge and also sealed it with glue.

Here it is and the second pot is ready, still with wet glue. Of course there are wrinkles. But when drying the pots, it is important not to touch or tear off the soft and wet napkin layer. It is almost impossible to straighten it later.

The next one was this same plastic pot.

For him, I decided to use a thick napkin with a bright checkered pattern. By the way, for decoupage, choose thick and durable napkins. Soft ones are much more difficult to stick because they quickly get wet and tear even under a soft brush.

Here is the result of my labors.

And this is the next contender for transformation.

I choose roses that are already familiar to you.

Ten minutes later and he's ready. The evening was a success!

My pots change their appearance very quickly. And, it seems to me, for the better.

Then several more pots were made. Agree, with this small rose tablecloth the pots look quite bright.

That's closer. And don’t scold yourself for small wrinkles on finished pots. They probably also have experienced craftsmen, but they don’t like to admit it.

I think that after practicing on pots, it will be possible to decorate something else at home using this technique (decoupage).

This photo is with those that I told you about at the beginning of the article.

You can take a closer look at the pots.

But that is not all. It seemed to me that this was not enough! The next morning I continued to decoupage the pots. Now I took a brown plastic pot with a plant already planted in it.

On a brown background, these roses look like a transfer picture. But also as an option.

This rose will decorate the next pot. 
And here he is. A tangerine is planted in it. It grew from a bone thrown into the ground. 
Then I decided to combine a checkered stripe from one napkin and a floral pattern from another. I had to prepare quite a few of these fragments to decorate the next pot.

It took me much longer to decoupage it than all the previous ones. And all because it is quite voluminous and I had to stick on small pieces of napkins and at the same time try to choose the right pattern.

Here they are, my tangerine “trees” in updated pots.

I covered all the flower pots with acrylic varnish, but only when the PVA glue had already completely dried.
The decoupage technique has many advantages. Here are some of them:
- easy to select materials for work
- a wide variety of materials to suit every taste
- Decoupage is done quickly
- objects are completely transformed after decoupage
- does not require special skills or experience

And my pots have transformed beyond recognition and seem very elegant to me.

This kind of work does not tire you, but on the contrary, it gives you a rest for your head and at the same time, the result is that the house becomes more comfortable.

Now each pot has acquired its own individuality, instead of white, brown or gray.

If you have never done decoupage before, give it a try. It's a fun activity. After all, judge for yourself: the result may be a completely exclusive thing, just the way you came up with it. Nowadays there are a lot of materials for decoupage on sale and therefore there is a lot of opportunity to dream up and bring it to life. Everyone Have a good mood and inspiration!


2016, . All rights reserved.
Regular brown or white pots look a little boring. Why not decorate them? There are many ways to decorate flower pots. But the most famous and easiest is decoupage. The Land of Soviets will tell you how to do Decoupage flower pots.
The technique is very simple. Those who have already tried to decorate bottles or frames with napkins more than once can easily quickly decoupage a flower pot. For decoupage, you can use either a clay or ceramic pot, or a regular plastic pot. The technique of decorating pots is practically no different, but each has its own characteristics.
Decoupage of a plastic pot
Decoupage of plastic flower pots is very easy to do. To do this you will need the following materials:
- multi-layer napkins with patterns
- acrylic paints
- clear acrylic varnish
- wide tassel
- scissors
You can decorate your pot the way you want. We are we will describe the basic working methods. It is advisable to repaint the pot in a different color. The usual brownish color of plastic pots will not look very presentable or bright. So paint the flower pot with any acrylic paint you like. In this case, you can paint the rim a different color. Once the acrylic paint is completely dry, it's time to decoupage.
From the top layer of napkins that you use to decoupage flower pots, separate the bottom layers. You only need the top layer. Carefully cut out the patterns you need from the napkins.
Press part of the napkin to the walls of the pot and gently brush over it with a brush dipped in varnish. So glue all the parts of the napkin to your pot. When all the elements are dry, the pot should be varnished again so that the picture is not afraid of water.
By the way, if you want, then you you can decorate the pot with various beads or rhinestones, which can be glued using universal glue.
Decoupage clay pot
If you don't like plastic pots, you can decoupage flower pots from clay. You will need these materials:
- napkins
- acrylic paints
- scissors
- tassel
- PVA glue
- construction varnish
As usual, cut out the design you want from a napkin. If you want to, you can immediately glue it to the pot. You can also change the background of the pot by painting it acrylic paints. When the paint is completely dry, start gluing the napkin. To do this, apply a thin layer of glue to a napkin. If you have a large design, then under no circumstances cover the entire napkin with glue at once, otherwise it will get wet and tear. Apply glue to small areas. Now place the napkin over the pot. Let the glue dry completely. The final touch is to apply a top coat of varnish, which will protect the paint and napkin from abrasion.
Now the decoupage of the pots is ready. Now you can plant your flowers in them. But that's just in a ceramic pot better flower don't plant. When watering, water will be absorbed into the ceramic, which will damage the design. Therefore, it is better to use such a pot as a decorative one. Let the flower be in an ordinary plastic pot, which will stand in a ceramic one.


