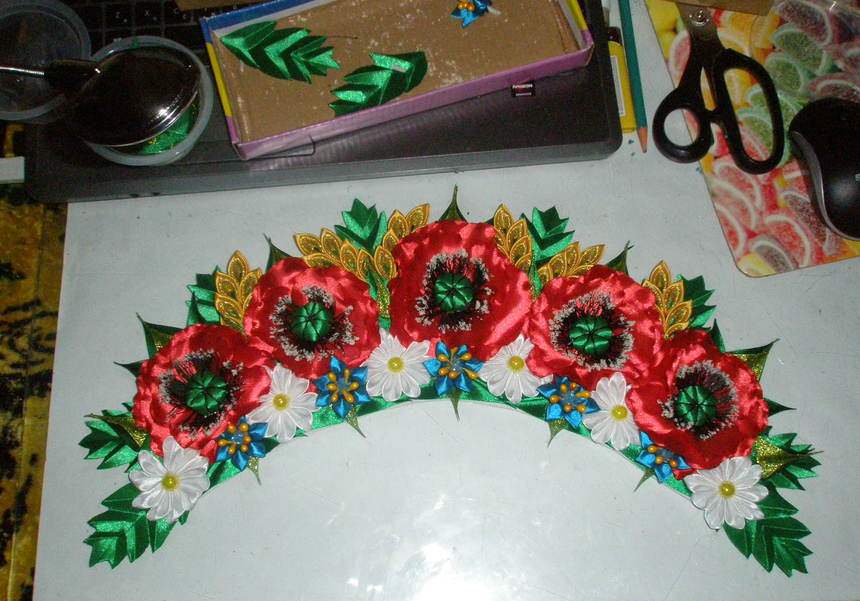
Often used to create jewelry, hair accessories and various decorative items. This craft can be made in different ways.
Kanzashi “Chamomile”: master class on creating a flower
The easiest way is to collect an inflorescence from individual petals obtained by singeing pieces of tape over a candle or lighter. To work you need to prepare:
- lighter or candle;
- glue gun;
- tape white 12 mm wide;
- scissors;
- tweezers;
- a white felt blank for fastening the chamomile;
- yellow satin cord.
Let's start making the inflorescence.
- Cut the white ribbon into rectangles 3.5 cm long. To make one flower, you will need 26 petals.
- We round each segment on one side using scissors. You can not cut off the corners, but burn the tip of the workpiece more strongly with a lighter from the wrong side, then it will simply bend outward. It is important to use the middle or lower part of the flame, otherwise the edges will char and the tape will have to be cut again.
- On the other side Both edges of the petals need to be bent to the center and secured over the fire.
- Take a felt piece with a diameter of 2.5 cm and begin gluing the petals. There will be two levels in total, each with 13 leaves. The second row is glued in a checkerboard pattern.
- In the center you need to place a yellow cord rolled into a circle. If desired, you can tie a beautiful knot from it.
- Sometimes leaves, which are made from pieces of light green satin, are added to the finished chamomile from kanzashi ribbons. They can be made using a knife heated over a flame or in any other way.

Chamomile made from ribbon 5 cm wide
For the second option of creating a daisy from satin ribbons, you will need material 5 cm wide, white and Green colour. The product consists of 14 square blanks for petals and 3 for leaves. If you plan to make a flower without foliage, there will be 17 petals. To make a petal, fold one piece of white tape diagonally, turn the edges towards the center, and bend it in half. Grabbing the corner with tweezers, cut off a few millimeters on one side and singe the workpiece over a candle or lighter. Then we turn the petal over and cut off the edge again. You should get a round petal. From such blanks you can make kanzashi daisies with your own hands not only from satin ribbons, but also from other materials. On the lower tier, some needlewomen place a row of green leaves made using the same technique.
How to make the center of a flower
To make foliage for a chamomile from satin ribbons, fold a piece of green material diagonally twice, grab the edge with tweezers and cut off the tip. We fix it over the flame. To create the central part of the daisy, you can use a large rhinestone, yellow button or bead. Another option is to cut a circle the right size from cardboard and cover it with yellow fabric or satin ribbon. A compass or button will help you get an even circle, which you can simply trace with a pencil. Then all that remains is to assemble the flower by gluing the center to a felt blank with petals. Ready-made chamomile can be used to create beautiful hair ties, headbands and barrettes. The product is well complemented by plastic ladybugs.

Kanzashi daisies from ribbon 1 cm wide
A simple and neat flower is made from a measuring tape, cut into 4 cm pieces. One inflorescence consists of 33 petals. The chamomile turns out to be three-layered, with 11 parts in each row. To assemble, you need to prepare a glue gun, a white felt base and a decorative cord. Separately, leaves are made from light green or green ribbon. We process the pieces of white tape on both sides in the same way as in the first case. The difference in the technique of making petals in this version is that they are not bent outward, but towards the center. The decorative cord for the middle should be folded into a spiral or tied in a decorative knot. We decorate the center of the kanzashi chamomile with artificial yellow stamens or tint it with paint.

Chamomile from a ribbon 0.5 cm wide
An elegant and neat flower can be made from a 0.5 cm ribbon. The petals for it are made a little differently than in previous versions. The tape is cut into pieces 8 cm long, each of which is folded in half. The free ends are fixed above the candle flame. You need to make 24 petals for one chamomile. First, 8 petals are glued to the felt blank, then 8 more in a checkerboard pattern. The second row needs to be shifted slightly closer to the central part of the inflorescence. The last layer is glued not on top, but under the first two, to give the chamomile volume. As the center of the flower, you can use microbeads, decorative cord or small yellow beads strung on a thread or fishing line.
Options for making leaves
There are several popular ways to make kanzashi leaves for various flowers, including daisies. The simplest of them is using a heated knife. To do this, cut a green ribbon 5 cm wide into equal squares. The workpiece is cut diagonally, the edges of the resulting triangles are scorched with a candle, and then a knife with a blunt blade is heated over the flame of a candle and passed over the material several times, creating veins. Using the same method, you can create rounded leaves if the ribbon folded in half is rounded on one side. The cut areas must be scorched, otherwise the material will begin to crumble. Simultaneously with scorching, you can give shape to future leaves by stretching them out and making the edges wavy.

It is easier to cut the tape using a soldering iron, then you get two even pieces at once, the edges of which do not need to be processed. A template of the required size will speed up the process. You should work with a soldering iron on a metal surface to avoid damaging the table. If you use pieces of tape 5 cm wide and 10 cm long folded in half, you can cut several small simple kanzashi leaves from them. It is enough to apply a metal ruler diagonally, stepping back a little from the edge of the workpiece, and quickly draw the tip of the tool along the tape. Then, moving the ruler, cut off part of the tape again. In this way, you can get 3-4 finished leaves from one piece.
I recently came across a video - a daisy pattern made from a narrow ribbon, authored by Natali Doma. The method of execution is simple, and the result is very nice. This chamomile can be used not only as a hair decoration, but also to decorate clothes, a summer handbag or hat, or even interior items. The only thing I changed was the middle. The author suggested embroidering it with the same narrow ribbon, only yellow color, French knots, but my needle with a large eye broke, and it turned out to be problematic to buy a new one. Therefore, I decided to get out of the situation with the help of beads. I don't think this affected the final result.
Material:
1. Tape 0.6cm wide
4. Felt circle
5. If desired additional elements decor - ladybug, green leaves.
Progress:
1. Cut the ribbon into pieces of 7.5 - 8 cm. If you take petals of exactly this size and a felt base d = 4 cm, then the flower will be 9 cm in diameter. (But you can take ribbons of a smaller size, then the felt circle will also be smaller diameter) In total I used 38 petals.

2. We form petals from ribbons. To do this, bend it in half and swap the ends of the segment. So the lower end goes up, and the upper end goes down. We combine these ends and solder them over the candle.

3. Glue the petals in a circle onto the felt circle. I have a circle with a diameter of 4 cm. But in order to evenly distribute the petals, I took the author’s advice and drew another circle d = 2.4 cm inside the circle (I used a special quilling ruler for this). The author of the video recommends simply drawing the inner circle at a distance of approximately 8 mm from the outer one. In total, I got 13 petals in a circle. The second row also has 13 petals, which must be placed between the petals of the first row. And in the 3rd row I placed 12 petals. If you want to get a more magnificent flower, you can add a few more rows of petals (this is according to your taste and desire).

4. Drop glue into the middle and sprinkle it generously with yellow beads. We press it lightly, and then shake off the excess beads that have not stuck. While the glue has not yet cooled, you can carefully straighten the beaded center with your fingers, giving it an even shape.
5. If desired, add decorative elements - ladybug, leaves.

We attach the finished chamomile wherever needed - on a brooch, headband, hairpin, hat, handbag, or wherever you want.
I wish you success!
Spiridonova Elena.

Kanzashi is an original needlework technique that came to us from the East. Namely from Japan. This technique is based on origami, only in this type of needlework it is not paper that is folded, but silk ribbons and squares. The result is very beautiful flowers, which are traditionally used to decorate hair. It is not surprising that these ancient Japanese art is capturing more and more fans around the world.
The history of kanzashi
This type of needlework arose thanks to Japanese geishas, who complemented their kimonos with original makeup and flowers using the kanzashi technique. Chamomiles, roses, asters, chrysanthemums - this is not a complete list of types of flowers that craftswomen of that time made from silk. In Japan at that time, necklaces and bracelets were prohibited for women, so they decorated themselves using the kanzashi technique. They turned out bright and unusually beautiful.
A silk daisy or aster, woven into an intricate hairstyle, immediately attracted attention and made the girl stand out from the crowd. At first, daisies made from kanzashi ribbons were simply a fashionable attribute in Japanese society. Over time, such decorations began to reflect social status, belonging to a class of society, having children and a husband. Translated from Japanese, “kanzashi” means hairpin. This refers to a wooden, bone or metal pin on which a silk flower is attached.
Even today, when girls and women wear kanzashi, they always decorate their hair. Schoolchildren also wear silk origami jewelry, and Japanese brides decorate their hair with them at weddings.
Choosing colors for kanzashi depending on the time of year
In Japan, each month of the year has its own hair decorations. Each month is associated with certain flowers and plants, which are usually reflected in the hairstyle.
- January is the month of bamboo, plum flowers and pine.
- February is the time of butterflies, daffodils and tulips.
- March - peonies, butterflies and peach flowers.
- April is the month of cherry blossoms.
- May - plants of blue color usually wisteria and irises.
- June - carnation, hydrangea and weeping willow.
- July - a variety of flowers and plants, decorated with raindrops and dragonflies.
- August is the time of white and pink flowers.
- September - chrysanthemums, clovers, dark pink bells and carnations.
- October is the time of red and white chrysanthemums.
- November is the month of falling leaves, and maple leaves are especially popular.
- December - white motibana flowers, pine needles, bamboo.
General principles for creating kanzashi
You can put square blanks into flower petals, or rectangular ones. The result is products various shapes: sharp, oblong or round. By combining different colors, the number and shape of petals, you can get a huge number of different types of flowers. Classic jewelry is created from silk and attached with rice glue. Modern needlewomen prefer more affordable materials - satin ribbons and a glue gun. To prevent the satin ribbon from fraying while making flowers, its edges are scorched with a candle or lighter.
Tools for practicing kanzashi
To make products from you will need:
- Satin ribbons of different colors and widths.
- Sharp scissors.
- Candle or lighter.
- Thread and needle.
- Fabric glue.
- Tweezers.
- Ready-made hoops or elastic bands on which you will attach finished products.

This type of needlework does not require special material costs, the main thing you need for the work is perseverance, accuracy and the desire to do beautiful thing with your own hands.
Kanzashi technique. Chamomile: master class for beginners
Chamomile is a flower that has symbolized fidelity, love, tenderness, and simplicity since ancient times. According to Japanese rules, jewelry with such flowers is best worn in the summer, when they bloom. In this master class we will look at how to make daisies from kanzashi ribbons. So, let's consider all the stages in order.
What does the kanzashi technique require of us? Daisies will turn out unusually beautiful if you have the following materials:
- White ribbon made of satin or silk, 40 mm wide.
- Green ribbon made of satin or silk, 13 mm wide.
- Yellow rhinestones for the centers.
- Crocodile clip or elastic band.
- Lighter.
- Tweezers.
- Scissors.
- Ruler.
- Glue gun.
- White threads and needle.

Operating procedure:
- To make a daisy from kanzashi ribbons, cut the white satin into squares.
- The use of fire involves the kanzashi technique. The daisies should not “bloom”, so the side edges of the squares need to be burned with a lighter. Our flower will have 11 petals, so we will need 11 squares.
- We continue to create a masterpiece using the kanzashi technique. Daisies, as already mentioned, consist of squares, each of which must be folded diagonally.
- Fold the corners of the resulting triangle towards the center.
- We bend the diamond in half vertically with the corners inward so that we again have a triangle.
- Use tweezers to take the workpiece parallel long side triangle. We cut off a right angle from it and burn it with a lighter.
- We straighten the workpiece and get a petal.
- In the same way we make the remaining elements of our flower.
- Now we take a needle and thread and collect the petals into a chamomile.
- Cut a circle with a diameter of 25 mm from a white ribbon. Burn its edges with a lighter. In order for our circle to turn out smooth and beautiful, you can first make a blank out of cardboard and then trace it on a ribbon. You can also use a large button as a template.
- We take a needle and thread and make stitches along the edge of the circle, pulling it into a ball. This will be the base for the petals.
- Let's start making green leaves. Take the appropriate ribbon and cut pieces of 50 mm each. For one chamomile, two pieces will be enough.
- Cut out the leaf. To do this, simply cut off a corner on one side or trace a template of a cardboard leaf.
- We burn the edges of the parts so that they do not fray.
- We collect a flower. Glue the petals to the substrate with a glue gun.
- Glue green leaves to the back of the backing.
- We attach the back side of the flower to a hair elastic or hair clip. To make the fastening more reliable, glue a thin ribbon over the elastic to the backing.
- All that remains is to attach the core of the flower - a yellow rhinestone.

The picture above shows the process of creating a daisy flower step by step. Enough exciting activity- Kanzashi technique. Chamomile, the master class of which is quite simple, turned out to be tender and lush. We hope you enjoyed our lesson.
To make this simple flower, you will need to prepare the following materials:
- scissors;
- candle, matches or lighter;
- glue;
- pencil;
- ruler;
- threads;
- needle;
- button;
- narrow ribbon of bright color.
First you need to cut the tape into 8 equal strips. The size of these parts must be determined independently. It should be taken into account that the length of one petal will be equal to one-fourth of the length of the strip. After this, the sections of the resulting tapes must be processed using fire. It is best to use a candle flame.
Use a pencil to mark the middle of the workpiece. An adhesive substance is applied there. Both edges of the strip are glued to the center. They need to be pressed well. Similar actions are carried out with the remaining ribbons. Then you need to form a daisy from the double petals, which is then glued or stitched in the center. At the last stage, the flower is decorated with a button. Chamomile is ready.
Chamomile made of white ribbon and yellow beads
First you need to prepare all the materials:
Satin ribbon of two colors, narrow and wide;
- scissors;
- glue;
- a sheet of cardboard;
- pencil;
- soldering iron;
- button with a foot;
- beads
A satin ribbon 0.5 cm wide and at least 10 cm long is cut into small strips. These pieces are folded in half and soldered together using a lighter. The result is a number of double petals. A circle is drawn on a sheet of cardboard and cut out. Its diameter should be at least 4 cm. To simplify the task, you can take any medicine bottle, attach it to the cardboard and circle it.
Next you need to start making leaves. To do this, pieces are cut from a wider tape. They can be different lengths. After this, the tapes are folded with the front side inward. A small cut is made on each. To do this, apply a ruler to one of the corners and the middle of the opposite side. You can cut it using a soldering iron, if you have one.
The leaves are then turned inside out and glued to a cardboard blank. Then the formation of chamomile occurs. First, the first row of petals is glued, then the second between the petals of the first row. Next, take a button, smear it with glue and roll it in beads until you get a full-fledged core for a daisy. After complete drying, the center is glued with hot glue into the daisy. The flower is ready.
Kanzashi daisy made of satin ribbons (photo and video)Kanzashi daisy made of satin ribbons (photo and video)
In this lesson, we will analyze an interesting kanzashi technique that came to us from the land of the rising sun - Japan. Based on this technique, you can make wonderful flowers from satin ribbons with your own hands. Their creation is a painstaking but fascinating process. A distinctive feature of making such flowers is that you do not need threads and needles to work. Today's master class (MK) will be devoted to creating a delicate chamomile. Step by step process equipped detailed photos for beginners, as well as a video clip demonstrating all the technology of work. 


Master class on creating chamomile
To make chamomile from satin ribbons, first of all, you need to prepare the base material in delicate shades. Your kanzashi daisy does not have to be white. You can experiment and make, for example, a sky blue flower.
So, let's start the master class. First, you need to cut the satin ribbon into squares. The width of the tape is five centimeters. To create one kanzashi daisy, prepare fourteen squares of white and three of green. You can make a flower without foliage. In this case, you will need to increase the number of white blanks to seventeen. 
Many needlewomen who create kanzashi come up with various devices to make their work easier. This MK uses metal plates, as in the photo, the width of which is 5, 4 and 2.5 centimeters, respectively. Thanks to such details, you will be able to properly prepare neat details from ribbons. 
To create daisy petals, you need to fold the ribbon diagonally, then fold the corners closer to the middle, as in the photo: 

Next, bend this part in half. After this, we need to grab the petal using tweezers. The photo shows how to do it correctly: 

Having completed this action, cut off the part indicated in the photo. This operation can be performed using a burner. If you do not have such a tool, use ordinary sharp scissors, a lighter or a candle. 
The next step is to turn the petal over and cut off the end. As a result of the work done, you should receive the following element: 


To make it easier to understand the process of creating petals, the video lessons presented in our article will help you.
At the next stage, the master class, we begin to create green foliage for the daisy from satin ribbons. For this we take a green ribbon. This material must be folded diagonally a couple of times. We grab the folded element with tweezers and cut off part of the part. Thus, you should get the next chamomile petal. Having made such a blank, we put aside the received parts for a while and move on to creating the core of the flower. 


To make such an element, you can use a rhinestone or a yellow button. Or another material suitable for the middle. This master class (MK) uses a circle covered with a yellow satin ribbon for these purposes.
To make the center of the chamomile, use thick cardboard or another suitable base. Take buttons of different diameters, place them on cardboard and circle them. Cut out the resulting circles. Circles small size will be the centers of the daisies, and a little larger ones will be the base. For two daisies we make two blanks each.
We take a thread and a needle and begin to gradually tighten the circles. 


Next, the master class begins the stage of assembling the chamomile. In the video you can see the details of this process. At this stage you will need a glue gun. We begin the assembly by gluing together the green leaves. We connect two of them, after which we fix the third one with a small protrusion among them. Next, you need to glue the petals of a chamomile flower from satin ribbons. All that remains is to put the flower together. 


The resulting void is filled with glue down the center. This in turn will also help to securely fasten all the parts together. We wait for the glue to dry slightly and attach the prepared core. This could be an ordinary button or, as in this MK, a specially made part. Next, you need to turn the chamomile over and cover the base with another prepared larger element. 


As a result, we get a couple of delicate daisies from ribbons. These flowers can be used as accessories. Attach elastic bands to it and you will get a wonderful hair decoration. Also, as an additional decoration, daisies can be decorated with ladybugs.
Leaf options for chamomile
Let's look at a few more options for creating chamomile leaves. The first one is the simplest and fastest. You just need to cut out the leaves from the green satin ribbon and scorch them, while slightly stretching them. Next, such blanks must be glued to back side flower. 

The next method is more labor-intensive, but as a result, you will get original two-color castings for your chamomile.
The presented leaves will have a sharp shape and consist of ribbons of two colors. To work, prepare two elements in the shape of five by five centimeter squares. One piece of each shade.
Making a simple sharp petal. Take the squares and fold them in half. Further, the formed triangle is more light color must be nested among the boundaries of the dark. We do this in such a way that the borders of the light green workpiece are slightly visible by two to three millimeters. 


The resulting element must be folded in half again and unnecessary parts cut off by soldering the rear edges. As a result of the operation performed, we get the following petal acute form. The edge can be formed on both the right and left sides. 

We make three similar leaves, as in the photo for two daisies. All that remains is to connect them with each other. We do this using glue gun or glue Moment “Crystal”.
The gluing process takes place in several stages:
Like these ones beautiful leaves you may succeed. 
Choose the method you like to create beautiful kanzashi daisies with interesting details.
To help beginning needlewomen, we have prepared video tutorials on making kanzashi daisies from experienced craftswomen.
Video: Making kanzashi daisies
Comments
Related posts:
 Headbands with flowers made from ribbons using the kanzashi technique (photo)


