ORIGINAL SLIPPERS WITH SPOKES. DESCRIPTION Cast on 51 stitches with dark thread, knit 8 rows in garter stitch. Then divide all the loops into three parts: 17+17+17, and knit only the middle part in stockinette stitch. We temporarily remove the side loops using large pins. Having knitted 10-12 cm, we will get a rectangle. We don't close the loops. On the sides of the rectangle we cast on additional loops (approximately 23-25) with thread light color . We knit the “teeth” on three sides of the rectangle: knit 4 rows in stockinette stitch, 5th row - remove the edge loop, *2 knit stitches together, yarn over* - to the end of the row. We also knit 3 rows in stockinette stitch. We fold the knitting along the row where we have yarn overs and connect the initial row with the last knitting path: knit 1 loop from the first row and one loop from the last row together. Then we put the loops from the pins into work and knit in garter stitch the height of the slipper is 3-4 cm with a dark thread. We move on to knitting the sole. To do this, mark the middle 12 loops and knit them in short rows until we have closed all the side loops. To knit the heel along the edges, we gain the height of the slipper on both sides, 16-18 loops each. We knit the middle 12 stitches in short rows like the heel of a sock. Tie the top of the slippers with “teeth”. Hem with a needle. Ready-made slippers can be decorated as desired. We start knitting the teeth on top (with the first color), cast on 50 loops and knit 5 rows in stockinette stitch, 6th row - 1 edge. *yo, 2 knits*, 1 chrome. Then again 5 rows in stockinette stitch After hemming the teeth with a knitting needle Then 3 in garter stitch in the second color After dividing the loops into three parts and knitting only the middle part We switch to the first color and pick up the edge loops of the middle part to knit the teeth. We knit the teeth at the top: 4 rows - stocking stitch; 5 row - 1 chrome, * yarn over, 2 vm., * 1 chrome, then again 4 rows of stockings, knitting. After we hem the teeth with a knitting needle. Then with the second color on all loops of the shoe we knit in garter stitch 1.5-2 cm (fullness shoe). Again we knit the teeth with the first color - 4 rows of stocking stitch, 5th row - 1 crocheted, *yo, 2 knits*, 1 crocheted stitch, then again 4 rows of stockings. viscous. Then we hem the teeth with a knitting needle. We move on to the sole, which we knit with the second color in garter stitch when we start knitting the sole. you need to decrease the first two loops together in every second row...then two together before the central loop...knit the central loop and again two together and the last two together. Cast on 51 loops with dark thread, knit 8 rows in garter stitch. Then divide all the loops into three parts: 17+17+17, and knit only the middle part. We temporarily remove the side loops using large pins. The middle part can be decorated with any design. For example, "butterflies". Knitting butterfly pattern. For a butterfly pattern, the number of loops should be divided by five, plus two more loops. For the sample we cast on 27 loops. We knit the first row with facial loops. We knit the second and all even ones with purl loops. We knit the third row as follows: remove the first edge loop, take the thread towards you and remove five loops. The thread should lie across the removed loops along the left knitting needle, then we knit five facial loops and so on until the end of the row. We always knit the last edge stitch. We knit the fifth, seventh and ninth rows in the same way. In the eleventh row we knit a butterfly. We knit two front loops, then insert the right knitting needle under the threads lying on the loops, from bottom to top, grab the working thread, drag it under the threads, put the resulting loop on left knitting needle and knit it together with the next loop behind the back segments. Then we knit 9 facial loops. And we repeat this until the end of the row. In the 13th row we knit 5 knit stitches, take the thread to ourselves and remove 5 loops. We knit the 15th, 17th and 19th rows in the same way as 13. In the 21st row we knit 7 knit stitches once and make a butterfly, as in the 11th row, then we knit 9 knit stitches to the end of the row and knit a butterfly again. That is, we knit 21 rows - 7 levs make a butterfly, 9 levs. What we knit before the brackets once. We knit what is in brackets to the end of the row. Knitting butterfly pattern. Butterflies are arranged in a checkerboard pattern. Pattern repeat: kp: 5 +2; 1 - lv; 2 and all even - izv; 3 - nox, 5s, 5lv; 5, 7 and 9 - as z; 11 - 2lv, make a butterfly, 9 lv; 13 - 5lv, nox, 5s; 15, 17 and 19 - like 13; 21 - 7 lv, we make a butterfly, 9 lv / 23 - like 1. Knitting 10-12 cm, we will get a rectangle. We don't close the loops. On the sides of the rectangle we cast on additional loops (approximately 23-25) with a light-colored thread. We knit the “teeth” on three sides of the rectangle: knit 4 rows in stockinette stitch, 5th row - remove the edge loop, *2 knit stitches together, yarn over* - to the end of the row. We also knit 3 rows in stockinette stitch. We fold the knitting along the row where we have yarn overs and connect the initial row with the last knitting path: knit 1 loop from the first row and one loop from the last row together. Then we put the loops from the pins into work and knit in garter stitch the height of the slipper is 3-4 cm with a dark thread. Let's move on to knitting the soles. To do this, mark the middle 12 loops and knit them in short rows until we have closed all the side loops. To knit the heel along the edges, we gain the height of the slipper on both sides, 16-18 loops each. We knit the middle 12 stitches in short rows like the heel of a sock. Tie the top of the slippers with “teeth”. Hemming with a needle
Warm wool socks are an indispensable part of any person's wardrobe. In addition, this is a great way for beginner needlewomen to practice and improve their knitting skills. You will learn from our article how to knit socks using the two-knitting technique, and a knitting pattern with a description of the work will help you with this.
Master class on socks on two knitting needles with knitting patterns
Many of us are accustomed to seeing our grandmother busy knitting socks. However, she does this on 5 knitting needles, which for beginners seems like a skill beyond reality. There is also knitting of socks, which is done on two knitting needles.
For a pair of socks size 40-42 you will need the following:
- Warm wool yarn, about 200 g
- Knitting needles No. 5 or No. 5.5
Instructions on how to knit socks will be described step by step simply, even if you have not knitted on two needles before.
Stage 1. Elastic band. We cast on 39 loops. We begin to knit with an elastic band, that is, alternating the front and back loops. The last one (before the edge) should be knitted face-on. So we perform about 28 rows. Then the number of loops is mentally divided by 3, 13 in each part. We begin to knit the middle: 34 rows of knit stitches in the center.
Stage 2. Sock. 2 loops joined together and knitted as one will be called combined from now on. We continue to work with the central 13 loops.
In the first row:“combined” knit, 9 loops “face”, “combined” knit.
Second row: 13 knit stitches.
Third row:“combined” facial, 7 “face”, “combined” facial.
Fourth row: 9 knit stitches
Fifth row: combined facial, 5 facial, again “combined”.
Stage 3. Foot. In the first row, 19 additional loops are cast on the left, along the “tongue”, they are knitted “face down”. Next, another 13 knit stitches on the left side along the shin. In the second row, we add 7 loops to the upper side of the “tongue”, 19 from the right side and 13 loops along the shin. We knit everything face to face. Having completed these two rows, count the loops, you should get 71. We knit them with facial stitches for 10 rows.

Stage 4. Sole.
First row:“combined” knit, 28 knit, “combined”, 3 “face”, “combined”, 3 knit, again “combined”, 27 “face”, “combined.”
Second row: the remaining 66 stitches are knitted.
Third row:“combined”, 26 “face”, “combined”, 2 knit, again “combined”, 2 “face”, “combined”, 26 knit, again “combined”.
Fourth row: 61 knit stitches.
Fifth row:“combined”, 24 knit, “combined, 1 “knit”, “combined”, knit loop, “combined”, 25 knit and again “combined”.
Sixth row: 56 "face"
Seventh row: “combined”, 22 knits, 3 “combined” in a row, 24 knits, “combined”.
Eighth row: 51 knit stitches.
Repeat decreasing the loops, starting from row 1, until their number is reduced to 26. We finish the work, close the loops. The foot, heel and shin are sewn together with a crochet hook or just a needle.
The result is these socks on 2 knitting needles:
The scheme of this work is extremely simple: it mainly involves only facial loops (and even “combined” ones are knitted “face”).
Video on the topic of the article
“Simplified” knitted socks:
Socks on two knitting needles:
Two socks simple knitting needles which are made without a seam:
"Invisible seam":
Toe socks:
Related articles:
Every fashionista is interested in learning how to knit an openwork braid correctly and quickly, because such an element beautifully decorates any product. These patterns are used...
Many knitters like to use a special Bulgarian beginning in their work - a type of loop that allows them to make the edge of the product more beautiful and sophisticated...
Handicraft is a wonderful process of creating a knitted accessory. An openwork knitted shawl combines fashion, style, beauty, comfort and warmth. This is a...
Spring has come, but the machinations of winter are still felt. The weather is in no hurry to please you with sunny warm days, and socks that will warm you remain very relevant. A simple option will be offered to your attention knitting socks on two needles, for those who are uncomfortable, don’t like it or have not yet mastered knitting on five.
For these socks, we took the already beloved Pekhorka Children’s yarn, a new product in bright green (“exotic”) and beige. This is 100% acrylic, the yarn was developed for children's skin and therefore does not prick, has large volume thread, with a weight of 50 g/200 m, fits well in the fabric. Two knitting needles were taken from a set for knitting socks in 5 pieces No. 2.5.
We will knit socks in size 39, foot length 25 cm.
Let's start with calculations, first we knit a sample of 20 loops with stockinette stitch - this is when the front loops are knitted on the front side, and the purl ones on the back side.

Our sample length is 7.5 cm. For a size 39 foot, you need a circumference of at least 22 cm, which means 7.5 * 3 = 22.5 is suitable. For a full circle you need 20 * 3 = 60 loops, but we only take half.
1 row. Cast on 30 stitches on two knitting needles.

2nd row. To begin, we will knit an elastic band, 1*1, that is, 1 knit loop (knit stitch) and another purl loop (purl stitch). We must remember that when we knit on two needles, we always remove the first loop without knitting, this then gives an even side edge to the product.

3 – 8 rows. 30 loops with elastic band.
9 – 10 rows. 30 p. with an elastic band, but replace the green one with a beige thread.

11 – 12 rows. 30 sts with elastic band. Green thread.
13 – 14 rows. 30 sts with elastic band. Beige stripe.
15 – 16 rows. 30 p. Green stripe.
17 – 18 rows. 30 p. Beige stripe.
19 – 20 rows. 30 p. Here we will cut the beige thread and continue with the green one.
20 – 26 rows. 30 p. Elastic band, green thread.

If you want, you can make the elastic band longer.
27 row. 30 persons. n. We switch to stockinette stitch, and then we will knit with it.
28 row. 30 p. p.
29 row. The first loop is removed (sn. p.), 28 persons. p., 1 rest. (leave the loop on the knitting needle without knitting).

Row 30 1 rest. (left in the previous row), 1 dc. p., 27 p. p., 1 rest.

View at the end of the row.

31 row. 1 rest., 1 dn. p., 26 persons. p., 2 rest. p.
32 row. 2 rest., 1 dn. p., 25 p. p., 2 rest. p.
33 row. 2 rest., 1 dn. p., 24 persons. p., 3 rest. n.

34 row. 3 rest., 1 dn. p., 23 p. p., 3 rest. p.
Row 35 3 rest., 1 dn. p., 22 persons. p., 4 rest. p.
36 row. 4 rest., 1 dn. p., 21 p. p., 4 rest. p.
37 row. 4 rest., 1 dn. p., 20 persons. p., 5 rest. p.
38 row. 5 rest., 1 dn. p., 19 p. p., 5 rest. p.
Row 39 5 rest., 1 dn. p., 18 persons. p., 6 rest. p.
40 row. 6 rest., 1 chain stitch, 17 purl stitches, 6 remaining stitches.
41 row. 6 rest., 1 dn. p., 16 persons. p., 7 rest. p.
42 row. 7 rest., 1 sp. p., 15 p. p., 7 rest. p.
43 row. 7 rest., 1 sp. p., 14 persons. p., 8 rest. p.
44 row. 8 rest., 1 sp. p., 13 p. p., 8 rest. p.
45 row. 8 rest., 1 sp. p., 12 persons. p., 9 rest. p.
46 row. 9 rest., 1 sp. p., 11 p. p., 9 rest. n.

47 row. From this row we begin to increase the number of loops to be knitted, at the expense of the ones left, knitting them at the end of the row, one in each row.
9 rest., 1 sp. p., 12 persons. p., 8 rest. p.
48 row. 8 rest., 1 sp. p., 13 p. p., 8 rest. p.
49 row. 8 rest., 1 sp. p., 14 persons. p., 7 rest. p.
50 row. 7 rest., 1 sp. p., 15 p. p., 7 rest. p.
51 row. 7 rest., 1 sp. p., 16 persons. p., 6 rest. p.
52 row. 6 rest., 1 dn. p., 17 p. p., 6 rest. p.
53 row. 6 rest., 1 dn. p., 18 persons. p., 5 rest. p.
54 row. 5 rest., 1 dn. p., 19 p. p., 5 rest. p.
55 row. 5 rest., 1 dn. p., 20 persons. p., 4 rest. p.
56 row. 4 cells, 1 n. p., 21 p. p., 4 rest. p.
57 row. 4 rest., 1 dn. p., 22 persons. p., 3 rest. p.
58 row. 3 rest., 1 dn. p., 23 p. p., 3 rest. p.
59 row. 3 rest., 1 dn. p., 24 persons. p., 2 rest. p.
60 row. 2 rest., 1 dn. p., 25 p. p., 2 rest. p.
61 rows. 2 rest., 1 dn. p., 26 persons. p., 1 rest. p.
62 row. 1 rest., 1 dn. p., 27 p. p., 1 rest. p.
63 row. 1 rest., 1 dn. p., 28 persons. n.
64 row. 1 dn. p., 29 p. p. The heel is completed.

Front view.

The depth of the heel was 5 cm, taking into account that the toe will also be 5 cm, we need to knit 15 cm with stockinette stitch.
65 – 120th row 30 p.

125 – 160 rows. We repeat rows from 29 to 64. This is knitting a sock.

161 rows. We take hold of the upper part of the toe, lifting the foot. We will knit in stripes in two rows, alternating a beige stripe with a green one. The task that now faces is the connection of the two parts of the sock, the lower (foot) and the upper (instep). We will connect by knitting the side loops of both parts together.
On the foot, with a free knitting needle, we hook the first one closest to the knitting needle, on which the loops are located, a loop.

Then on the same (right knitting needle) we remove the first loop from the left knitting needle.

162 row. We hook 1 loop from the foot.

Slip the first stitch from the left to the right needle.

And we knit 28 purls. p., we will knit the last two together (those that were removed in the previous row).

163 – 220 rows. We continue knitting: remove loops on the right knitting needle, one from the bottom and one from the top part, knit 28 loops according to the side (front or back), and knit the last two together.

221 – 222 rows. Two green rows in stockinette stitch. Let's cut the beige thread.
223 – 228 rows. We begin to knit an elastic band with green thread, continuing to connect the front and back parts of the sock.
229 – 230 rows. Beige stripe.
231 – 232 rows. Green stripe.
233 – 234 rows. Beige stripe.
235 – 236 rows. Green stripe.
237 – 238 rows. Beige stripe.
239 – 245 rows. Green stripe.

We knit the first two loops together into one.

Return this loop to the left needle.

Again we knit the first two loops together.

We return to the left knitting needle again and so on until the end, until there is only one left.

We cut the thread, fasten it and hide the end.

We knit the second sock in the same way. The socks are ready, you can try them on.

This method of knitting socks is suitable for everyone who knows how to knitting knit and purl loops.
Dina Kiseleva specially for the site Handicraft Lessons.
I want to tell you about a borscht recipe that I learned just the other day and immediately decided to try it in practice with my own additions. Who would have thought that traditional Ukrainian borscht could be made with dried fruits! It turned out it was possible. And it turns out very, very tasty! Recipe for borscht with prunes To prepare vegetarian borscht with prunes for 4-5 servings you will need: Beets: […]
Chicken in white wine sounds unusual, cooks quickly, and looks appetizing. And it’s so delicious that it just melts in your mouth. The dish is perfect for celebrations and candlelight dinners. White wine will tenderize the meat and give it a subtle flavor. Recipe for cooking chicken in white wine We have already prepared with you Chicken stewed in milk - it’s delicious [...]

Black currant is a tasty, fortified, even if slightly sour berry. It is a storehouse of substances useful and necessary for the human body, in particular vitamins and minerals. In the summer we prefer to eat fresh fruits, and canned, dried and frozen for the winter. Every housewife has her own secrets for preparing berries. Our Smart Kitchen contains the most popular and best [...]
If you have never knitted socks on two needles, but would like to learn how to do it quickly, efficiently and beautifully, read our article, study master classes and watch video lessons. You will learn how to knit children's, men's, fishnet socks step by step, learn how to make seamless socks, discover the most easy way knitting socks, and also get detailed recommendations on how to knit the heel of a sock on knitting needles: detailed instructions will reveal all the secrets to you.
For some knitting needles, knitting cozy and warm socks on two needles is even easier than on five. We have already described to you in detail, and right now we want to tell you how to create with your own hands very beautiful socks without single seam . Women especially like to wear this accessory because it sits comfortably on the leg without pressing on the skin or tightening the veins.
Seamless socks with braids: knitting pattern
To work, you will need any combined yarn, which includes both natural and synthetic fibers. Its quantity is approximately 110 grams. And d all knitting needles, size 2.5. We will knit these wonderful socks 2x2 elastic pattern, as well as a braid pattern, consisting of six loops. Probably every beginning craftswoman knows how to knit an elastic pattern.
  Knit the braid according to the pattern.
 And this – knitting pattern for the product itself, which you will use while working.
Cast on 50 stitches on the knitting needles and knit according to the pattern, checking the odd rows according to the pattern.
 Having knitted 38 rows according to the patterns presented above, cast on another 20 stitches and turn the knitting over. Knit according to the pattern, and then add another 20 loops, thus getting 90 loops to work with.
- 40 loops– for knitting with an elastic pattern;
- 10 loops– for a braid with two purls on each side;
- 40 loops- for elastic.
 Knit the central pattern without changes, and for the sides make decreases, knitting one loop at a time together with the edge. Knit in this way until you get 10 loops on the knitting needles.
  Cast on the knitting needles the loops you knitted , starting from row 39. There should be 50 of them.
  Decrease along the edges according to the previous instructions., until ten loops are formed on the knitting needles.


- On a free knitting needle cast on edge loops from rows 1 to 37- in the amount of 18 loops. Using the same knitting needle, knit 10 stitches according to the pattern.
- Turn the work over and cast on 18 stitches on the other side. Your resulting combination: 18 loops + 10 loops + 18 loops. Together 46.
 Decrease stitches along the edges as indicated in the instructions above.


 We reduce until there are 10 loops left that need to be closed.
 Cut the thread, carefully securing the end.
 Wash finished socks in warm water.
Knitting socks on two knitting needles: new patterns and patterns
Continuing the topic of knitting socks, we want to show you new models with descriptions.
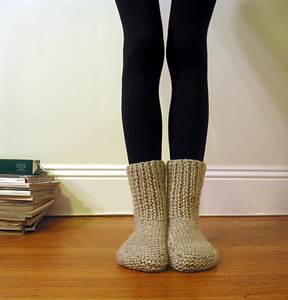
An absolute hit is short socks; this trend is also present in the world of knitting.


 We present to your attention: knitted short socks and detailed instructions for knitting them.
 Openwork patterns popular when creating any clothing, and socks are no exception. We talked in detail about patterns for knitting socks in our article

 A about knitting openwork socks we want to tell you right now.
 Men's socks are an indispensable accessory, Every woman knows about this. However, not every woman knows how to knit socks and at the same time surprise her loved one with her creativity and care.


 Read the detailed instructions and How to knit socks with two knitting needles.
Knitting children's socks on 2 knitting needles: step-by-step instructions
Child dressed in knitted socks, it's not only cute and beautiful, but also very warm. We talked about how to knit tiny ones in one of the previous materials. Booties are worn by the youngest children, and for older children, soft and warm children's socks are knitted with knitting needles. We'll tell you how easy it is to knit this cute accessory for your baby.

- This method knitting is also suitable for inexperienced knitters, you need to measure the length of the baby’s foot and dial required quantity loops We start knitting from the cuff with an elastic pattern. We make the cuff 3-4 cm high from the child’s ankle.
- Next we move on to the front loops and knit about 8 cm(or as needed according to your foot size).
- The most crucial moment is the formation of the heel of the product. We divide the loops into 4 parts (excluding the edge ones).
- We knit the heel first from the first three parts, after which we turn the work and yarn over. We knit those loops that are in the middle (from the three parts that we are working with at the moment) and turn the knitting again. Don’t forget to yarn over before the last stitch. until we get 10 loops on the knitting needles.
- From now on we knit with an increase. The first loop from the side is knitted with a double crochet and together with the last loop in the middle. We knit until the loops run out.
- We continue to knit in stockinette stitch to the place where the thumb is located.
- To form the toe, we again divide the loops into 4 parts. In every second row we decrease the loops by knitting the last two loops together. We do this in each of the four parts in four rows. In the next rows we decrease stitches.
- At the end we get 4 loops on the knitting needles and tie them together. We fasten the thread.
So we knitted socks on two knitting needles: a simple method for beginners that does not require a lot of time and resources. Warm and cozy socks for a baby can be knitted from leftovers, and if you took new yarn, then you will have enough for socks, and not included in the list creative projects on our website.
How to knit the heel of a sock on knitting needles: detailed instructions
Heel toe is one of the the most important indicators product quality. The heel is rubbed first, so for knitting it you need to choose strong, high-quality and dense yarn. There are several ways to carefully knit a heel, we talked about some of them earlier in the article.
Knitting socks on two knitting needles differs from the method of knitting on five knitting needles in that we create the product in one continuous fabric using methods of decreasing and adding loops and carefully calculating their number.
To avoid losing your calculations, study the entire master class from start to finish


