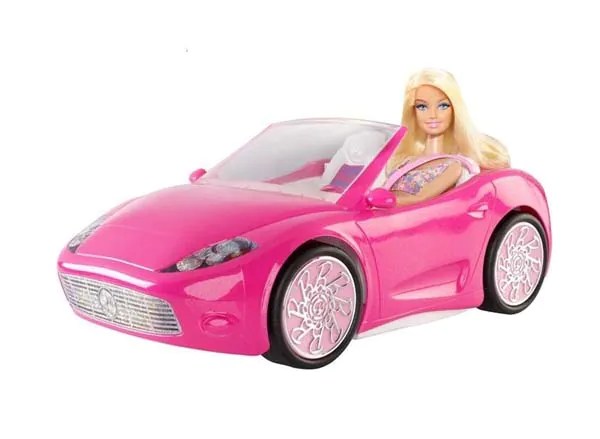
Today, you can buy absolutely everything for children's dolls, like the world-famous Barbie: clothes, furniture and even cars. The shelves of toy stores are simply bursting with all kinds of sets designed to diversify the usual play with dolls. However, such accessories are quite expensive, so often girls have to do without them, being content with only a doll. But playing with dolls alone can be very boring, because you want toy girls to have furniture, various accessories, and even their own car. In this article we will tell you how to make any paper car for dolls out of cardboard with your own hands, so that your little princess can take her doll for a ride in a beautiful homemade pink car. Also from this article you will learn the easiest way to make a fire truck out of cardboard. So let's get started!
How to make a doll machine out of cardboard with your own hands
As always, before starting the master class, you need to prepare everything you need. To make a doll car from cardboard and paper, we will need materials that will not be difficult to find, namely:
- A shoebox to put your doll in.
- Thick cardboard
- Colored cardboard
- Colored paper (we will use pink and black)
- Double sided tape
- Transparent plastic (a small piece can be cut from a toy box)
- Shiny headlight decorations
- Wooden skewers
For those who want to know how to make a car for Barbie out of cardboard, this master class will be a real salvation, because it presents probably the easiest way to create a doll car. So if you have prepared everything necessary materials, then let's get started.
We draw a template for doorways. To prepare the template correctly, keep in mind that the length of the doll’s legs is approximately 18 centimeters.
We attach the template to the two sides of our box and trace it. Then we cut the sides along the contour to a horizontal line and bend the resulting “wings” inward. These parts will then hold the seat of our cardboard box car.
We cover our box with colored paper, first on the front and back, and then on the sides. Where we made the blank for the seat, we cut the paper to the corners, carefully bend it inside the box and glue it. 
We cut out 4 circles with a radius of 3 cm from colored and thick cardboard and glue the colored cardboard to the thick cardboard. Using a needle, we make holes in the resulting 4 circles, which we then expand with wooden skewers. We got wheels for our car.
We cut out identical blanks for the hood and trunk from colored cardboard. Don’t forget to leave a 1-centimeter margin on each side to glue the cardboard to the box. We cut the blanks at the corners so that the part bends well.
We glue the first part piece by piece with the colored part of the cardboard facing down, since it will be easier to glue the paper onto the gray part. 
At the bottom of the box we make holes for the wheels and insert skewers into them.
By analogy with the hood, we glue the trunk, which is the second part.
We cover the hood and trunk with colored paper.
We cut out a piece of plastic from a toy box and, gluing it with black cardboard, we get the windshield of our car. 
From black cardboard we cut out the remaining parts of the car: the seat, the hood and the bumper. For sitting, in addition to black cardboard, you will need thick cardboard.
We glue a strip of thick cardboard with a black stripe pasted on it to our car - we get a seat. We glue our glass and hood onto double-sided tape.
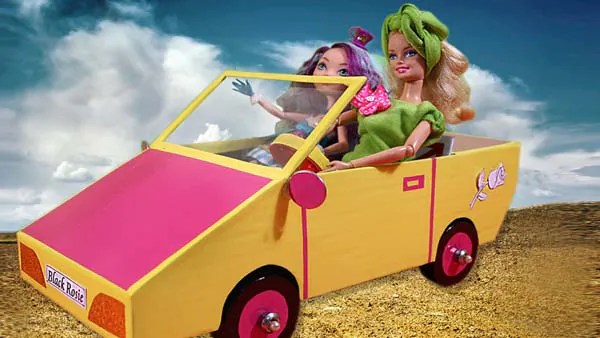
We glue on the headlights, thin black stripes for the seats and the bumper. Attach the wheels and cut the skewers, leaving a small part so that the wheels do not fall off. We make a steering wheel from a button, wire or black cardboard. Barbie's car is ready!
Trying to make a doll fire truck from paper templates
Now you know how to make a car out of cardboard with your own hands. However, in addition to the usual Barbie car, you can also make a fire truck. The easiest way to make a fire truck out of cardboard is to print out a pattern and glue it in the right places. However, there is also a more complex and interesting way making such a toy, you can see it below if you watch the video for the article. 
Video lessons on the topic of the article
Now, after familiarizing yourself with the master classes, you can make toy cars from cardboard yourself. At the end of the article, we have compiled a selection of videos on this topic so that you can learn more more ways how to make a car out of cardboard.
What modern and advanced doll does not dream of her own means of transportation, a personal car. After all, with the appearance of a real doll car in a doll’s life, many opportunities and options for games open up.
The doll can go on long or short trips, arrange trips with friends into nature, organize a doll wedding procession, which happens on real wedding, and many other equally interesting and exciting things.
 In this article, the News Portal “site” has collected for you two detailed, understandable and useful video master classes, using which you can easily create a unique doll car or doll bicycle using available materials.
Just a few tips from us.
 When creating a doll car, be sure to take into account the dimensions of your doll so that she can easily get into the car, and, if desired, give her doll friend a ride.
If you are a creative person, then you can make an original and beautiful car interior. Cover the cardboard seats of a doll car or the seat of a bicycle with bright scraps of fabric, pieces of fur, decorative paper, ribbons or braid.
 After finishing the painstaking work of creating a doll car and bicycle, be sure to take care of the garage. A garage can be made from any cardboard box in which you cut out the garage doors and then decorate it.
Doll machine
How to make a car for a doll with your own hands?
Bicycle for a doll
How to make a bicycle for a doll with your own hands?
Agree, making a doll car or a doll bicycle is not impossible. Even a child can cope with this task. And it is not at all necessary to spend money on buying expensive doll cars and bicycles of the same type in toy stores.
 If you know and can make a car for a doll or a bicycle, then the News Portal “site” will be happy to post your work on the site. Send your photos with descriptions to our email address -
How to make it yourself car For Barbie pupae.
Barbie- the dream of many girls. You can buy a lot of accessories for this girl’s favorite: cars, houses, furniture, clothing items, etc. Loving parents The only thing that can stop us is their impressive cost. Therefore, many of them begin to think about some applicable solution. Then they decide to make these items with their own hands. Therefore, this material, in which we will look at how to do it for doll car, may be useful for parents.
Barbie Car.How to Make a Doll Car.Barbie
List of required materials.
Before starting work, it is better to check the availability of suitable materials in advance. There is nothing rare in this list; everything can be found in household supplies. After all, it is important that a machine you make yourself does not come up with a time and cost invoice. So, you can’t do without:
Shoe box (your pet will sit in it). Thick cardboard. Colored cardboard. Colored paper (pink and dark are useful). Double-sided tape. Glue. Transparent plastic (a toy box is suitable for cutting out a small piece). Sparkling decorations (these will be headlights). Wooden skewers.
Let's start making the car.
Having checked whether all the materials are in place, you can begin to create the puppet transport. We start with a drawing of a template for doorways. To make it, you should take into account the length of Barbie’s legs: it reaches about 18 cm.
The next step is to apply the template to the sides of the shoe box. Then you need to circle it. Having cut the sides along the horizontal contour, it is necessary to bend the wings that came out inward. This is the future seat mount. We take colored paper to cover the box on all sides. In the place where the blank for the seat is made, the paper must be cut to the corners, folded with all possible care into the inside of the box and pasted.
How to make a car for a doll.
We take colored and thick cardboard. We will need them to cut out circles. Their number should be equal to four, and their radius should be three centimeters. Having done this, we glue the cardboard together. You might guess that the wheels of our car are almost ready. The only thing missing is the holes in them. The latter can be done using a needle and then expanded with wood skewers.
The car will be made with your own hands soon. Next up is the hood and trunk. We make them from colored cardboard by cutting out similar blanks. The prepared supply of about 1 centimeter will allow you to easily stick the cardboard to the frame of the car. It is necessary to keep in mind the cuts in the corners of these parts, they will allow them to bend perfectly. Let's start gluing the first part, the hood. We hope that it is completely clear how to make a car for dolls out of the box.
After making holes in the bottom of the box, you need to stick skewers there. Similarly to the first part, we glue the second one (this is the trunk). This will come in handy now colored paper for covering the hood and trunk. A piece of plastic and dark cardboard glued together will become the windshield of the car.
Let's look further at how do For doll car. Black cardboard will be used to make the seat and bumper. To make a seat, move the thick cardboard closer to you. A strip of thick cardboard glued to the car, on which a black stripe is glued, is our seat. will be needed for gluing the top of the hood and windshield. Don't forget about the bumper, headlights, and black seat stripes. After gluing the wheels and cutting the skewers, a small part should remain. This will allow the wheels to hold tightly and not fall off. A button, wire or black cardboard are the materials that will make an excellent steering wheel.
Knowing how to make a car for a doll, you can complicate your work and work on making a real fire truck. The most in a simple way its production will involve printing out the layout and gluing it in the right places.
If someone found it difficult to answer the question of how to make a car for Barbie dolls, then he can rest assured. With not much effort and time, you can make any accessory you like with your own hands. Created together with a child, such a machine will give him double joy.
Abstracts
How to make a car for Barbie. From the article you will learn how to make a car for a Barbie doll with your own hands. Barbie Car. How do machine for dolls for Barbie or other dolls 1. accessories for Monster High and Barbie dolls. How to make accessories for Monster High and Barbie dolls with your own hands. How to make a car for a doll with your own hands. A Barbie doll is the dream of many girls. You can buy a ton for this girly favorite. How to make a car and a bicycle for Monster High dolls, Barbie. How make a car and a bicycle for Monster High dolls, Barbie? for a doll with your own hands. OUR COUNTRY OF MASTERS: How to make a car for Barbie. From the article you will learn how to make a car for a Barbie doll with your own hands. How to make a car for Barbie. With your own hands; with parental hands a barbie machine. how to make a car for. How to make furniture for barbie how to make pencils for. How to do car DIY for Monster High dolls. How to make a car for monster high dolls with your own hands – Paper crafts, printables for.
By following simple instructions, you can easy and simple to make a machine from cardboard with your own hands.
On the Internet, you can select the model of the car that you want to make, then print it on A4 sheet using a printer. We glue the sheet with the model to a sheet of cardboard. This way the car will be stronger. Using scissors, cut out the image of the blank. The car layout is ready.
To get started, you need to prepare the materials:
- A4 sheet of paper;
- A printer;
- Cardboard;
- Scissors;
- PVA glue;
- Watercolors or gouache, felt-tip pens, pencils.
The printed model shows all bend and cut lines, so it will be easy for even a child to understand. The wings of our model need to be folded and glued correctly, so our the car won't fall apart. If we have durable cardboard rather than thin cardboard, we can use superglue instead of PVA. So, the car body is ready, the child can only paint it to his liking.
If you don’t want to waste time painting the body of the car, you can find a colored model of the car on the Internet. And assemble it in exactly the same way, having first printed it on a color printer. Such blanks can also be used as cars for barbie dolls. It will take you no more than an hour.
Gallery: cardboard car (25 photos)


How to make a fire truck
 First you need to prepare and prepare the materials necessary to make a fire truck. These materials are scissors, paper and PVA glue. You need to find a model of a fire truck on the Internet and print it on a printer.
Then, just as in the example described above, glue the A4 sheet and cardboard together so that our model is durable. Since a fire truck consists of several elements, we may need several pieces of cardboard and paper.
Then the blanks are cut along their contour with scissors and bent. In the places where the wings of the workpiece are located we glue the model.
Additional workpieces can be a ladder, a crane, etc. Such blanks can move apart and rotate.
Making a machine from various materials
 As children grow up, they become interested in the more complex and painstaking process of making a machine.
Since a boy's main arsenal of toys are cars, making them from paper or cardboard is very a good option. A huge variety of such toys can be made, which will provide an entertaining game for the child and allow parents to save money.
Moreover, if the child himself shows interest and makes a car with his own hands, he will value it much more than a car bought in a store e toys.
It is not necessary to use only paper or cardboard to create machines; they can also be used carton boxes from shoes, matches, wooden sticks, colored paper.
You can use cylindrical cardboard left over from toilet paper and cover it around the perimeter with colored paper. When the workpiece dries from the glue, you need to cut a rectangle along the surface. At the same time, leave a little margin on one side so that you can make driver's seat.
Using paints or felt-tip pens, you can decorate the model as your imagination desires. You can cut out a steering wheel from paper and glue it to our model car. You can also decorate the car with a variety of patterns and ornaments. Appliques of various colors. For example, you can stick numbers if the car is a racing car, if it is a fire truck, police or ambulance you should stick or draw the corresponding elements.
Instead of wheels you can use plastic lids from bottles.
How to make a washing machine for dolls, master class
 To make a car for dolls with your own hands, we will need the following materials:
- A small white cardboard box (a shoe box will do just fine);
- Plastic cups for sour cream white and covers from them;
- Super glue;
- Muffin tin covered with foil;
- Scissors;
- Stapler;
- Scotch;
- Paper with glossy or varnish coating(you can take a box of nylon tights);
- Permanent marker;
- Buttons.
Cut off the bottom plastic cup from sour cream, cut out the middle so that in the door washing machine it turned out to be a transparent window.
Then we need a white box made of thick cardboard. From the existing box you need to get a box 14 cm high and 8 cm deep. Washing machine made of cardboard for this size is perfect for a Barbie doll. Excess lengths are trimmed using scissors. Use scissors to cut a hole in the middle of the front of the box. round shape for our window.
Take paper or glossy coated cardboard and glue over all the unsightly areas of our workpiece.
Then we will make a drum for the washing machine; for this we will need a mold for baking foil cupcakes, as well as a second cup of sour cream. Measure a height of 8 cm from the bottom of the cup and cut off the rest. Coat the bottom with superglue and place a muffin pan inside, press and glue. This is how we made a washing drum for the doll.
The base of the sour cream cup will be the door. The lid of the cup, which is made of transparent plastic, must be glued to it with tape.
Then we fasten the resulting door. We lay our box blank so that the inner side is on top. Then use superglue to glue the door. You can also use a stapler.
The sour cream cup that we made at the very beginning is also glued to the top using tape.
The last step of the work is to connect all the edges and corners of our workpiece. They can be connected using superglue, tape or a stapler.
We attach glossy paper to the top of the box, on it you can draw the display using a marker. Then we glue the buttons and the feeding compartment washing powder. Following the work plan, you will not have any questions about how to make a car for a doll.
How to make a big car out of a box
 Let's look at an example of how to make a car out of boxes. For work we need big box made of cardboard, which must be connected on all sides using tape.
On the side of the box we draw the outline of the car doors. The contour should be smooth and symmetrical.
Using scissors or a stationery knife, you need to cut holes for the doors along the resulting contour. If a child is doing this, a parent should come to help him, as the child can cut himself with a sharp object.
Using the same knife, you need to cut a hole on the top of the box for windshield. In size it should be approximately 2/3 of the top of the box.
The cut hole should be located between the doors that are located at the front of the car.
It is worth doing the work carefully without damaging the bottom of our box. The lower part will be the hood of our car.
Then we will make the windshield of the car itself. The part of the box in which the hole for the glass is cut needs to be bent inward. We attach tape on both sides of the hole. It will serve as the windshield for the car.
Using a utility knife, we cut off the part of the windshield that was bent inside the box.
Attach wheels to the bottom sides of the box. To do this you need to take paper plates.
To make headlights you can use paper cups. The wide part of the cup needs to be glued to the front of the car. They can be colored using paints or markers or covered with colored paper.
You can also use a paper plate instead of a steering wheel. Thus, you can make a car out of a box with your own hands. We also make a toy police car step by step.


