Hi all! The chain of gifts will never stop, so today I am offering you something interesting. A fascinating article awaits you on how to make a keychain with your own hands.
This is a necessary, but at the same time miniature gift for all occasions. I have prepared 25 master classes and simply original handicraft ideas that will help you make the very keychain you want.
First of all, advice: if you want to make a cool keychain, be sure to buy good fasteners (rings, laces, etc.). At the end of the article, I will tell you what is best to buy and where it is best to do it.
How to make a keychain with your own hands: 25 master classes and ideas
Soft keychain made of “Fluff” fabric
What do we need?
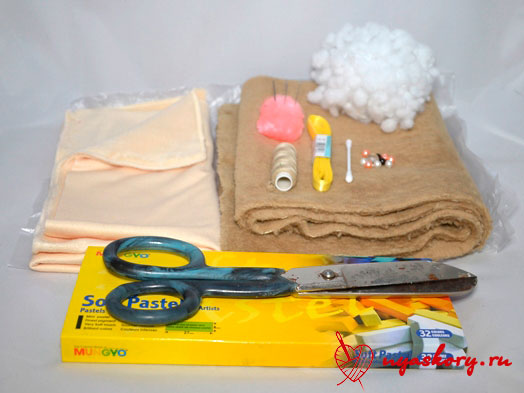
- velsoft (you can also use faux fur);
- fleece or minky fleece;
- satin ribbon for fastening;
- threads;
- pastel for painting the nose and cheeks (you can use acrylic paints);
- padding polyester for stuffing;
- cotton swab;
- scissors;
- needle;
- beads for eyes.
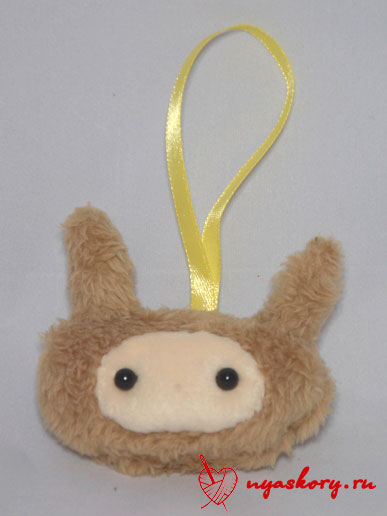
DIY keychain - sewing a bunny Cannon
You can make Cannon patterns yourself by looking at the final version of the toy. You can print the photo and trace the elements, increasing each by about a centimeter so that there are seam allowances.
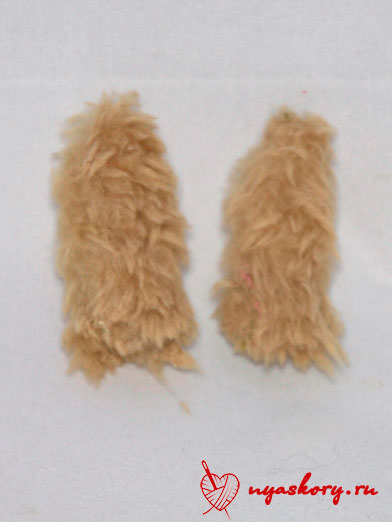
First, sew the ears, placing them right sides together. Turn them inside out.
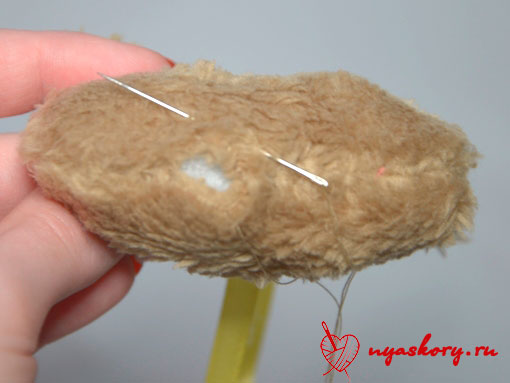
Now take a pre-prepared piece of tape. Fold it in half and place it on one of the parts of your head approximately in the middle. Also attach the ears. To prevent them from moving out, you can attach them with a thread.
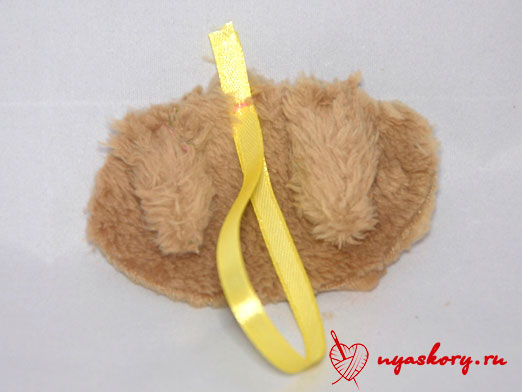
Now attach the second part of the head to our workpiece and sew it, leaving a hole for turning it inside out. Turn out the future keychain.
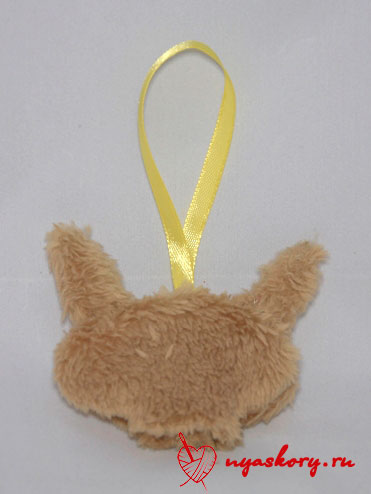
We stuff the blank Cannon. Stuff tightly, but in moderation. Sew the hole of the keychain closed with a blind stitch.
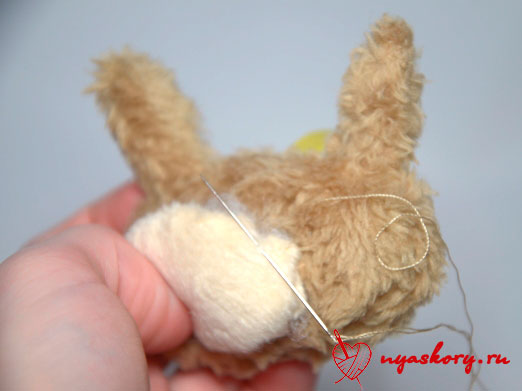
Take the muzzle part and go over it with a running stitch. Tighten the future face a little (but not much).

Lightly stuff the muzzle with padding polyester. Attach the face to the head with a hidden seam. While sewing, carefully hold the face so that it does not “run away”.

Now sew on the eyes and embroider a small nose on the bunny with black thread, making a few stitches between the two eyes.
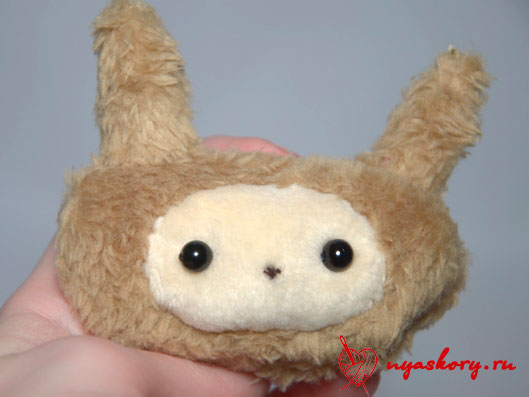
Take a cotton swab and rub lightly desired color pastel chalk. Then just rub this cotton swab muzzle Cannon in the cheek area. You can also paint the area of the nose, but now with black pastel.
The keychain is ready

Other Keychain Ideas
It won’t be limited to just Fluff - as promised, here are 24 more cool ideas for making keychains.
Orange beaded
Enough simple circuit, accessible even for beginners. You will need a thin fishing line and beads (monofilament will probably do).

Fur nigellas
For them you will need a circle of black fur with long pile, a little felt and the fastenings themselves.

Leather keychains for a bag
A very stylish and simple option, obtained by folding a rectangle with fringe at the ends into a tube. A piece of leather with a carabiner is placed inside. By the way, any keychains of a simple shape from two parts can be made into leather ones.

Cute animals for keys
The completely simple forms of such seals allow you to endlessly fantasize with colors, fittings and materials. Yes, and you can use any fastenings here

Beads are in use!
From wooden and plastic beads you can make very original accessory. You will need two beads, a ring for a keychain, knitting needles or sticks, paper tape, a brush, acrylic paints and an elastic cord. First, color the beads as you wish and leave them to dry on your knitting needles. Fasten the elastic band to the ring and thread the elastic band through both beads and tie a knot at the bottom.

Fantasies on wood
All you need here is a wooden base and acrylic paints. And then only your artistic abilities and imagination.

Interesting keychains made of polymer clay
It’s just a fairy tale to make simple little cute things out of it. Cupcakes, animals, treats - whatever you want! There are as many as 6 ideas for you from this pliable material.


Great option for a gift for a guy different holidays(including February 23) - two puzzle pieces made of polymer clay. Roll out the pancake, cut out the puzzles, making holes for fastening, bake them and paint them.

Made from felt and wool
I want to show you a few interesting ideas performing different animals (and not only with the help of these materials).


Other materials
Something is just not used when they want to make beautiful and cool keychains for keys and more! Look, for example, at these seals - they are made of special beads that melt when ironed. You can find similar ones in departments for children's creativity.

you throw away wine corks? But in vain - they make excellent keychains. All you need is paint and fasteners. 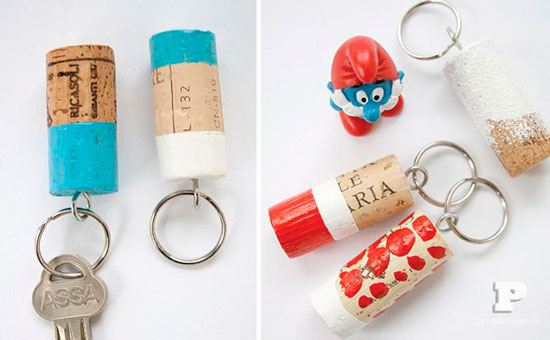
But even there you have to keep your eyes open. Quite recently I successfully purchased some elements for making keychains there, I’m sharing the links:
Thread fastenings- perfect for soft accessories.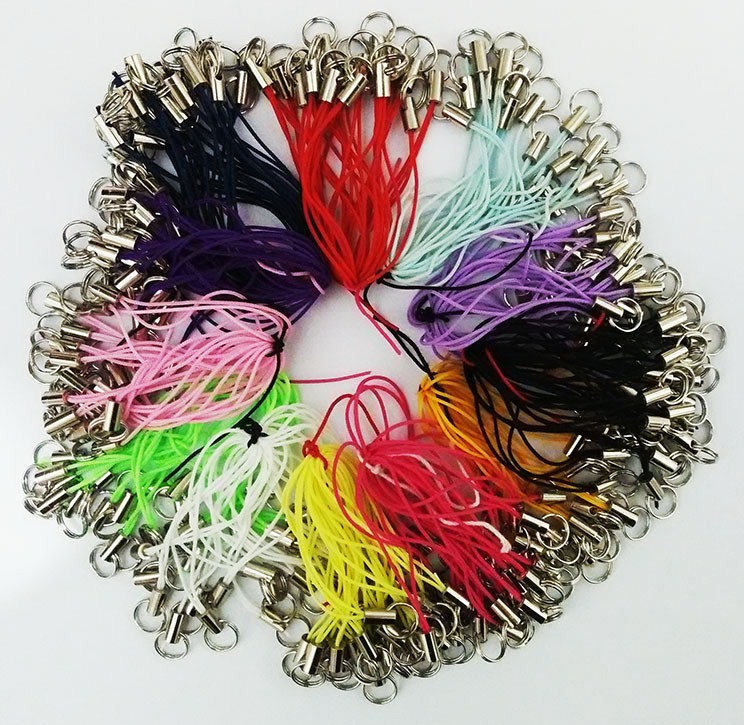
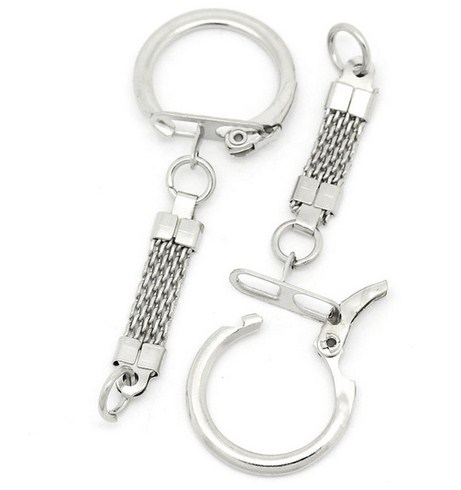
And finally small threaded loops for screwing into solid products (chains are attached to them).
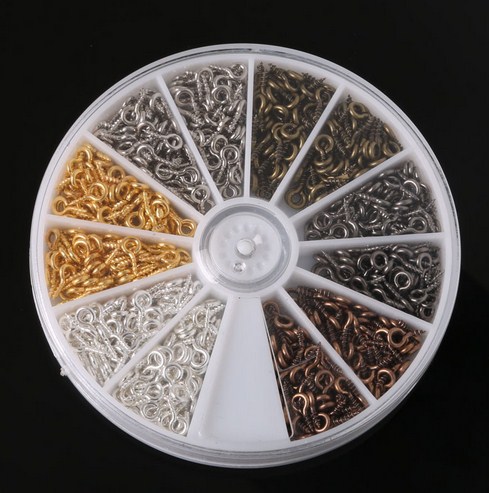
These are the most advantageous offers that I took advantage of myself - I can recommend
With this I say goodbye to you! Share your impressions and link to interesting material with friends!
Sincerely, Anastasia Skoracheva
To stand out from the crowd and make your image more original, you don’t have to buy expensive jewelry. Even from ordinary plastic you can make beautiful accessories. This does not require special equipment and professional tools– just a few minutes are enough and you will become the owner of unique badges or keychains that will accompany you everywhere.
To make your own badges for a backpack or jeans, as well as original and stylish jewelry for everyday wear, you will need ordinary disposable plastic tableware of any shape (for example, packaging for cakes, cookies and other sweets, food storage containers, empty bottles, etc.).
To beautifully decorate a backpack, jacket, bag or outerwear, you can make keychains in different styles, depending on the desired image: romantic, free, rebellious, etc. Please note that to make plastic keychains in the oven at home, it is advisable to choose the most transparent products with a flat and smooth surface.
Tools and materials

For home “experiments” with plastic, you will need to prepare a basic set of tools in advance:
- scissors or stationery knife;
- hole punch to make holes;
- colored markers for drawing;
- tassels with acrylic paints.
As a future ornament, it is allowed to use any ready-made template With interesting drawing. This could be an image on paper or even a photo on your phone. All you have to do is make a plastic blank required sizes, attach it to the “object” of copying and trace the drawing.
To copy and trace the outline of images, it is best to use special permanent markers various colors that do not wash off. Don't forget to make holes with a hole punch for the rope or chain.

Please note that the pictures that will be used as a stencil must be large, since the size of keychains, badges and other homemade plastic decorations after “cooking” will decrease by at least three times.
What plastic is needed
To icon from plastic container It turned out beautiful and original, and most importantly - of high quality, you need to use only smooth surfaces, corrugated ones will not work for this purpose. And, of course, the packaging must be transparent.

If you don’t have a suitable container at hand, use ordinary plastic bottles to make keychains. By the way, to quickly and securely glue pins for badges, use hot melt adhesive.
The better to color
As already written above, to color blank badges cut out from a template or stencil of the required size, it is best to use not ordinary school markers, but permanent markers that cannot be erased with a simple finger movement. Whereas finished keychains can be painted with acrylic paints or nail polish.
Temperature and baking time

One of the important stages of making keychains with your own hands from plastic is their obligatory “baking” in the microwave. After all the models of badges and keychains are ready, simply transfer them to a baking sheet, which must first be covered with parchment, and send the baking sheet to simmer in the oven or microwave oven.
Almost any item can serve as the basis for keychains. For example it could be:
- Old Leather Jacket, or, to be more precise, the skin itself;
- Yarn set;
- Polymer clay;
- Wood, cartridge;
- Champagne cork.
From this we can conclude that materials for keychains are 100% available in anyone’s home.

Keychain ideas

Leather keychains
Many needlewomen can find scraps of leather in secluded drawers. After all, it is used in many places. Leather keychains look stylish and elegant. They are suitable for both keys and backpacks.

What might you need?
- Pen
- Scissors
- Lurex thread
- Sintepol
- Pattern

We place the leather on a hard surface with the wrong side up, place the pattern on it and redraw it onto the actual leather. And cut out two identical parts.

From leather of a different shade (if you need) we cut out small parts for the keychain. Also, do not forget to make a loop, which should be immediately attached to the ring.

Also, if you want, you need to embroider certain parts with lurex thread. Then your pendant will look even better.

Now we are slowly putting all the details together. To do this, take one already cut piece of leather, place it inside out, now glue all the small parts, if any, glue the loop, then drip a little glue into the center, apply synthetic polyester (for volume), drip glue onto it and apply the other side keychain


Make sure that the synthetic foam does not stick out from the toy, otherwise there is a risk that all the contents inside will come out over time.

OK it's all over Now. Your leather accessory ready to use.

Pompom keychain
Such keychains will look no less original on your keys. Fluffy and soft pompoms can calm your frayed nerves. And it’s easy to make such crafts. It's especially easy if you know how to make pompoms.

We just make pom-poms of a certain color, then glue on small felt parts, or eyes, a nose, etc., and that’s it.

From beads
The most avid needlewomen can be advised to make a beautiful keychain from beads.

To do this you will need:
- Scheme;
- Threads or wire;
- Beads;
- Ring.


From felt
Cute little felt keychains will help you decorate your backpack and make it more colorful.

To create it you will need:
- Felt (Specific colors)
- Floss
- Pen
- Needle
- Scissors
- Waxed cord
- Ring
- Sintepol
- Pattern

First of all, we transfer the pattern to felt and cut out all the details we need. Next, we sew small parts onto the base with one thread of floss using a blanket stitch. The floss contains six thin threads.

Now we sew the two bases of the keychain together using a blanket stitch, leaving a small hole into which we will then have to carefully insert the synthetic pad. This can be done from the back of the game. After the toy is filled, sew up this hole and sew on a small ring.

Not only girls, but also men can start creating. To do this, you don't have to embroider, sew or glue. You have more male manual labor.

Made of wood
To make such a product, you do not need to be excellent at carving wood. You will need to make an even cut, remove the bark and skin, make a hole for the thread and varnish it. Admit it, there is nothing complicated.

If you think too simple material, you can try to cut out some kind of figure or use a burner to apply some pattern, design, or a significant date in your life to the wood. Yes, whatever your heart desires.

Metal
You can also make your own keychains from improvised materials. For example, someone makes keychains from a bicycle chain, someone from a cartridge, and someone can melt the metal themselves and mold themselves a keychain of the shape they need. It depends on what your imagination is enough for.

Out of traffic jams
Bottle caps can also help you in this difficult choice.

For example, you can take a wine cork, insert a holder into it and attach a ring. And now, the original keychain is ready.

Or you can complicate the task and make, for example, a keychain from a beer bottle. You just need to decorate the outside with something, you can glue rhinestones on the sides if you plan to give it to a girl, and glue your common photo inside.

Then she will always remember you, just as she will hold the keys in her hands.
It’s always not easy to find something in any girl’s bag, and if it’s a small key, then finding it can take a lot of time. For a faster search, you need a large and beautiful keychain. Moreover, it will always emphasize your style and beauty. Let's figure out how you can make a beautiful keychain with your own hands.
How to make a keychain at home?
This world is developing so quickly that we simply do not have time to keep track of everything. At the moment there are hundreds of thousands of different keychains, from different materials, different colors, etc. We'll show you how to make the most simple options, from simple and cheap materials.
How to make a leather keychain?
Let's prepare materials and tools:
Key ring;
- a piece of leather;
- batting;
- scissors;
- pen;
- thread and needle;
- printed template.

1. First we need to decide what shape we want to make the keychain. Then print the template on a piece of paper. As you can see, you can do different shapes- heart, triangle, circle.
2. Apply the leather to the template and draw the cutout area. Leather can be either natural or artificial. We cut out two parts of the keychain, the back and the front, as well as a small strip (see photo).

3. We put the two blanks together and start stitching. We insert the needle from the inside of the future keychain to hide the thread knot. We start stitching with small stitches. Don't forget to put a strip for the ring on one of the edges. Fold it in half and push it into the mold so that it peeks out a little and sew it on. Do not sew up all the edges at once, because you still need to put the filler in the middle.


4. To add volume, add a little batting in the middle. And after that we sew it up completely.

5. We cut off the excess thread, insert the key ring - and our keychain is ready!

How to make a beautiful fabric keychain?

To make such a wonderful and very bright keychain, we need:
Beautiful fabric;
- peltex;
- iron;
- curly scissors;
- thick tape.
Peltex is a material that sticks to fabric under the influence of hot (iron).
1. Let's prepare the fabric we have chosen. It should be ironed well from the inside. Peltex ( white fabric in the photo) no need to iron.

2. Using a round template, transfer the shape to the fabric.

3. We place the decorative element, the letter “C” in the middle of the keychain shape. We stick it in any way possible.

4. Now, we need to attach the peltex. Turn our fabric over to the other side, apply peltex and iron with a hot iron. Apply the iron for 15-20 seconds so that the fabric sticks well.

5. Cut out our circle shape. The prepared part and the back, you can use a different fabric.

6. Sew the top and bottom.

For better reliability, we stitched almost the entire circle. Don't sew everything through, because you still need to insert the tape for the ring.
7 . Trim the edges with curly scissors.

8 . Cut a piece of thick tape, bend it twice and insert it into the keychain. We stitch again.

You can insert a key ring.

We cut off the excess threads and our keychain is ready!
How to make a Lego keychain?

You can also make a beautiful keychain from Lego. All you need is a few Lego bricks and a key ring. To make them convenient to hang, you can make a beautiful wall mount.
We'll tell you how to quickly do itwith your own handsA bright and original keychain made of thread for keys, to decorate a bag, backpack or even as a gift.
To make a keychain from tassels and pompoms for your keys or bag with your own hands, you will need:
- a set of colored yarn/silk for embroidery;
- a piece of cardboard size A6;
- sharp sewing scissors;
- chenille needle (a needle with a wide eye);
- wooden beads with large holes;
- fork;
- scotch;
- carabiner and ring for pendants.
How to make a keychain from yarn and pompoms with your own hands
1. Select a yarn color for the main tassel. Make a small cut in a piece of cardboard, hook the yarn and wrap it around about 35-40 times.
2. Cut a piece of yarn about 50 cm long in the same color. Thread it under the yarn wrapped around the cardboard and tie it in a double knot to keep the bun secure. The ends of the threads hanging on the sides should be the same length. There is no need to trim them.
3. Pull the skein of yarn from the cardboard and cut the loops of yarn using sharp scissors. Gather together all the threads except the two that you wrapped around the bundle. Take a different color of yarn and tie a knot around your bun about 3cm apart. Continue wrapping the other color of yarn around the bun until the “divider strip” is thick enough. Tie a knot and trim the ends of the threads. Now you can trim the remaining threads in the tassel, but the long piece of yarn on top should remain untouched.

4. Now make mini pom poms. Take a fork and pass a yarn, about 25 cm long, between the middle teeth. The ends of the thread can be glued to the fork with tape so that they do not interfere with you.
5. Start wrapping the yarn around the fork as shown in the picture. The bun should be large, but not too big, since the pompom is difficult to tie if it is very “plump”. 15 revolutions is enough. Peel the starting strand of yarn from the fork and use it to tie the bun. Tie tightly and securely. Pull the bun from the fork and tie again.
6. Using sharp scissors, carefully cut the threads that formed the pompom loops. Roll it out in your hand to fluff it up and trim the threads for a smoother, neater look. If you want a two-color pom pom, wrap two colors of yarn around a fork. Follow the link for options on how else you can do it.

7. At the next stage, you need to combine the parts that you made with your own hands into one keychain decoration for your bag or keys. Take long ends threads of the tassels and thread them through a needle with a wide eye. Pass the needle through beads and pompoms in any combination. When finished, pass the needle through the separating ring of the keychain, and back through the beads, pom-poms and tassels. The needle should come straight out through the main part of the brush.
8. Remove the threads from the needle, holding them with your hand. Tie them together with another tassel string to secure them in place. Now adjust the length of the threads. Your DIY keychain is ready!

Now you know how to easily and quickly make an original keychain from tassels, beads and pompoms with your own hands at home. Make it up different variants and color combinations, experiment with shapes and create keychains even from, because bright details can revive even the most inconspicuous thing.


