In modern landscape design so many different options design, elements and details that boldly take part in this. Willow twigs still occupy a leading place in garden decoration.
This is the most popular decorative element that is used by many summer residents and gardeners. There are several prerequisites for this.
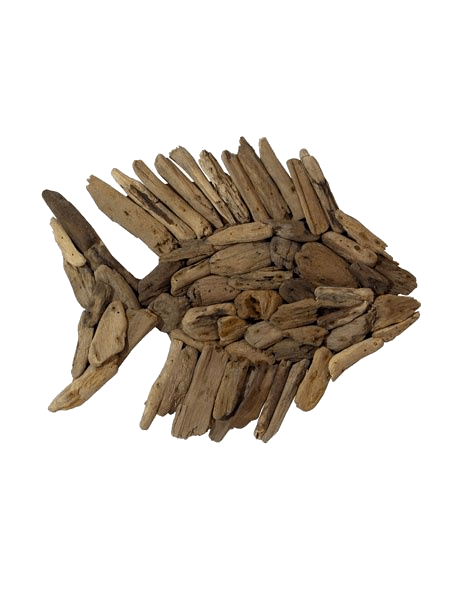
Photo example:
Benefits of using willow twigs in landscape design
The positive characteristics of using willow twigs include many points.
- Firstly, this is a lightweight material that anyone can use, even if they are a novice gardener.
- Secondly, this item is easily accessible as it can be purchased at any gardening store.
- Thirdly, the most important feature is that all wicker items and things made from them will be high-quality things.
- Willow rods are very durable and strong, so any object can withstand the load.
- You can use them to make furniture, decorative toys, figurines, weave fences, hedges, utensils and many other objects.

Which willow twigs are suitable for weaving?
Any item that will be made from willow twigs should contain several other smaller types of rods. They will facilitate the manufacturing process and also help hold the structure together for longer service.
You need to use several types of rods.
Willow twigs must be collected during early spring, until the willow begins to secrete juice. Since this is a period of time, all the young shoots will become wet and will not hold well in the product.
You can also start collecting young twigs before the onset of winter, until the snow falls. Other vines, such as willow, straw and reeds, can also be used together in weaving. Some walnut sticks will also work.
It is better to make all these preparations for the winter, so that they dry well during this period of time. And also at this moment their size reaches a normal size, ideal for starting weaving. Photo:

How to weave a green fence from willow branches?
Many gardeners are keen various types landscape design. With its help, they create a certain style in the yard. This can be helped not only by planting plants and arranging objects of beauty, but also by woven items with your own hands.
Every yard always needs a fence or some kind of hedge that will block the path and cover some object. Some people plant plants densely and form a hedge from it. It's beautiful, but it can be found in almost everyone's yard.
But to weave a fence from willow twigs with your own hands is something not everyone can think of. This original weaving will add beauty and grace to the yard, filling it with ancient Russian style.
Technique for creating a wicker willow fence
- Initially, you need to select thick sticks, which will serve as a certain height of the fence, as well as support for weaving the rods around them.
- These sticks need to be placed at a distance of about half a meter from each other. It is better to treat the sticks at the base with a special solution that will protect the tree from rotting and harmful insects that will spoil and gnaw it.
- To prevent water from stagnating at the base, you need to dig a trench and fill it with sand. You need to dig sticks into such a foundation. Well, after the process is underway twig weaving.
- They are secured to sticks that are securely buried in the ground. Each twig is tied to the base, secured and woven from one stick to another.
- There is no point in maintaining any straight positions or lines here. It is enough to pull tightly, braid the pole and move on.

Hello, friends, readers and guests of the Domovenok-Art blog! Those who have been with us for a long time are probably accustomed to the fact that handicrafts here, as a rule, are homemade (that’s how it was originally intended). But today’s master class is clearly out of line with the general concept of the blog. Let's go outside! Because today we will weave... Yes! DIY decorative wattle fence made from grapevine.
Part 1. Fabulous
For a long time, a vineyard grew in one magical and very picturesque place. Every year he produced a long vine that entwined itself around everything that came in its way. Special support posts, stretched wire, or even just tall grass or nearby bushes. And by autumn, juicy bunches of grapes ripened on the vine. However, there was so much of this vine that if it weren’t for the people who care for the vineyard and annually cut off these long arms, our vineyard would have gone wild and stopped producing such wonderful, varied fruits.

Every spring a huge mountain of pruned vines was collected. Lonely, having served its purpose, sadly lying a pile of thin branches that had given up their juices and were sent into exile from the cozy garden... And so she lay until she indulged in the bright flame of the May fire...
But one day... a creative being approached this pile of drying branches and decided:
💬 “This year everything will be different. You can give these branches new life, but in a slightly modified form. Let there be a wicker fence made of vines!”
And what, good idea improve the place where grapes grow and more! Make a fence with your own hands from the same vine... A small cozy fence. After all, no one in this place has ever seriously engaged in landscape design, and this will be the first step.
And as you guessed, there are no barriers for a creative entity if it has decided to help something appear in this world, to create something. And so, a few hours later, the area was decorated with this same decorative fence (which is in the first photo), and this place became much more beautiful than it was before.
To tell the truth, the entity did not only plan to make a fence. But about that for now, shh...
And today I will act as an information guide and show you how to make this wattle fence with your own hands from a grapevine. And yes, it’s really easy to do it yourself, even if you are a girl, a young woman, or a representative of the fair sex.
Part 2. Practical. We make a wattle fence with our own hands from a grapevine.
Did you like the fairy tale? Now to the point! If you have any other thin long branches - ok. With them the fence will turn out even more even. However, give you practical recommendations I can’t handle the preparation of other materials. But as for the grapevine, I can say that it is best to use a recently cut vine, since it is more flexible and easier to lay down without creases. But, if it so happens that you missed this moment, it’s okay, a fence can be woven from a vine that has lain for a couple of months and has dried out quite well.
How do I know? Because this is exactly my story.
So, I offer the master class in 2 formats: a full video and the resulting text. Watch the video right now. Read the text below)))
To make a grapevine wattle we need only three types of materials:
- the vine is straighter and longer;
- thicker sticks (for example, cherry, acacia);
- wire.
And women's instruments))))):
- hacksaw;
- hammer;
- sharp knife;
- pruner;
- pliers.
How to make a wicker fence from a grapevine with your own hands
Cut the thick sticks into equal parts. To do this, you need to know the future height of the fence, plus a margin of about 20 cm for driving into the ground.
One end of the pegs must be sharpened using a knife. With this end, the pegs, also known as fence posts, will be driven into the ground. And the sharper it is, the easier it will be for the prepared sticks to fit in. It is necessary to drive in at not very large intervals, for me it is 25-30 cm maximum. This way the vine on the fence will stay tighter and therefore stronger.

I suggest weaving this fence from a grapevine in 2 twigs (this is how I weaved baskets in the article with). Those who tried to make baskets from paper vine, now they can show their skills))) Because the processes are somewhat similar, with the exception of growing the vine.
The rods themselves need to be prepared, branches and old mustaches must be cut off...
So, connect 2 vines at one end with wire. Now start braiding each post crosswise so that, as an example, the far twig is always above the front one.

If the length of the planned vine fence is large, then, naturally, the rods will have to be increased. Just slide them under the ones that have already been woven.
You can start the next row on the opposite side. But at the same time, follow the rule of the “distant twig from above”))) So that everything goes in the same direction. Continue to the desired height.

Wicker wicker. Final touches
So, the do-it-yourself grapevine wattle fence is almost ready. All that remains is to consolidate the success. More precisely, the upper twigs so that they do not slide up. To do this, they must be tied with wire to the racks in several places. Be sure to attach the vine to the outer posts in this way! In this form, the fence is not afraid of either rain or wind.
If any of the stakes are too long, trim them using pruning shears. Or drive it deeper. And that is all!

Congratulations! We have just made our own wattle fence from grapevines. As you can see, everything is so simple that you can actually cope with a fairly long fence in a few hours. Moreover, on your own 😉 And it’s really faster than weaving. I checked :)
A little philosophy of grapevine weaving
And yes! You know, when I saw this fence for the first time, and then compared it with what they weave on the Internet (what are you weaving!!! 😄))))), but not from a vine, but from willow, walnut and other smooth, specially prepared sticks, At first I even wondered if it was necessary to show this fence and master class online. But then, looking from the other side, more broadly, I remembered how Indian women, when weaving rugs, deliberately leave some kind of flaw as a sign that there is no ideal in the world.
The use of natural objects, in in this case ordinary branches will help create a unique atmosphere in your home. Eco-decor made from branches is not a new idea, but it is incredibly interesting, especially for handmade lovers. We have selected ideas for you that will inspire you to create eco-friendly home decor.
Walking through the forest, you can find a lot of interesting, intricate driftwood, large and small dry branches, and then use them to decorate your home. You can also purchase them at a specialty store. If you find dry branches, you must clean them and apply a layer of a product that will protect your product from wood beetles and larvae. Prepared branches can be coated with stain and varnish to preserve their original appearance.
In what interior style are dry branches used?
You can decorate your home with dry branches in any interior style. The most important thing is that the decor is combined with the main idea of the style and does not seem out of place. There is no need to overload the room with a large number of branches. Remember that everything should be in moderation.

When we use tree branches for decoration in our home, we seem to become closer to nature, which adds originality and exclusivity to the environment.
Eco-decor elements made from tree branches
Compositions made from tree branches can be quite diverse. It all depends on your imagination. For example, you can decorate vases, candles, old flower pots.

Tie the mirror with woven branches, which will give it some originality.

You can also decorate photo frames with branches. This will be a pleasant gift not only for yourself, but also for your loved ones. Very often we can see the front door decorated with a wreath of dry branches. This is an interesting decorative element for your home.


You can also decorate a floor vase with dry branches, which will add a bit of originality. This type of decor is the easiest to create; you just need to put the prepared branches in a vase.


Small tree branches can be placed in vases, which can then be placed on a table or shelves.

If you attach paper, plastic or textile fruits to the branches, you can admire the fruit-bearing tree without leaving your room.

A painting made from dry branches will look very unusual and elegant.

You can use a decorative branch as a jewelry holder.

To prevent the wall from looking empty, you can easily decorate it using ordinary branches. And with the addition of lighting it will look more impressive.


You can decorate decorative branches with pebbles and shells of various sizes. And in New Year's Eve Instead of a Christmas tree, you can use a dry branch and hang it with festive attributes.


Dry branches can also be used in the interior of a children's room. Branch above the bed, decorated various toys, bows will give this room a certain fabulousness.

The branches will also look very interesting in the kitchen interior. Dry twigs of the same length will help to perfectly hide an unsightly battery. You can make your own hot stands from ordinary branches. And how interesting will the magnets on the refrigerator look, made from small dry twigs and tied with a ribbon.


You can also use dry branches for bathroom decor. This could be a paper holder made of dry knots, a hanger or hook for towels and other small items.

Decorative branches are not only beautiful, but also convenient
Dry tree branches are used not only as a decorative element, but also as a functionally necessary element in the interior. They can be used as an addition to furniture.


From dry branches you can make a coffee table, chair, comfortable and roomy bookshelves, floor lamps, complementing them with decorative materials.


Railings made from simple dry branches will look very interesting in the interior.


If you have a small room area and would like to visually separate the zones, an interesting design move would be to use dry branches as partitions. This division into zones will look stylish.


In the interior of the bedroom you can use a screen made of branches.

Hangers made from dry branches look very creative.


Lighting fixtures made from branches
Chandeliers or lamps that are created using wooden branches will give your room a fabulous atmosphere.


You can make your own lamp. But when creating your masterpiece, remember safety precautions.

You can make such a lamp with your own hands. You just need to determine what shape you want to give it. Will it be a snowflake lamp, a sconce made of twigs, or just a lamp in the shape of a ball.
Let us consider step by step the process of creating a spherical wooden chandelier:
- You can buy decorative branches at a specialty store, or find them in the park. Select only branches that are at least 9 cm long and have an unusual shape. You will also need an inflatable balloon, hot glue, cling film, pruning shears, a light bulb and a lampshade.
- Wrap the ball in cling film. Then cover it with prepared branches. When the glue is dry, pierce the balloon and remove it.
- Insert the base with the light bulb inside the chandelier and secure it. The wooden lamp in the shape of a ball is ready.


In order to make a lamp from ordinary driftwood, you will need:
- dry branch, diameter from 3.5 cm;
- board;
- sockets and lamps;
- screws and nails;
- engraver or knife, soldering iron, saw, pliers and screwdriver;
Let's look at creating a chandelier step by step.
The branch must be cleared of bark and a groove made with an engraver or wire knife. Using a drill, we make holes in the board for the screw and wire.

We cut branches that are at least 3.5 cm in diameter into pieces 5 cm long. The middle must be drilled out and the cartridges inserted inside.

We connect one end of the wire to the “wooden” socket, and the other to the hole on a large branch. We do this with all cartridges. We lay the wire along the groove and solder all the wires together. The lamp is ready.
The whimsical outlines of the branches involuntarily attract attention, and you want to capture this subtle beauty not only in memory or in photographs, but also in real life. If desired, you can add an unusual decorative touch to the interior by creating interesting compositions or creative products with utilitarian features. Crafts from tree branches are a great hobby that allows you to create beautiful decorative elements with your own hands without investing any financial costs. The interior of a house, decorated with this natural material, acquires a special sophistication, where everything is aimed at emphasizing its individuality. Before starting work, the blank for the future craft should be carefully prepared, taking into account individual characteristics wood
Crafts from branches - material preparation
For creative activity To decorate the chosen room (it could be, and even) you will need well-dried branches. They are easy to collect during forest walks, and also to pick up in a public garden or park. You can independently dry the branches that remain after performing sanitary pruning measures.
Before working, dry the material carefully for further use:
Inspected for cracks;
Cleans from dust and dirt;
Peeling areas on the bark are sanded.
To prevent the appearance of unwanted larvae in the house, it is necessary to carry out disinfection using a low concentration solution of potassium permanganate, known to many. Depending on the design, the branches can be painted in the desired tone, covered with stain or varnish.


Decoration of various items
Having brought home a bouquet, you can quickly make a creative vase using branches. To do this, take any suitable jar - tin, glass, and cut pieces of branches slightly longer than the height of the container.
They are placed close to each other in a vertical direction on the outer surface of the jar and secured by tying it with a beautiful braid or ribbon. You can plant twigs on glue. Flower pots are decorated in the same way.


To make this wonderful vase, in addition to the glass base, you will need: glue gun, dry willow or birch sticks, wire cutters.
- Harvested branches need to be cleared of bark. It is better to do this when the wood has not yet dried, so it will be much easier to remove the bark;
- Next, using wire cutters, cut the bare branches into small pieces. Their size should be calculated based on the height of your workpiece;
- After the material has dried, we glue each stick to the base so that we get a kind of lathing;
- It remains to give the glue time to dry for 10-15 minutes. Congratulations, the twig vase is ready!
Crafts made from branches will always find their worthy use in decorating the interior of a house or apartment. Their shape and size can be completely different, because for their manufacture you can use various material. Products made from bark, wood chips, driftwood, sawn logs or large branches, etc. will look good. It all depends on your imagination and personal preferences.

Branches installed inside will look no less original glass jar continuous layer over the entire lateral plane. To prevent them from falling apart in a makeshift vase, the bouquet should be quite voluminous.
For the products described above, you will need fairly even trimmings from the lower ends of the branches. The upper thin stems will help create a delightful evening with the flickering of candles. To do this, simply place them in a glass container so that they rise above it, pour no more than half the volume with water and lower the floating candles.


Charming compositions from branches
To bring an unusual accent to a room, for example, a bedroom, trunks topped with a web of thin branches, placed at the head of the bed in a niche cut into one side of the coffee table top, will help. A tall floor vase containing dried cereals along with branches will look elegant in a dining area or office.
Bizarrely curved branched thin tree trunks are placed in a vase and decorated with colors that match the interior decorative elements. These can be sparkling stars or snowflakes on the eve of the New Year, bright valentines on the eve of the corresponding Valentine's Day, or simply butterflies with fancy patterns on their wings, birds, flowers, fruits, leaves from any available material.


By attaching graceful branches to velvet fabric, the color harmonizes with the overall decor, and placing, after gluing on cardboard, the resulting composition in a wooden frame, you can get an elegant interior decoration.
A beautiful branch can be complemented with golden bows, New Year's balls or forest cones. This decoration will help good mood and evoke only positive emotions. In addition, New Year's decorations will create a festive atmosphere on the eve of the main winter celebration.


Branches in the interior: step-by-step master class
Tall trunks of shrubs (usually willow) will allow you to do this in an unusual way. For example, separate the sofa corner from the rest of the space in the living room. This partition is made very simply:
- To do this, take a wooden beam of the required length as a stand. You can use absolutely any type of wood.
- Two rows of non-through holes are drilled in the timber in a checkerboard pattern, in which prepared branches are fixed vertically to glue. Their length should be about a meter less than the height of the room. The step depends on how openwork the resulting screen should be.
- To make the product look stylish, it is varnished.


Current bedroom design ideas are limitless - birch trunks in the interior are proof of this

Trimmings of trunks with a diameter of 8-10 cm with strong branches extending upward from the side at an acute angle easily turn into dear hangers. They can be mounted on the wall in the hallway, creating a natural corner with a specific purpose. Among the designer finds you can find birch trunks that act as cornices and even posts near the bed for attaching a canopy.
The picture will be complemented by a coffee table, the base of which is a bundle of branches fastened vertically into a stable cylinder, and the tabletop is durable glass of a round or oval shape.
You can make an option with an unexpected effect by fastening the branches in the shape of a cube and laying it on the floor on the side edge. A plastic or glass square table top is placed on top.


Wall mirrors are often decorated with branches. They can be glued along the entire perimeter perpendicular to the frame or along it. There can be many options. Craftsmen easily make frames for photographs, children's drawings, and reproductions of favorite paintings from scraps of thin trunks.
A gracefully curved thick branch can become the basis of a table lamp. A branch with many branches, mounted on the wall near the mirror on the dressing table, will allow you to easily place all the jewelry.


This kind of work requires gentle female hands and special attention

Creative inspiration is the main incentive for a person who wants to create beautiful DIY crafts from branches.
In spacious hallways, one wall can be turned into a fairy-tale forest by installing trunks reaching to the ceiling behind a high plinth with LED lighting installed near the floor. This is one of the best ways Give your interior a picturesque look. Both thin and thick tree branches can be used as material.
Small items made from dried driftwood will look original. For variety, you can use tree bark and wood chips, later combining everything into a single composition.
We make decor from branches with our own hands
Crafts made from branches are always distinguished by their originality and unique design. With the help of these simple sticks and twigs you can create beautiful designer decor on absolutely any theme. , paintings, wreaths, flower pots, fancy animal figurines - this is just a small part of what can be created from this wonderful natural material.
- Making a wreath from branches is probably one of the simplest tasks that even a child can do. Take thin rods of willow wood and weave them together into a tight ring, then carefully tie them copper wire. As an additional decoration for the wreath, you can use tree leaves, flowers, and forest cones.
- You can revive an inconspicuous tree branch using ordinary snowflakes. Cut them out of paper, foil or colored felt and hang them on each branch. Such compositions will look great in the house against a wall with beautiful wallpaper.
- If you have any broken light bulbs, they can also be used as decoration. From soft wire make a special mount with which you can hang them on a branch so that the bulb base is at the top. Next, through a hole specially made in the base, the light bulb is half filled with water. All that remains is to give our miniature an elegant look. To do this, the branch can be decorated with decorative braid, ribbons and bows.
Despite the fact that the process of creating some crafts is quite long and labor-intensive, the result of the work done will be amazing.


Even the most ordinary painted twigs can be an excellent material for making fun crafts. For example, unique products made from star-shaped branches will look very beautiful and fun in interior design. You can make them with your own hands on a regular table.
- Preparation of material. For each craft we will need 5 sticks. These can be branches of any tree, the main thing is that they are even and of the same length. The material should be dried and varnished in advance, so your products will last longer. We also need thread, rope or thin ribbon. With their help we will tie the ends of our sticks.
- Making a star. Place the sticks on the table so that they form a closed pentagonal star shape. Tie each formed corner with thread or rope and decorate with satin ribbons. The resulting star can be hung on the Christmas tree or given to friends.

To create something unique for your interior, do not copy someone else’s ideas, but try to do everything yourself. Feel the mood of your home, think about what exactly is missing in it, what things and objects could highlight your own style. Write down everything that comes to your mind in a notebook - these thoughts may be useful to you when creating an interior design.
Pay attention to the little things. It is they, in creative union with non-standard design solutions, that create an unsurpassed atmosphere and place emphasis on a specific element of the interior.


Original floor lamp - creative decoration interior


Crafts from branches are not only beautiful, but also profitable. The main advantage is that their production does not require any funds, because the material itself is literally lying under our feet. Moreover, all compositions can be created with your own hands, involving your children in this entertaining process.
Crafts made from branches can be easily and quickly sold, because this unique decor, which is always in high demand. You can also earn extra money by teaching paid master classes on creating designer jewelry for beginners.


We really hope that this article was useful to you. Create, create, experiment and it’s possible interesting hobby will grow into your professional field of activity.
Grapevine is a malleable and beautiful natural material. Elements of street decor or fencing created from it look very organic among the vegetation, giving a special charm to the garden.

A fence woven from tree twigs was once a popular way to create boundaries between garden plots. Even today, sections of such a fence can be found on sale. But in order to make such a fence yourself, you need to have a lot of material, and you also need serious strength to assemble it.
But cutting several twigs from the branches that remained after the spring pruning of trees is something even a “tender” gardener can do. And the purpose of our use is not to hide from neighbors, but to solve some problems in the garden.
Options for using wicker fencing in the garden.
How can you use a woven fence made from sticks and vines? Here are just a few ideas for you
- Having sowed plants in the spring in a place where you have not planted anything in the garden before, you can surround it with a temporary wicker fence so as not to accidentally trample the seedlings, this is especially true if you sow plants behind a fence,
- A short wedge made of grape twigs can serve as support for tall plants with flexible stems
- This fence can be used to collect a crumbling bush of peonies or roses.
- If you have a dog, a wicker fence can protect your plant from urine burns.

- And if you surround the entire flowerbed with such weaving, there is a chance that the flowerbed will become more “visible” to pets, and they will be less likely to encroach on the safety of the flowers planted there.
All of the above problems can, of course, be solved with the help of special plastic devices, but wooden weaving made from natural material looks much more natural for the garden, and it doesn’t cost anything.
Materials used and manufacturing steps

And nature itself gives us materials. Branches (preferably straight and with smooth bark) and vines. Moreover, here we mean girlish grapes, which quickly grow and recover. If you don’t have one like this on your property, then in the immediate area you can definitely find a wall or fence tightly woven with girl’s grapes. Even if it is a neighbor’s, you don’t have to worry that you are damaging the hedge - such grapes grow very quickly and luxuriantly, so borrowing a few vines will not disturb the overall picture.
So, to make a wicker fence:
1. Use pruning shears to cut off the woody vines of the grapes and tear off the leaves from them. You don’t have to remove the antennae - once they dry, they will only add beauty.

2. Determine the height of the planned fence. If it's easy decorative design for a flower bed, we choose the height based on the height of the flowers. If we protect a plant from pets, then we proceed from the size of the animal from which we will protect.
3. We cut the branches to such a length that it is larger than the planned height, since they will need to be stuck into the ground. How deep depends on what kind of soil you have.
5. We weave the vine between them one after another. Starting from the bottom, we gradually reach the top.
6. At first, the vine will hold perfectly on the supports in the position you braided it. But over time, when it dries, it will most likely move to the bottom. To prevent this from happening, you need to secure the vine to the posts using a garden rope or other suitable material.
A beautiful, decorative, natural fence is ready. To stylistically connect all the elements in the garden, you can also decorate several flower pots or flowerpots.


