Summary: DIY crafts for mom on March 8th. Beautiful paper crafts for March 8th in kindergarten. Crafts for March 8th for school.
Any mother or grandmother will be pleased to receive a homemade gift from her child on March 8th. On our website you will find a wide variety of March 8 crafts for children. For preschool and younger children school age You may need the help of an adult when making a DIY gift for mom. Kids need to prepare in advance all the materials necessary for creativity. Their participation in making crafts for March 8 will be small for now. Older children preschool age They can cut out the details of crafts themselves from colored paper, glue simple structures, and fold simple crafts out of paper using the origami technique. Encourage your child to show imagination and independence when making crafts for March 8 with your own hands.
A handmade postcard for March 8th can be either an independent gift or an addition to the main gift.
In a special article we talked about how to make original cards for March 8th for mothers and grandmothers. See link. After reading this article, you will learn how to make simple and voluminous cards for your beloved women. Postcards decorated with flowers, postcards in the shape of women's hats, handbags, dresses and cups of tea, origami postcards and much more. It is impossible to imagine March 8 without flowers. And if dad gives mom a bouquet of live tulips or mimosas on March 8, then the child can please his beloved mom or grandmother with homemade paper flowers. Read our special article on how to make paper flowers.

Here you will find master classes on making flowers from ordinary and

corrugated paper For mom on March 8th there will be homemade flowers, which the child will give in a handmade vase. For information on how to make a vase with your own hands, see our special article.

We will tell you how to make a vase from an ordinary glass bottle and corrugated paper, and how to make a beautiful vase using the decoupage technique.
You will learn how to make an original vase from threads or clothespins; you will also find a master class on making a vase from natural materials (birch bark, tree branches).

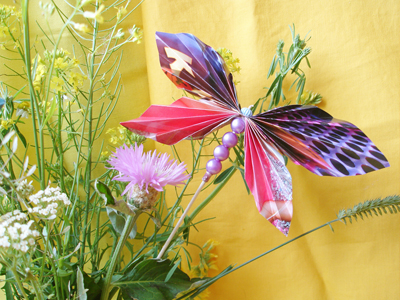
A bouquet of homemade flowers can be complemented by a bright, colorful butterfly made by a child with his own hands from paper and beautiful beads. See link.


Any mother will be delighted with a stylish bracelet made by her child especially for her. We will teach you how to weave bracelets from beads, beads, threads, laces, and paper. You will also learn how to make bracelets from wooden ice cream sticks or plastic bottles, and learn how to weave baubles.

Read the article “Do it yourself bracelets” on our website.
A beautiful craft for March 8th - a homemade fan. This craft for March 8th will be interesting to do not only for girls, but also for boys. We will tell you how to make a fan from paper and wooden ice cream sticks.

Also from the article “How to make a fan with your own hands” you will learn how to make an original fan from plastic disposable forks.


By the way, you can complement your handbag with a wallet made from a milk or juice carton. Read the instructions. Paper shoes To make an elegant paper shoe like the one in the photo below, you need to use a ready-made template.
When something is done with your own hands, it takes on individual characteristics. How an artist puts a piece of his soul, leaving it in each of his paintings, how a writer shares his inner world. Such things immediately acquire their own unique features, their own aura, which makes them priceless. Let's look at some DIY crafts for March 8, the most beautiful ones you can make.
Purchased surprises do not have such an aura, because they are made by faceless craftsmen for the masses. That's why mothers usually keep their children's handicrafts, first postcards, plasticine figures, and sewn toys. They may be lopsided and simple, but truly priceless.
Many people use plasticine for a comfortable and soft base into which they can stick spoons and other craft materials. It’s easy to come up with your own gift idea by looking at the examples. simple crafts. For example, daisies with petals collected from the same white spoons, complemented by wide tubes left over from cocktails, or assemble a whole picture using spoons.
Here only the frame is taken separately and ready-made, everything else is a flight of thought and available materials.
You can make any flower, depending on what the recipient likes. Whether there will be poppies or chrysanthemums, the main thing is to know the shape of the petals and the design.
Master class with step by step photos: A small bouquet for mom. Senior group.
Natalya Aleksandrovna Tsutserova, teacher, GBOU Secondary School No. 33-SP " Kindergarten No. 22" Syzran, Samara regionThe material will be useful for educators, additional education teachers, teachers primary classes, parents and just creative people. Options proposed in master class can be performed at the teacher's discretion.
Target: teach how to design a holiday gift with your own hands.
Tasks:
Improve knowledge about flowers appearance.
Enrich and expand knowledge about flowers (rose, chamomile, daffodil, forget-me-not, cornflower)
Develop compositional skills.
Strengthen skills in working with paper and scissors.
Activate speech.
Materials: colored double-sided paper (red, green, white, yellow, blue color), blue corrugated paper, chopped wool thread (yellow, of blue color), scissors, PVA glue, napkins, stencils.

Templates for flowers.


Progress of the master class:
Guys, I suggest you play the ball game “Flower Volleyball”. You need to throw the ball to each other, and when you catch it, name the flower.
- Guys, what holiday will be soon? (March 8)
- What holiday is it? (children's answers)
- What gift can you give to your mother or grandmother? (children list)
Guess the riddle:
They are fragrant and cute
They make wreaths from them,
On holidays they give
What are they called? (Flowers)
- Yes, guys, you can give your mother a bouquet of flowers. We will now give you a gift of a bouquet of flowers.
- First, you need to remember the rules for working with scissors.
(children list) - When working, you need to be careful and careful.
- When cutting, keep your fingers at a safe distance, so as not to get hurt.
- The scissors should be passed with the rings facing forward.
- After work, the scissors must be closed.
- Now let's get to work. First we'll make some grass. How to make it? (children's guess)
Grass.
1. We will take a sheet of green paper.

2. Spread the edge of the sheet horizontally with glue. Bend and glue. We try not to iron the fold.

3. We make cuts along the entire length of the sheet. The width of the cuts is arbitrary.


4. Next, we make a roller and glue the end. The workpiece is ready.


Next, we make flowers (one type at the teacher’s choice):
Option I (rose)
The bushes bloomed in the garden -
How beautiful their flowers are!
Subtle delicate aroma
Fills the garden in summer.
And until the frost
Will make us happy... (rose)
Yes, it's a beautiful flower. Despite the huge number of different flowers in nature, many people love it. This flower is called the "Queen of Flowers". But few people know why they called her that. The thing is that the birthplace of this flower is Persia, but in ancient times it was called Gulistan, which means “land of roses.”
1. Cut out an 8*8 square from red paper.

2. Cut out a circle.

3. Cut the circle in a spiral.

4. Carefully roll up. Glue the end. The flower is ready.


Next, we collect a pink bouquet. Glue flowers to the grass.

Option II (chamomile)
Guess the riddle:
Here is a flower in a clearing,
The middle will look at the sun,
He himself is wearing a white shirt.
Good in grass... (daisies)
-Where do daisies grow? (in the forest, in the garden, in the vegetable garden) You are right, guys, this is an ordinary wildflower. I want to tell you an interesting legend. Many centuries ago, there lived a couple. They loved each other very much. The guy's name was Roman. Into one beautiful evening he saw in a dream a small, delicate, fragile flower, with a yellow center and white petals. In the morning, Roman saw this flower near his head and gave it to his beloved. The girl was pleasantly surprised and named him chamomile. Her wish was that the flower, like her, would bring and give them to all loving hearts. Then Roman went to the kingdom of dreams. He walked for a long time. Standing before the king, he told the whole story. Then the king agreed, but what a cruel price he paid Roman for the desire of his beloved - he remained in the kingdom of dreams forever. The girl waited a long time for his return, but in vain. Until one morning she saw a clearing of daisies. This is such a sad story.
1. Using a stencil, cut out a chamomile. ( Blanks of other colors)


2. Cut a finely yellow woolen thread. Apply PVA glue to the middle and sprinkle with woolen thread.


3. Glue the flowers to the grass.

Option III (narcissus)
Guess the riddle.
The spring flower has
Signs to avoid mistakes:
The leaf is like garlic,
Ah, a crown like a prince’s! (narcissus)
- Why do you think it was called that? (children's assumptions)
According to mythology, a young man named Narcissus rejected the love of a beautiful nymph. As punishment for this, he was doomed to fall in love with his own reflection in the water. He stopped eating, drinking and came to the pond every day, and from this love he turned into a flower.
1. Cut out a flower from white paper according to the template.

2. Cut out a yellow circle, outline it with a red felt-tip pen. String the yellow circle onto a pencil and glue it to the flower in the middle.


3. Glue the flower to the grass.

Option IV (forget-me-not)
Guess the riddle:
Blooms from May to June
sky-colored petal,
There is a yellow eye in the center,
Tell me, what kind of flower is this? (forget-me-not)
-Guys, why was this flower called forget-me-not? (children's guess)
One day a flower appeared in a forest clearing; it differed from other flowers except in color. It was blue. Every flower knew its name, but this flower did not. All the flowers started asking him what it was called, but he didn’t know. As a result, all the flowers turned away from the nameless flower, apparently to remain lonely. And the flower cried. Suddenly the flower heard a rustling sound. An ant crawled past and carried a large leaf on itself and whispered something. The flower asked him: Can I help you?
“Perhaps you can help me,” said the ant. – Can you remember something? Of course I can, nodded the flower. Then remember: you need to crawl to the meeting in the anthill by the time the sun illuminates the entire clearing. Will you remember? “I’ll remember,” the flower answered confidently.
After some time, an ant appeared in the clearing.
- Well, what did you need to remember? - asked the ant.
-You need to crawl to the meeting in the anthill by the time the sun illuminates the entire clearing.
-Well done! – the ant praised, “You are truly a forget-me-not!”
- Forget-me-not? – the flower repeated thoughtfully and was immediately delighted: “Hurray!” Now I have a name! My name is forget-me-not! Thank you kind ant.
Like this interesting story about a flower.
1. Using a template, cut out a flower from blue double-sided paper.

2. Made of yellow paper - a star. Glue a star to the flower and put a point in the middle with a black felt-tip pen.

3. Connecting the parts.

Option V (cornflower)
Guess the riddle:
Like a blue light
Someone suddenly lit a fire in the rye,
Bright wildflower.
What is this? (cornflower)
- Why do you think he was called “cornflower”? I'll tell you a story now.
A widow lived in the same village with her son Vasil. He was a handsome and hard-working guy. From morning to evening he worked in the field, then went to the river to wash and rest. One day a young mermaid saw him and fell in love. She began to call to her. But Vasil flatly refused to leave his land, his field, he didn’t even want to look at it. The mermaid got angry - if that’s the case, then don’t let anyone get you, but forever become a flower in your field. The flower swayed in the rye. The flower was blue, like the guy’s eyes. And the people named it cornflower after him. This is such an interesting story.
1. Cut out a flower from corrugated paper, glue a woolen thread in the middle. Twist the flower petals a little.
The most beautiful, blooming spring holiday is very close - March 8th! He is a harbinger of spring, beauty and sunny days. On this day everything blooms and smells. The first spring flowers - snowdrops - are blooming, birds are flying in, everything in the area comes to life. On this holiday, all women, girls and girls are waiting for something special. So how can you congratulate your beloved mother, granny, niece, friend, sister?
Of course, the best gift is one made with your own hands. In this article you will see many craft ideas for March 8th.

Craft materials
So what can you use to make a craft for the eighth of March:
- Colored paper or thick cardboard.
- Pasta.
- Plastic spoons (bottles).
- Beads.
- Candies.
- Plasticine.
- Salty dough.

- "Blooming Lily"
- "Flower for Mom"
- Snowdrops spoons.
- Paper rose.
- Unusual chamomile.
- Flower of cotton swabs.
- Magnet - a heart made of salt dough.
Check out the modern home decor on this site. https://masterinterera.ru/dekor

"Blooming Lily"
You will need:
- Colored cardboard (green).
- The paper is white.
- Scissors.
- Heart templates (can be drawn by hand).


Manufacturing progress:
Let's take a heart template and cut it out green paper. Lily flower template cut out. Cut out the center of the lily from yellow colored paper. Glue the flower onto the heart. Attach the yellow center to the flower. The blooming lily is ready!

"Flower for Mom"
We will take:
- Black pencil.
- Thick cardboard.
- Corrugated paper.
- Stencil of a large flower.

Progress:
We outline the stencil on cardboard. Roll balls out of corrugated paper. Dip the resulting balls in glue and glue them onto the flower. The flower is ready!

Snowdrops from spoons
To make these beautiful spring flowers we will need:
- Plasticine mass (green and yellow shades).
- Plastic spoons.
- Already old unnecessary plasticine.
- Cocktail pipes (green).
- Green bottle.
- Napkins (green).
- Flower pot.


Instructions for making crafts:
We twist a ball from unusable plasticine and place it on the bottom of the pot. Roll 7 carrots from green plasticine and do the same with yellow plasticine. Attach a yellow carrot tightly to the tube. We carry out similar actions with all seven cocktail straws.

U plastic spoons Let's cut off the handles. We insert three petals into each tube. We will cut out leaves for our snowdrops from a green bottle. We attach the snowdrops one by one to the plasticine located in our pot. We also attach the leaves.

IN flower pot put green napkins to imitate grass. These wonderful snowdrops are ready, all you have to do is give them to your mother or grandmother.

Rose
To form a flower you will need:
- Double sided paper different shades.
- Green corrugated paper.
- Wire (preferably aluminum).
- Scissors.

Instructions:

- Cut out a circle from multi-colored paper in red shades. Draw a spiral in the resulting circle.
- We cut it carefully in a spiral, trying to be as even as possible. We twist the spiral.
- Glue the resulting structure together. Let it dry. Cut out leaves for the rose from green colored paper.
- Glue the flower bud to the leaves. We wrap the wire in green paper. We attach the bud to its base with glue.


Chamomile from cotton pads
You need:
- Cotton pads.
- White sewing threads.
- Acrylic paint.
- Plasticine mass.
- Durable, varied colored cardboard.
- Miscellaneous colored paper(any color).

Manufacturing process:
First we make the petals of our chamomile; to do this, we twist the cotton pads with the edges up. This is how we make 8-9 petals. We connect the petals with thread.

For the core of the flower, take a disk and dip it in yellow paint. Let it dry. Apply glue to the center and form a flower. Let's make a stem from green paper and 3-4 leaves per stem. Forming a flower. The chamomile is ready.

Chamomile
For fake we will take:
- Cotton swabs.
- Plasticine mass for modeling (yellow).
- Felt pens or markers.
- Scissors.
- Colored cardboard.

Instructions:

We take a piece of colorful cardboard, absolutely any color your heart desires, this will be our basis. Now we need to cut the sticks into two parts, scissors will help us with this.

We make the heart of our inflorescence from plasticine. Roll a plasticine ball. Insert cotton swabs in a circle into the resulting ball.

We stick the resulting flower to thick cardboard. Using markers we draw in the stem and leaves. If you wish, you can add pleasant words congratulations.

Salt dough heart magnet
We will need:
- Corn flour.
- Salty dough.
- PVA glue.
- Magnetic.

Manufacturing process:
First we cook salty dough. To do this, take 300 grams of regular wheat flour and 150 grams of salt, so that the dough can smell sea salt with some kind of smell. Add water and any food coloring. Mix well.

Roll out the dough and use a cookie cutter to give it a heart shape. Let's let our heart dry out.

The dried heart needs to be smeared with glue and decorated with cornmeal on top. Apply glue to the other side of the heart and attach a magnet. You can add beads if you wish.

Finally
Every girl, girl, woman, grandmother will be pleased to receive a gift on this delicate spring holiday. And it’s even nicer if this gift is made by yourself. Therefore, do not be lazy and take a little time to make a gift and give it to your beloved women. By the way, you can show off to your friends photos of the crafts you gave on March 8th.

Photos of crafts for March 8


