Friends, are you ready for the new year? And the holiday is just around the corner. And this is an occasion to work fruitfully with your little ones. What do I suggest? Today we will talk about how and what to make New Year's crafts from salt dough. Required condition- we will create with our kids. We use them in as many processes as possible. In fact, the material is safe and it is easy to wash, and therefore we will allow the crumbs to dirty the hands to the fullest.


Do you know what will add value to these activities? The fact that the child will feel that all this is a very important thing! He will try when he finds out that his crafts will decorate the Christmas tree: as toys (we will hang some of them on the tree) or become part of the festive composition.
Let's decide. Remember? We have a main focus - New Year's theme. There is a basic material - salty dough. And in the kitchen of any hostess there is essential tool. And our children have good helper- We! All that was left was to get down to business.


Ingredients and Tools We'll Need
All we need is:
- Salt;
- Flour;
- Water;
- A little vegetable oil.
Of course, I want the figures to be bright. Therefore, we use any dyes to choose from:
- Food colors;
- Building eco-friendly;
- felt-tip pens;
- Gouache;
- Nail polish (if you need to use very little).
And in order to make dough with your own hands, and then products from dough, you need tools. Prepare in advance:
- bowl;
- rolling pin;
- Cup;
- Scissors;
- Pen/felt pen.
We will need additional tools. We will talk about this in the next topic, when we look at different ideas for creativity.
Variety of decorating ideas

And a sea of ideas! And also flawless! But do not forget, it is worth considering 2 points:
- Abilities and opportunities crumbs;
- Crafts should relate to the theme of the New Year 2018. So, if not the symbol of the year itself, the Dog, we should succeed, then at least try to make golden colors dominate in our products.
And a lot will depend on what tools we have at hand. In principle, absolutely anything can be a tool! And already on what we own, the decorations of the works, and even their shape, will depend.
Now I intend to call what you can use as a handy tool in the manufacture of crafts, and how the work will depend on it.
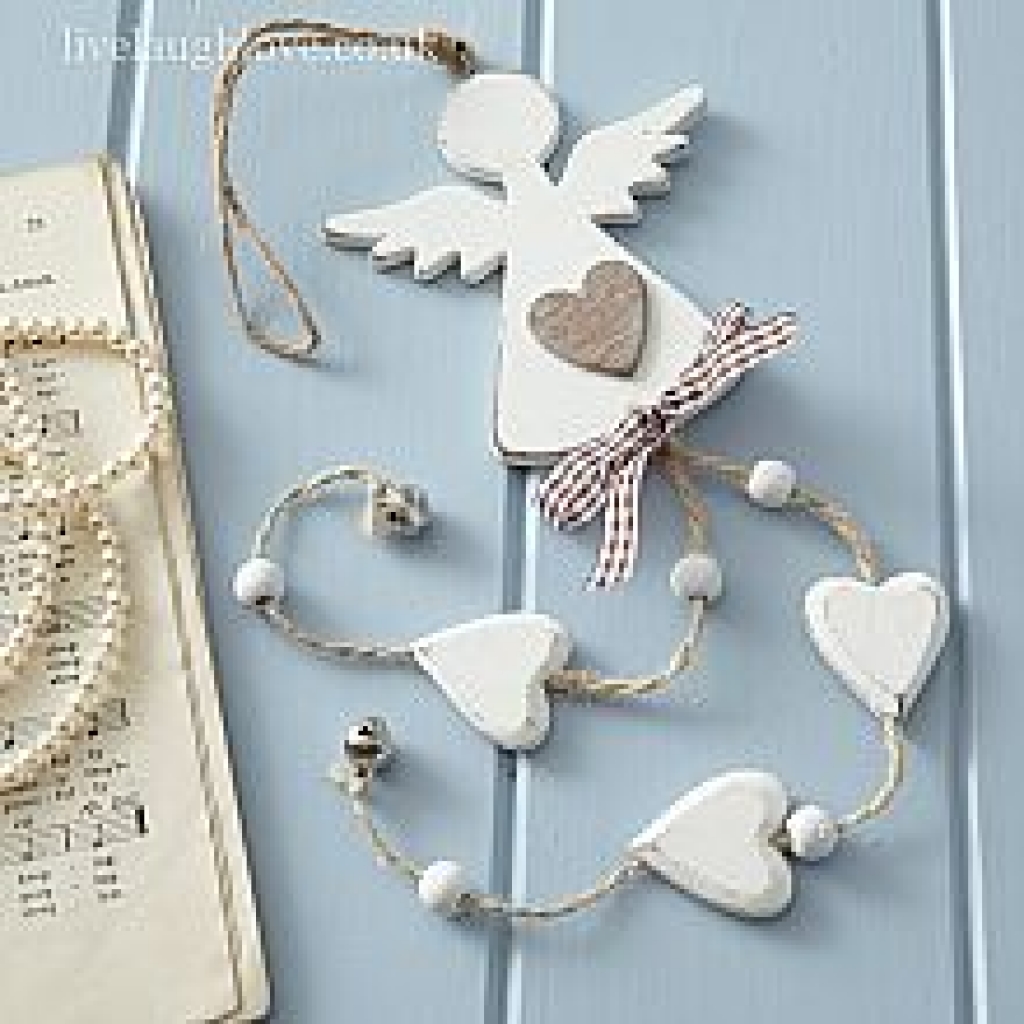
Lace. They will give delicacy to the work. One has only to attach them to the dough and hold with a rolling pin.
Buttons. For children, it will be simple and interesting to press buttons into finished goods to make an unusual texture.
Beads. They can simply sprinkle the finished work, and everything will immediately shine.
cocktail straw- this is an excellent "hole maker", which turns ordinary crafts into lace ones.
Marker. They can draw any patterns.
Arms, legs, paws. Attach the handle of your little one and make a palm print, the same can be done with the leg if you have a baby - a baby. If your dog does not mind, then the prints of its paws will also look symbolic.
Master Class
And now I will share what I and my crumbs did. And at the same time I will conduct a small master class.
Let's start with our video. In it, we show how to knead the dough, how to sculpt a big owl on the Christmas tree, how to decorate the window in the form of a Christmas tree with dough toys.
And now, as the photo lesson promised: how to make a slightly different owl, hedgehog and snowman.
Do you remember the recipe:
- Flour - 1 tbsp.;
- Salt - 1 tbsp.;
- Water.
Salt is better to take fine. It is cleaner, and it mixes better with flour and water. But I specifically took a large one, because I intend to basically bake all the products. And when baking, coarse salt gives an unusual golden color. As for the water. I didn't say how much you need. It took me half a cup. But it is better to focus on how much the dough will “take”, so that it is not liquid.
I will try to attach a photo for each step.
So the ingredients are:

The dough is tough but very flexible. I divide it into 3 parts.

Of the two, I intend to make figures of a Snowman and a Hedgehog. And I’ll divide the third part in half, and the baby and I roll out the mass and twist two circles with a glass.
I am eager to try how flat owls are made.
And the second part is a Christmas tree toy.

Now I will talk about each craft separately.
Snowman
1. I am making the basis for the snowman. I cut out a circle and decorate it by squeezing out a relief with the tip of a knife.

I divide the remaining mass into 3 parts so that one is large, the second is medium, the third is small.
I twist the largest piece in my palms into a ball. I make a small hole in the middle.

I do the same with the second one. So the whole structure will stand firmly without much fastening.
I stick a thin branch into the middle ball. These are the hands of the Snowman. I put a walnut shell on top. It turns out such a hat.

I make a nose from the tip of a toothpick.

How to paint a snowman I won't put it in the oven. Just wait for the dough to stick to the top with a crust. I have matching nail gels. I use them for painting.

The details remained: mouth, eyes, snowflakes according to the Snowman.
And here's what I got.

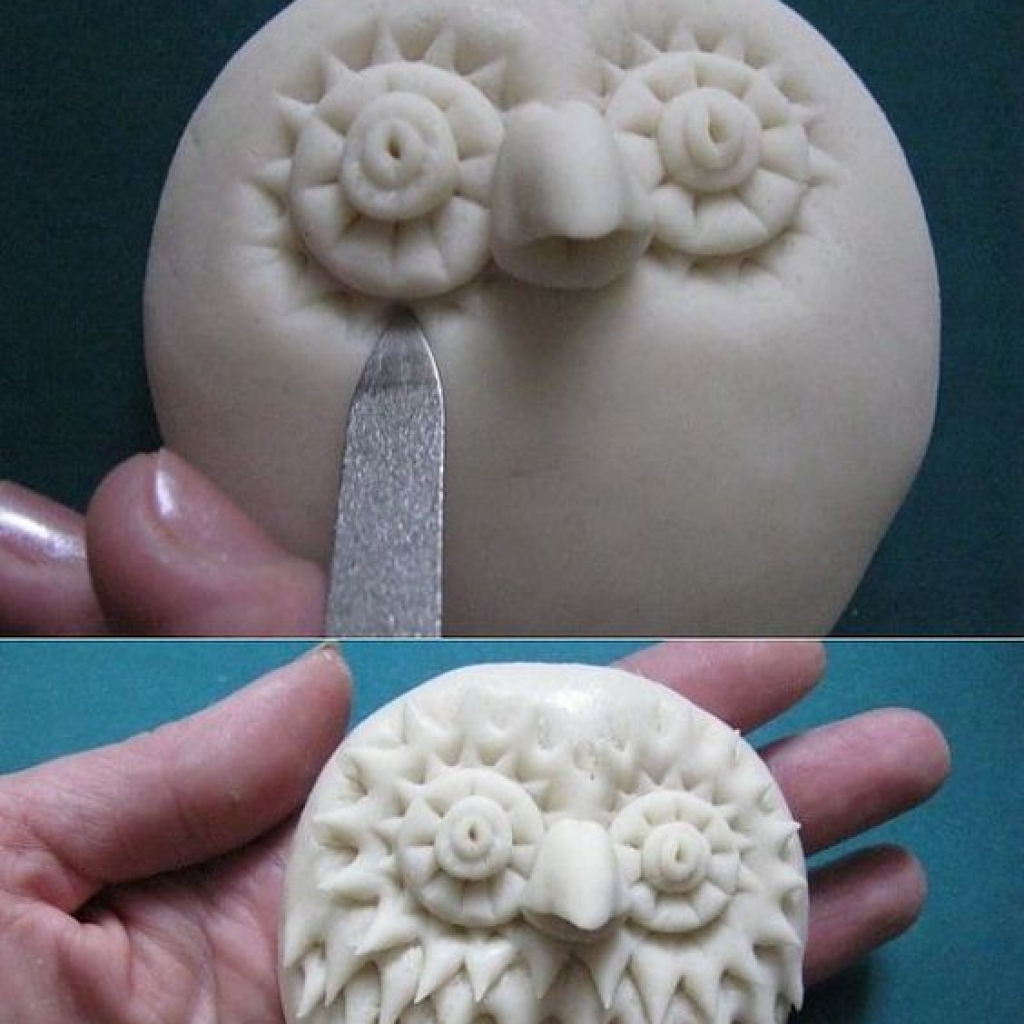
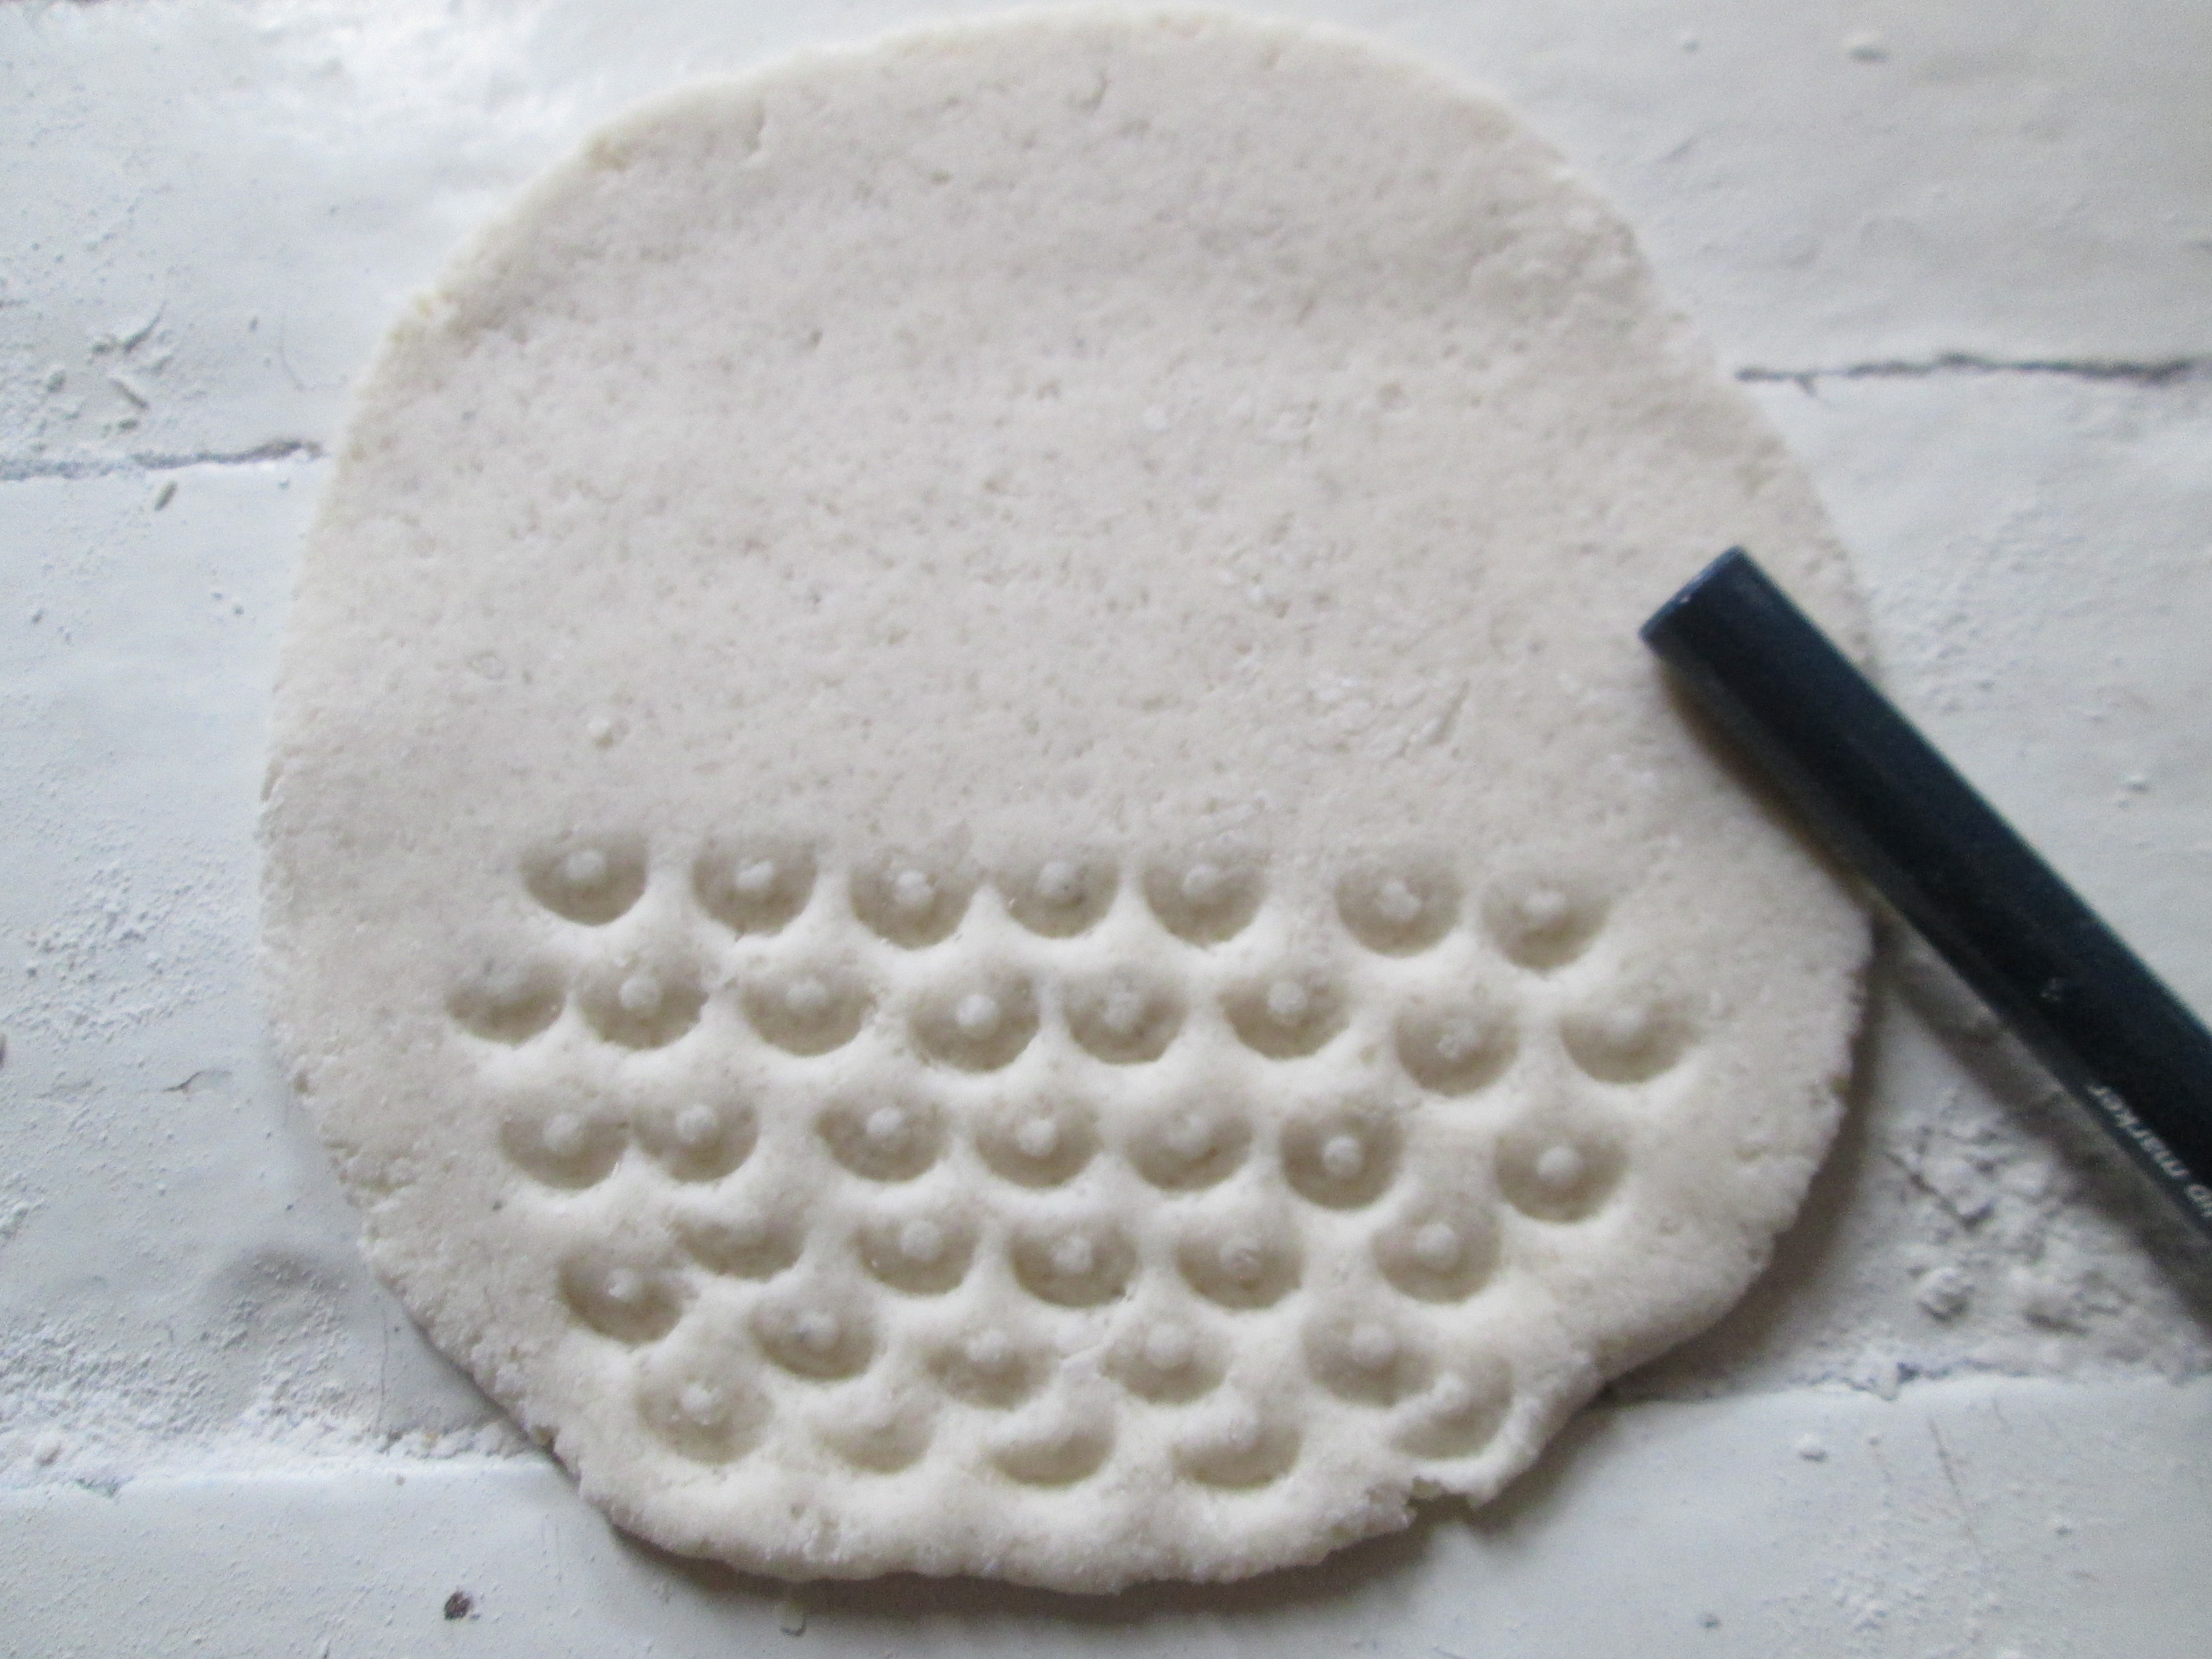
Owl
I squeeze the lower half of the circle with a cap from the pen. It turns out a pattern under the feathers.
I fold the edges on the sides so that they touch each other.

I fold the top half of the base in half and bend a little on top.
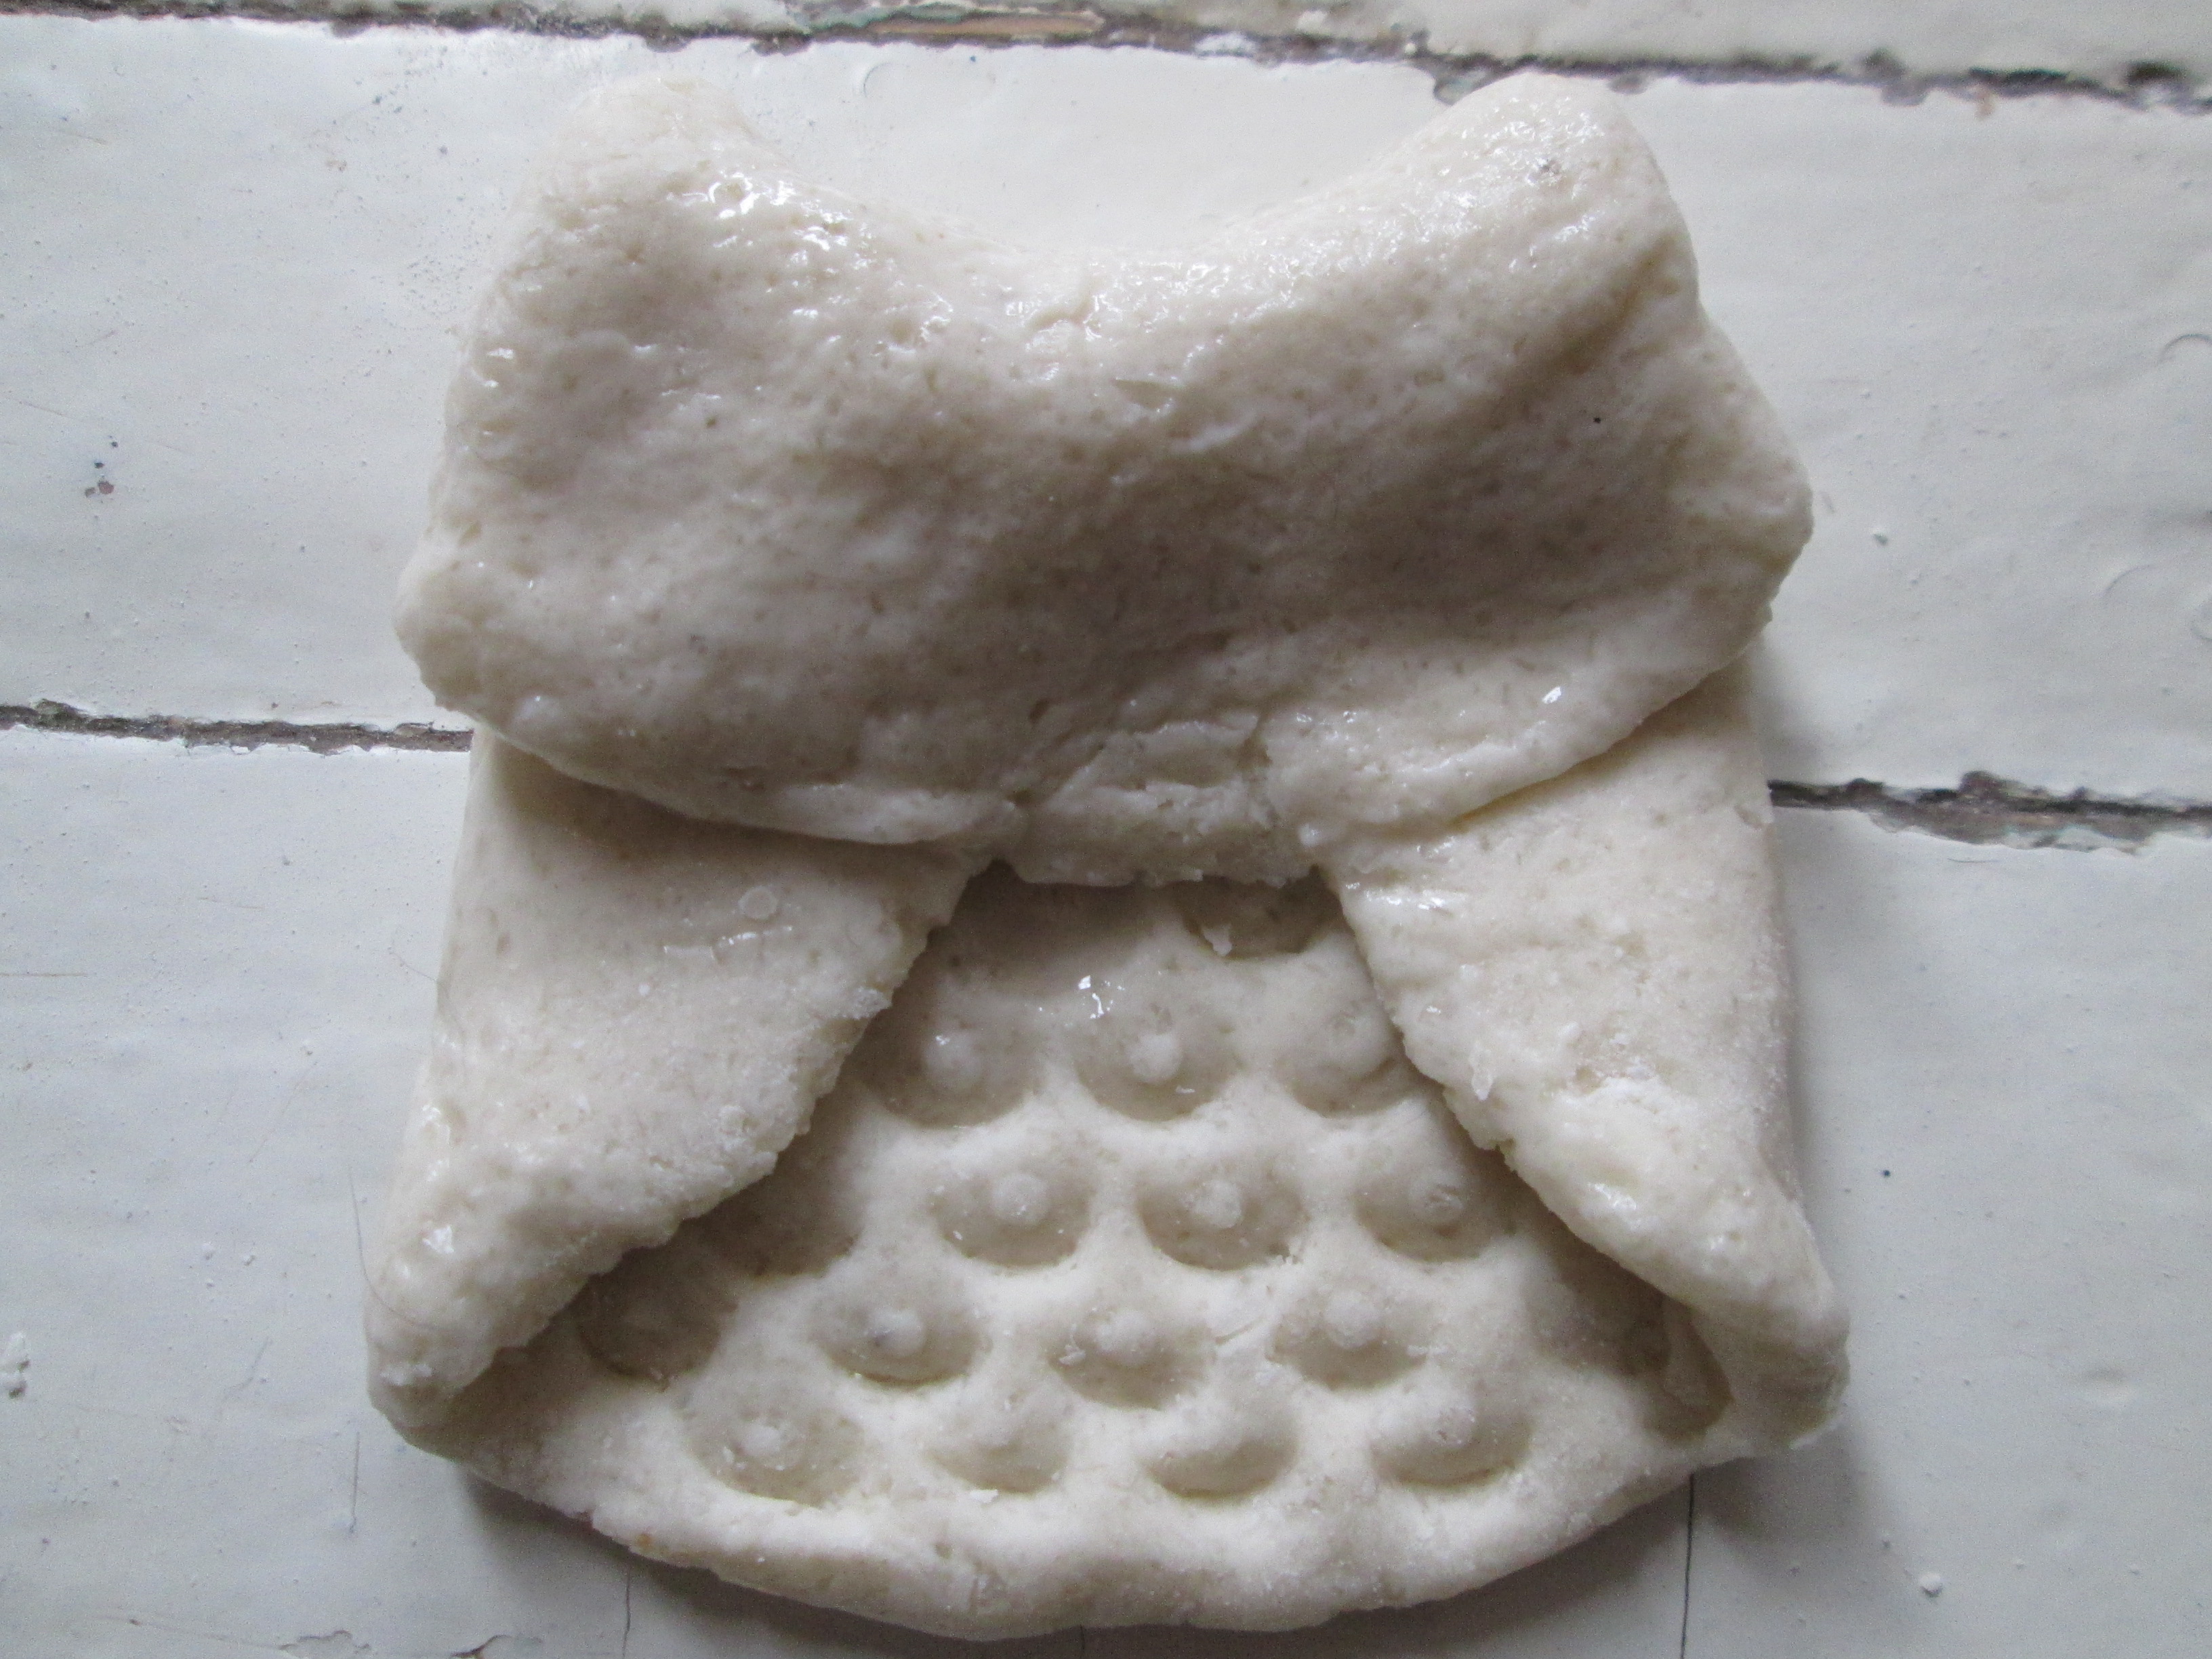
On the top I squeeze out the cap Round eyes and draw a beak.
Round the corners at the bottom. I make the "ears" sharper.

I put it to bake, after lubricating the wings and ears with yolk.

Here is such a golden owl after baking for 7 minutes at 180 degrees.

What else can you make owls?

Toy
I pierce the second round blank from above with a cap through and through. And below I make prints with the same cap.
I put the toy to bake.
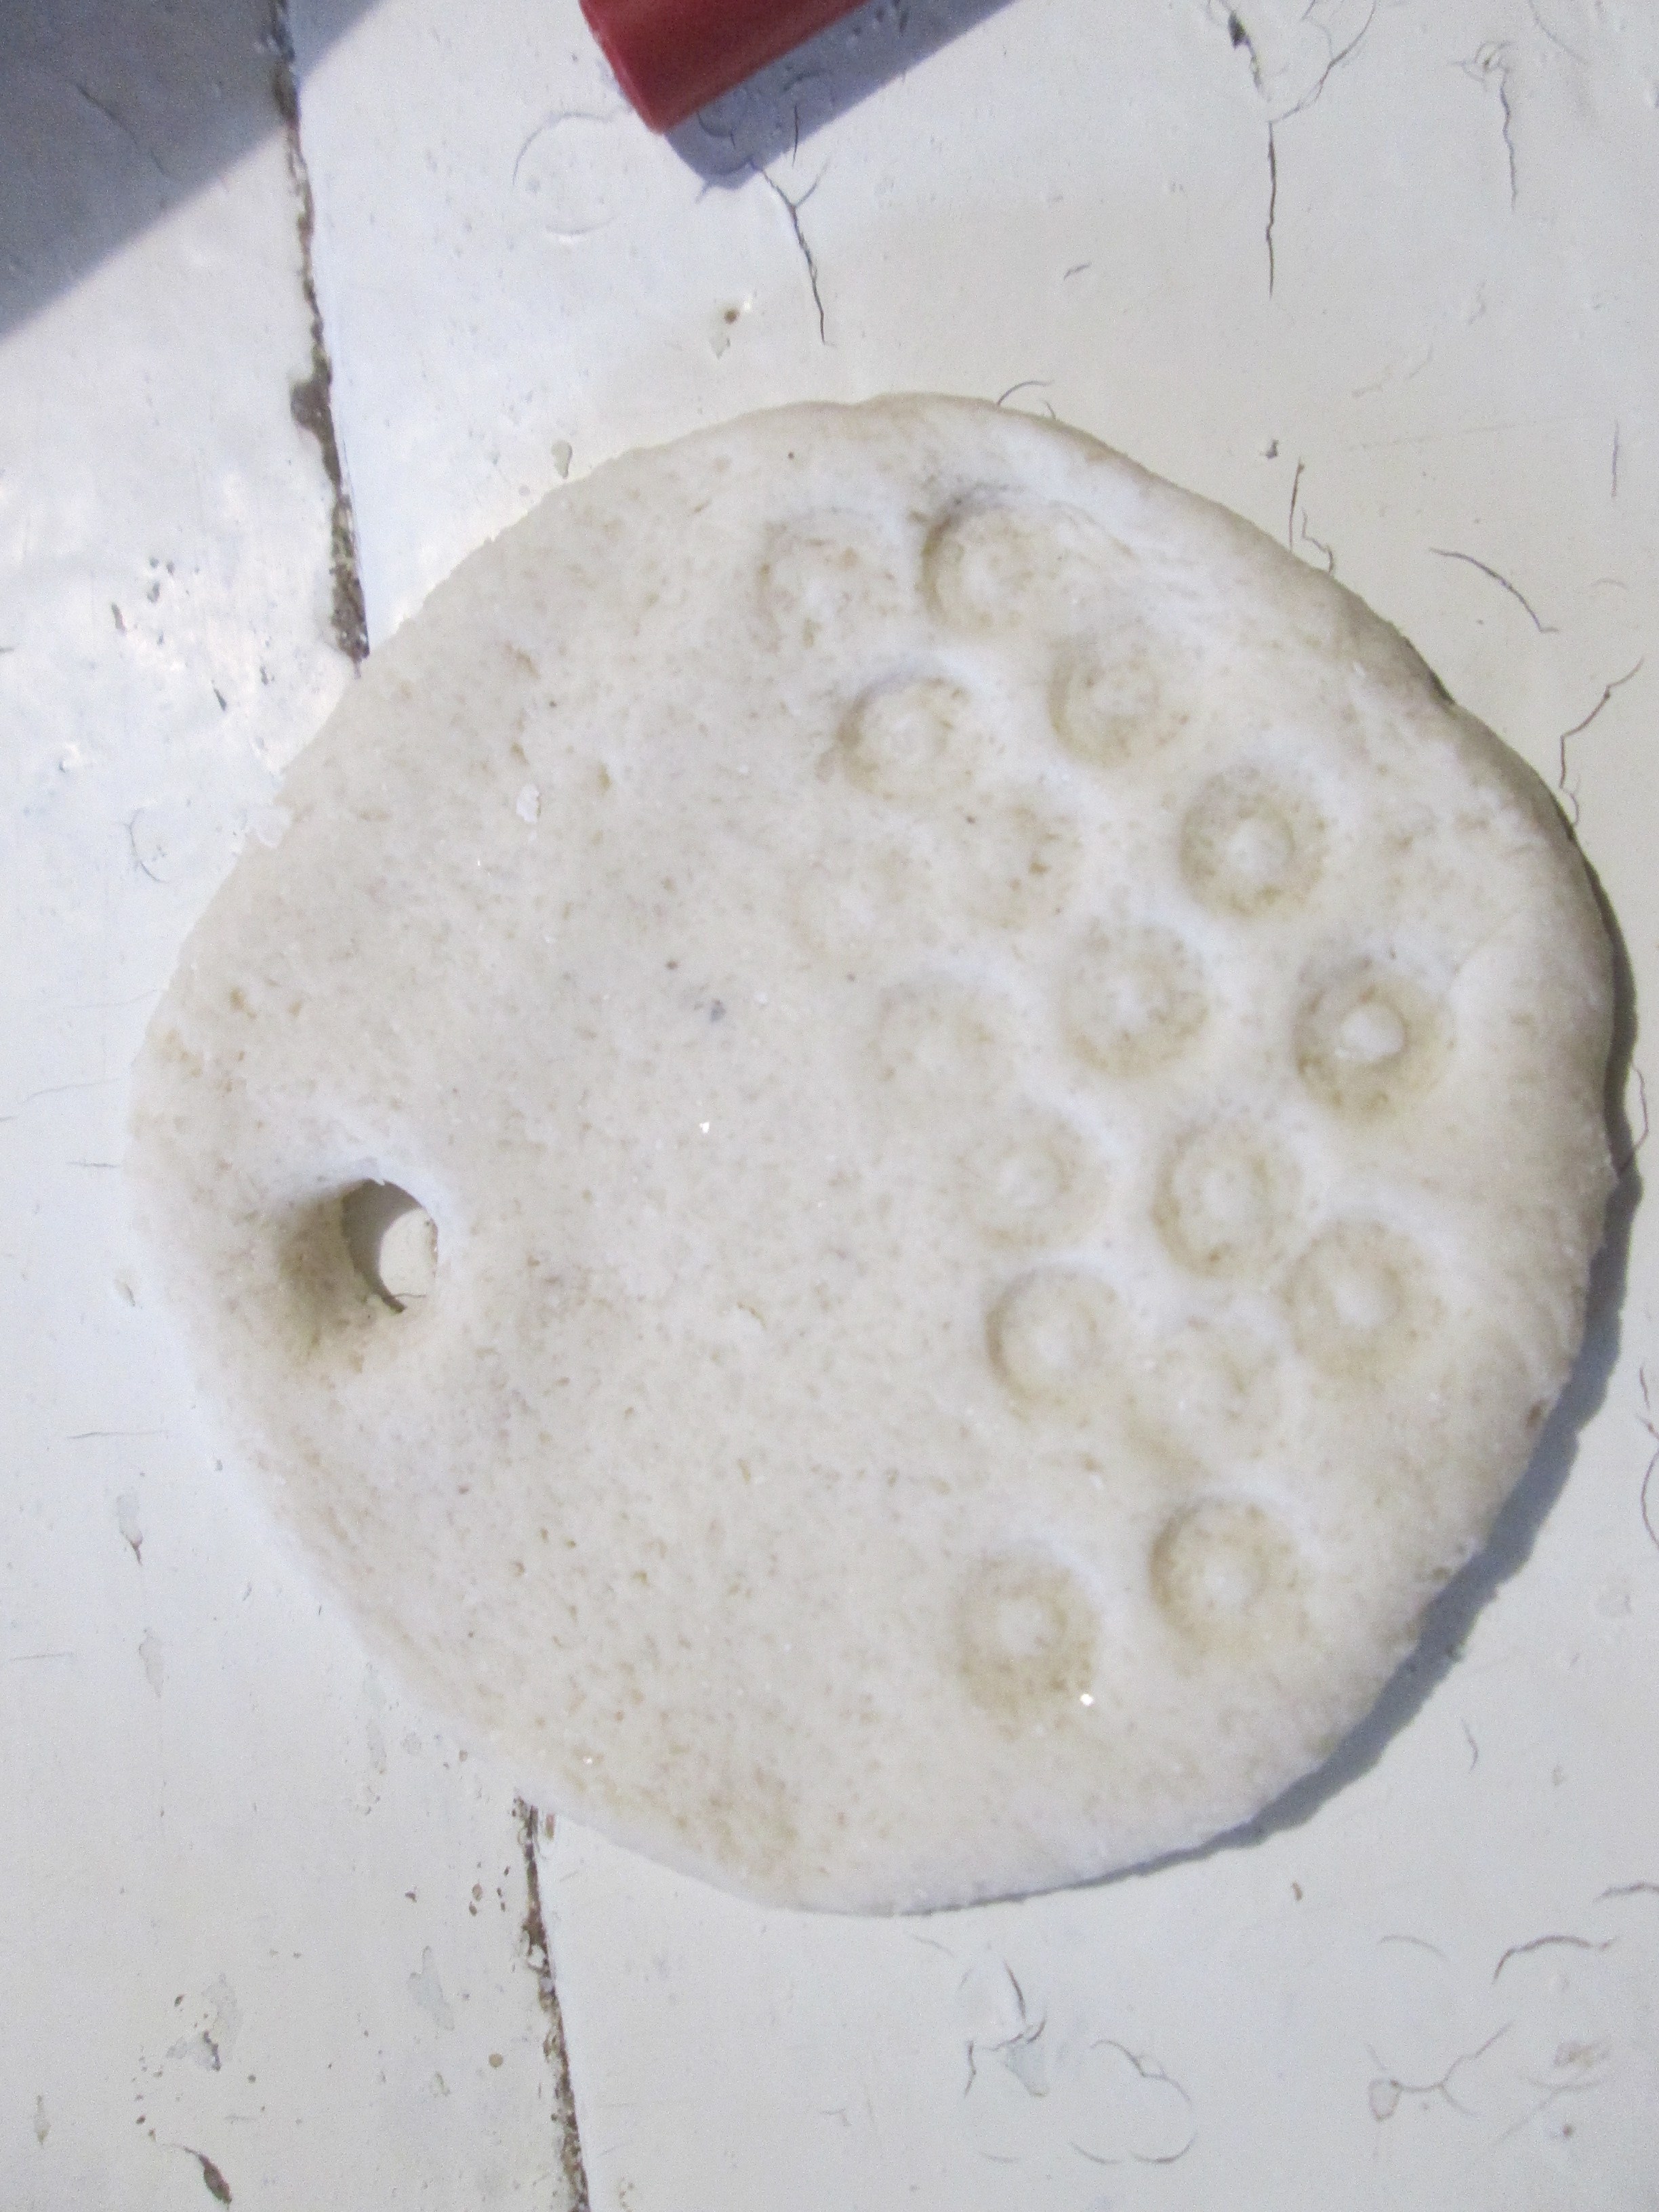
After baking, I put a little red varnish on all the circles, and draw leaves above them. This is mistletoe. It remains to thread a ribbon into the hole and you can decorate the Christmas tree with a toy.

Hedgehog
A small barrel-cylinder rolls down, in which the nose of the future hedgehog is slightly lengthened.

Needles are cut across the body. To do this, you need nail scissors with curved edges.
First, the edges of the scissors are slightly pressed into the dough, then the “needle” is cut.

By the same principle, a Christmas tree is made from salt dough: its branches are cut with scissors.
Now go over the muzzle and each edge of the needle with a brush with yolk, and you can send the product to the oven.
After baking, make a nose and eyes by pressing a piece of twig, and the Hedgehog with golden needles is ready!

That's how it turned out to make 4 toys with the baby!

Vmdeo master classes
Very! I really want you to show off your work! Send the results of your work, share your successes, so that we can rejoice for you! And that's all for today! I remind you about the subscription and please don't forget to bring your friends: it's more fun together! All! Bye bye!
New Year's Eve is the most favorite time for both children and adults. After all, preparations for the New Year 2016 will be filled with fun chores, buying gifts for loved ones, waiting for a miracle. What joy brings decorating a house and a Christmas tree, choosing gifts, hanging garlands, toys, New Year's attributes. We, in turn, offer to experience the joy of the fact that you will do crafts for the New Year 2016 with your own hands.
This activity will be especially interesting for children, because joint creativity in the family always brings together, makes everyone friendlier and closer.
Each year has its own symbol. In 2016, the Fire Monkey will be the patroness, so it is worth considering her tastes when decorating your home.
First of all, keep in mind that the house should have red crafts. If you have a fireplace, then the best option will light it and prepare everything for the holiday. If there is no fireplace, then you can make candlesticks in which red candles should be installed. During the New Year's meal, you should light them. By the way, sparklers should not be excluded, however, when setting them on fire in the house, do not forget about safety rules.
Monkeys
In that New Year You can't do without a pet monkey. Great monkeys can be made from salt dough. Finished figures can be painted and varnished.
You can make toys in the form of monkeys from felt, as well as using the technique of macrame or felting, embroider, draw. In general, we use everything that can only come to mind. It is simply impossible to list all the ideas.
Boot for gifts

Such a boot can be used both for gifts and as a Christmas toy.
To make a craft you will need:
- burgundy and red felt,
- scissors,
- needles and threads,
- sintepon,
- pattern,
- lace,
- rain and other details for decoration.
Photo templates need to be printed, attach the templates to the felt and circle with chalk or soap. There should be two blanks. If you will make several boots, the number of patterns must be multiplied.

Sew the side pieces. To do this, choose threads white color. You need to sew in a looped way, creating a decorative effect. Sew a ribbon on top of the boot, and sew a satin bow on the side. Decorate the boot according to your tastes, you can use rain, golden paper, beaded details or colored felt figurines.
From above you need to sew a loop, for it you can hang boots on a carnation or a branch of a Christmas tree.
holiday balls

Interesting crafts you can do with your kids. For example, a filament transparent ball. All the guys like this craft for its originality. Even children can be able to make such a craft. kindergarten but of course under the guidance of adults.
Need to buy balloon and inflate it, coat it with PVA glue, and wind threads of different colors on top. To fix them, you should use a simple varnish that you use to style your hair. Now pierce the balloon with a needle. As a result, you will get an unusual holiday ball.
fir cones

Crafts from cones fit very nicely into the theme of the New Year. Making them is very easy. It is worth mixing a solution of salt and water, 1 to 2, and bring it to a boil. Then remove the solution from the heat and put cones or spruce branches in it. Let them lie there for 5-6 hours.
Then you need to take them out and leave them to dry - crystals of "snow" will appear on them.
You can powder the crafts with foam plastic snow. To make snow you need to take foam and glue. Cover the branches and cones with glue, and crumble the foam on top. Watch the video, you can get a lot of ideas from there:
Snowman

In winter, when there is a lot of snow, children traditionally go outside to build a real snowman. Only you can blind it not only from snow, but also from improvised materials. You can make a children's snowman from plastic bottles, dough, felt, thread and balloons, paper or origami method.
Here are the instructions for making a pom-pom snowman:
- You can make three pompoms using special bobbins or from yarn or cardboard circles. They will be the body, the head. Yarn is best to take blue or white.
- Wind the threads around and tie tightly in the middle. Remove them from the workpiece.
- You need to cut the threads exactly in the middle, namely at the top of the turns. Such pompoms need to be transformed into neat balls - cut off the protruding threads.
- Connect the pom poms with glue.
- Cut the bottom and top of the snowman until they have flat view, because it will stand on the bottom. On the head you need to put on a snowman a bright red hat, which can be made from felt. You can use a saucer as a place for a snowman, cover it with white foam.
Fridge magnet

But most simple option crafts for the New Year will be a fridge magnet. You can make it from a napkin with a New Year's theme and an old disk. We will use the decoupage technique.
- So take a napkin and separate upper layer where the picture is shown.
- Sand the disc with sandpaper, then spread with glue so that there is an even and thin layer. Attach the drawing to the center, smoothing it out, eliminating all the wrinkles in the image.
- Cover with a small layer of glue on top, and as soon as it dries, fix it with varnish. On the other side of the disk, glue the magnet with Moment glue. To highlight the picture, you can use glitter. That's all - New Year's craft ready!
Photo


Salt dough crafts for the New Year 2016 are original, cute and very easy to make. The material will not stain your hands, and it can also be easily painted in any color! In addition, it does not contain harmful substances, has no bad smell like plastic, for example. Salt dough crafts for the New Year create a special atmosphere in the house. There are many options for such products that can be easily made at home. They can be made of any level of complexity, so you can even connect your children to work, who will be delighted with these activities, so feel free to prepare salt dough. Crafts for the New Year from such material can be prepared by everyone.
Santa Claus from salt dough for the New Year
A cute Santa Claus made of salt dough for the New Year will be a great decoration for the Christmas tree and your interior. We hope that our article will help you make New Year's crafts from salt dough, the master class is presented below.
To create original crafts from salt dough for the New Year 2016, you will need the following materials:
- flour;
- foil;
- PVA glue;
- acrylic paints;
- brushes;
- small jar for water;
- water;
- various decorating materials.

So, now you know what you can make from salt dough for the New Year to please yourself and others, as well as decorate the interior in an unusual way, bringing originality and zest to your home.
Cute Santa Claus from salt dough: a master class, recommendations
Do you want to make it handsome grandfather Salt dough frost? The master class that we offer you in our article will help you with this.

- Knead an elastic dough that will not stick to your hands, and put it in plastic bag so that it doesn't dry out.
- We roll a small ball from a miniature piece and flatten it. Then we put foil on it, which must be rolled up in the shape of a cone. It will be required for a larger volume of the product. Leave the foil in the middle of the dough and roll out the cone. This is the basis of our craft.
- We roll up a small sausage, pinching off a piece from the main piece. We fasten it to the base - the cone, leaving a small part. This part is the character's hat, and the sausage is the fur of the hat.
- We roll up another sausage, which will be longer than the previous one, and attach it to the product, fashioning the shape of the collar.
- We make a small ball - this is the nose of our Santa Claus.
- We create another sausage and scroll it (weave it like a rope). The ends should be pressed. This is a beard product. We attach it to the head. The mustache is made from two pieces of material. They should also be slightly flattened when connected.
- We make fur for a fur coat, press it down a little when fastening.
- To make hands, roll up sausages, expanding them from the shoulder to the wrist. Do not forget to make indentations for the mittens, which are made from cakes.
As you can see, do-it-yourself crafts for the New Year from salt dough are easy to do. Just be patient and be creative.
Put the product in the refrigerator for 24 hours. When the craft dries, it needs to be decorated and decorated. We glue beads and sequins, apply transparent nail polish on the “fur” and the beard, on which you can pour a pinch of sparkles.

Creating crafts from salt dough for the New Year 2016 is a very pleasant experience that will give you a lot of pleasant experiences.
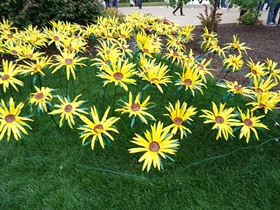 Sunflower from plastic bottle do it yourself - photo how to make
 Do-it-yourself figures from plastic bottles - photo, video master class
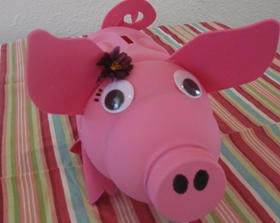 Do-it-yourself pig from a plastic bottle - photo how to make
Made with a child. Colored and shiny, a little uneven and this makes it even more touching and memorable.
On New Year's Eve, every adult, not to mention children, wakes up with a desire to create cute little things that bring a feeling of comfort and warmth to the house ... And although the shops are full of factory-made toys and New Year's accessories, I want to do something of my own, unique, inimitable.
Elegant toys for the New Year's green beauty can be made from paper, fabric, thread. And you can use salt dough - another interesting and quite affordable material. How to make for the New Year? This is what will be discussed now.
How to make salt dough?
First, you need to prepare the right salt dough. To do this, prepare in advance one measure of fine salt and two measures of flour. Dissolve the salt in warm or hot water, and when it has cooled, gradually pour the salt solution into the flour, stirring constantly. You can add a little sunflower oil to the dough - it will make the mass more elastic and less sticky. However, it is more difficult to mold something from dough with the addition of butter, since its pieces do not stick together well. This option is good for simple single-layer crafts.
The dough should turn out quite steep, holding its shape. Let it stand for the gluten to disperse, and get to work. Salt dough Christmas decorations are easy to make with cookie cutters.
DIY Christmas crafts
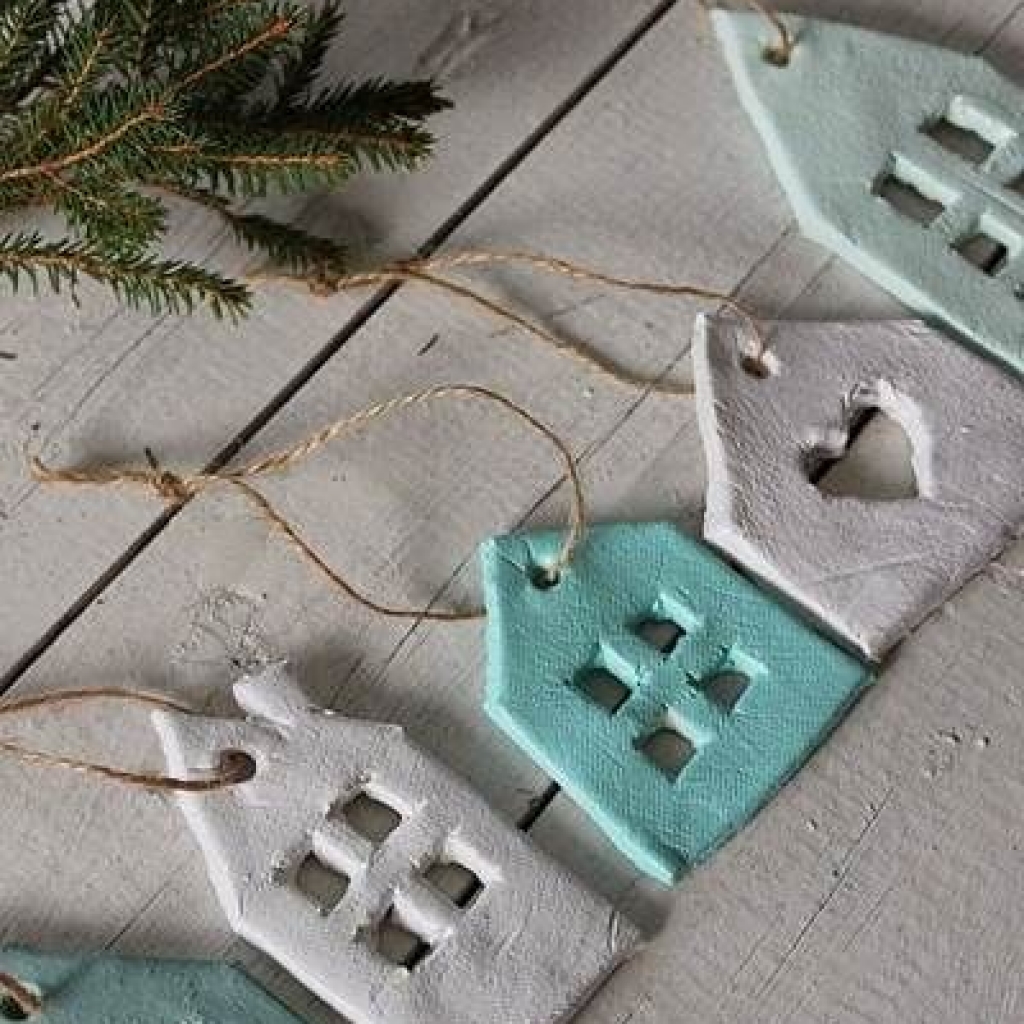
Figures made in this way are very reminiscent of traditional gingerbread and create a feeling of home comfort. You can make cute hearts, Christmas trees and stars: just roll the dough into a thin (about 1 cm) sheet and invite your child to make figures out of it.

If there are no ready-made molds, you can cut them out of cans from drinks, bending the edges inward so that the baby does not get hurt. Even simple round pendants that can be made using a glass, a glass or a small jar will look beautiful. Don't forget to make a hole for a loop in each figure.


Lay out the cut out figures on the grid and let them dry well; if drying on a dense, flat surface, periodically turn the crafts over. You can use the oven by carefully drying the workpieces at a low temperature.

We paint the dried figures with bright colors, cover with sparkles.

Top crafts can be covered clear varnish This will give them a nice sheen.

We thread a ribbon or a thick thread - and the decoration is ready.

Salt dough Christmas tree.

Salt dough heart.

Can be colorized Christmas decorations from dough with paints.


From the imprint of a child's hand, a charming Santa Claus is obtained. The craft is made in the same technique. Let the piece dry well.

We apply a layer of white paint.

We paint the craft and cover it with varnish. Santa Claus is ready!

Salt dough can be made wonderful Christmas decoration"pig with wings"

Do-it-yourself New Year's crafts from salt dough made in this way for children will become especially expensive, and the children will be happy to join the process of decorating the main symbol of the New Year.
DIY Christmas crafts from salt dough (video)
Salt dough Christmas decorations (sweet and pink):
Master class with step by step photo"New Year's gifts" in the technique of modeling from salt dough.
Author: Galanova Daria, 9 years old student of the MBU DO DDYU Association "Salty Fantasies", MillerovoTeacher: Nazarova Tatyana Nikolaevna, teacher additional education MBU DO DDIU Millerovo

The complexity of the master class is very simple, perhaps it will be useful for kindergarten teachers of senior and preparatory groups. In this case, you can pre-cut the blanks of snowmen and mittens from the dough. Dry them, and in the lesson the children are invited to make the rest of the molds. Also the master class will be interesting
Anyone who loves to sculpt from salt dough. Make gifts for friends and family. As well as teachers of additional education, teachers primary school, educators of extended day groups.
Purpose: New Year gifts.
Target: creation of New Year's gifts in the technique of modeling from salt dough.
Tasks:
Educational: master the technique of making gifts from salt dough;
Developing: develop accuracy in modeling, artistic thinking;
Educational: stimulate the desire to give new Year gifts made with my own hands;

Required material:
Paper napkin, stack, glass of water, Extra salt, premium flour, snowman dough cutter 10.5 x 6 cm, photo frame, colored paper, floral mesh "snow", "small mitten" 5 x 2.5 cm cocktail tube, ball pen without paste, rolling pin, simple pencil.
Salt Dough Recipe:
Combine 1 cup flour and 0.5 cup salt. Stir, make a moon. Gradually, in a thin stream, pour in 1 cup of cold water. Knead a tight, elastic dough. Store the dough in a cellophane bag.
Recipe for snow
In a small saucepan, combine 2 tablespoons water and 1 teaspoon potato starch. Stir and put on low heat. In the meantime, stir constantly. As soon as the mixture becomes transparent, remove it from the stove and immediately pour in 1 cup of Extra salt. First with a spoon, and as soon as the mixture has cooled slightly, you can stir with your hands. Snow is ready. Transfer it to a plastic bag and seal tightly. It is important that air does not enter the bag.
Progress:

Roll out the dough with a thickness of 5-7 mm. Cut out a snowman with a cookie cutter and transfer to a paper towel.

Mark the eyes with a pencil, push the mouth with a stack. With a stack, make a mark for yourself where you glue the snowman's hat.

Form a cake from a small lump of dough. Cut it in half. Moisten the snowman's head with water and glue the hat. We glue all elements of the composition with cold water. Roll up a small, thin flagellum and glue it on the hat. We sculpt fur hat. Form a ball from a small lump and glue a bell.

Form a very small carrot and glue the nose to the snowman.

Roll up a thin flagellum and glue a scarf to the snowman.

From small, identical lumps, form two bean-like lumps and glue the legs.

With a ballpoint pen without paste, push the buttons in the center of the snowman.

From a lump the size of a large plum, form a gift box and glue it on the snowman's hand. It turns out that the snowman is holding a gift in his hands. Glue the gift tighter so that after the craft dries, it does not fall off.
The snowman is ready, let's start sculpting mittens.

Roll out the dough to a thickness of 3-4 mm. Cut out two small mittens.

Stack push the cuffs on the mittens. Make holes with a cocktail tube.

On one of the mittens, mold a very small snowman.

Glue a Christmas tree and toy balls on the second mitten.
So quickly we blinded the mittens.
Put the snowman and mittens on sunny window sill. In the air, crafts dry for about 5-7 days. Although the mittens will certainly dry out in a couple of days, since they are not as voluminous as a snowman.
The pieces are dry. Paint them with paints, cover them with glossy varnishes.
We glue the snowman into a frame, decorate with glitter. Spread a layer of PVA glue under the snowman's legs, put "snow". Compact it slightly. Once the glue dries, the "snow" will hold firmly. Such “snow” can be stored for a couple more days in a plastic bag.
The snowman is ready.
Pass the tape through the gloves. Decorate with glitter
Gifts for the New Year are ready.


Happy New Year!