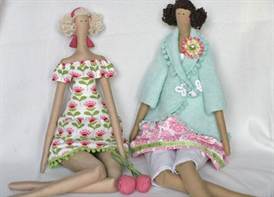
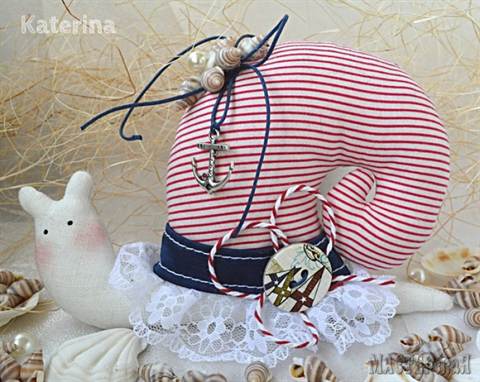
Tilda dolls have become popular quite a long time ago. And today we will show you a popular pattern for creating a tilde snail!
Their distinguishing feature is their appearance. Simple and whimsical faces, well-chosen textiles in warm colors show their zest.
In this article, we will talk about a pattern for creating a Tilda snail. Here you can also find a master class on making a Tilda snail from felt, fabric, or other material that you have at hand.
Making a Tilda snail with your own hands is very easy. Modern needlewomen can come up with all kinds of things, there are snails - pincushions, snails - bagels, snail pillows - you can see all this in textile stores and at attractive prices. But who wouldn’t want to have such beauty in their home, especially something created with their own hands?

The Tilda snail in the form of a pillow should always be in full size, so that the person who will sleep on it will be very comfortable. Unless, of course, it’s decor. Tilda snail patterns can be downloaded on the Internet, but it’s better to make it yourself.

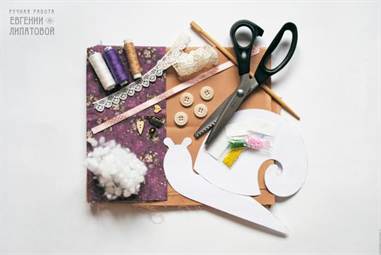
Making patterns for sewing a toy snail Tilda with your own hands
You will need:- paper
- padding polyester
- pencil
- scissors
- threads
- needle
- textile
- beads
- black pen
- accessories for decoration.
Draw patterns. Transfer patterns to fabric. Cut out the resulting shapes from the fabric. Sew the fabric right sides together. Turn the craft inside out. Fill with filler. Sew together the resulting parts of the future Tilda snail.
Bring the product to its logical conclusion with the help of accessories. Your snail is ready. Now, you know how to sew a Tilda snail yourself. It will serve as a beautiful addition to your interior and serve its intended purpose.
It is also easy to make a completely simple snail - a pincushion.
You will need:- durable fabric
- scissors
- threads
- filler, can be padding polyester
- accessories for decoration.

- Cut out the outline of a snail from fabric
- Sew the resulting parts together.
- Fill with padding polyester.
- Sew up the hole.
- You decorate, bringing your product to its logical conclusion.

Your snail-pincushion is ready. Enjoy it!
Felt snails, as a rule, simply serve as decoration for the interior, or for your apartment, cottage, house, car.
To make such a snail, you will need:- threads
- accessories with which you will decorate the snail
- padding polyester
- Cut out the necessary parts from felt.
- Sew them together right sides together.
- Turn them right side out.
- Sew the pieces together again
- Fill with padding polyester.
- Sew up all remaining holes.
- Decorate your snail with accessories.

The product is ready!
Video on the topic of the article
You can see the details of making the Tilda snail pattern, felt snail, and snail pillow in master classes with descriptions by following the links below:
The tilde snail is not only a toy, but also a decorative element, a pincushion, and also a very interesting and original gift to a loved one. We present to your attention detailed master class how to sew this craft.
Required tools and materials
To sew a snail tilde, you will need to take the following tools and materials:
- Textile. At least two shades are needed: the body will be sewn from a neutral one, and the shell from a bright one.
- Stuffing material. You can use both standard padding materials (for example, padding polyester, padding polyester, holofiber, and so on), and unusual fillers (for example, aromatic herbs, relaxation balls, etc.).
- Pencil, marker, chalk.
- Pattern.
- Needle.
- Threads.
- Scissors.
- Stuffing stick (will help fill the toy evenly and tightly with filler).
- Various decorative elements (buttons, ribbons, beads, etc.).
- Glue gun.
Creating a pattern for a tilde snail
The snail, the pattern of which is presented below, can be made in two ways:

- Can be found ready-made pattern and print it on a sheet of A4 paper.
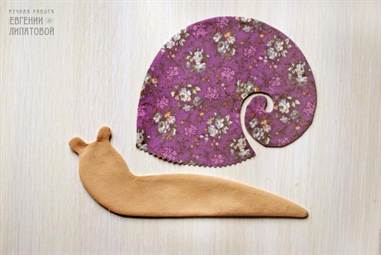
- Take any paper and draw the pattern yourself. Do not forget that the tilde snail consists of two main parts: a body with a pair of ears-antennas and a shell.
The advantage of the second method is that it is easier to change the size of the toy.
Snail - tilde: master class on sewing a toy

Step-by-step instruction:
- Cut out the paper pattern pieces.
- Take two types of fabric: for the body and for the shell.
- Fold the fabric in half or two identical pieces together. The front side should be on the inside.
- Attach the paper pattern to the fabric. To make it more convenient to translate the pattern, the paper parts can be pinned using pins or needles.
- Transfer the pattern onto the fabric; to do this, trace the details with a pencil, marker or chalk.
- Peel the paper pattern from the fabric.
- Sew the fabric together. It is more convenient to use a sewing machine, but if you don’t have one, you can resort to a regular needle and thread. The stitches should be neat. Do not sew up the parts completely, leave a small hole into which you will then stuff the filler. Best of all, let the hole be in the center of the body and at the bottom of the shell. Just where the parts will be connected to each other.
- Cut off the excess fabric, stepping back from the seam by five to ten millimeters (the distance depends on the type of fabric: the more it frays, the larger it should be).
- Turn out the snail parts.
- Fill all parts tightly with filler. While you are stuffing, form the body, antennae and shell.
- Carefully sew the shell to the body with a blind stitch. To make the task easier, pin the “house” to the snail using needles or pins.
- Make a face. You can cut out the eyes and mouth from fabric and then sew or glue the pieces on. Or draw a face with special fabric paints or a marker. The third option is to embroider the eyes and mouth with thread. Fourth - sew the eye of a button or bead into place.
The tilde snail is ready!
Decorating a toy
The snail won't look very interesting if left like that. Here are some ideas on how you can decorate the toy:
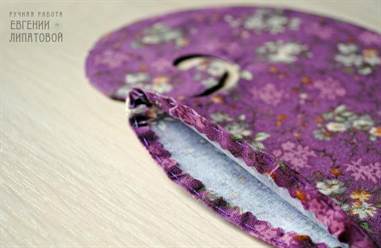
- Sew a strip of lace at the junction of the shell and body.
- Using a special glue gun, glue various interesting elements to the shell: beads, rhinestones, bows, figurines, and so on.
- Make up the snail using regular blush and eye shadow.

Make your crafts original; don’t be afraid to use your imagination.
Remember that if the toy is intended for small child, then do not glue or sew small parts on it that are easy to tear off and swallow.
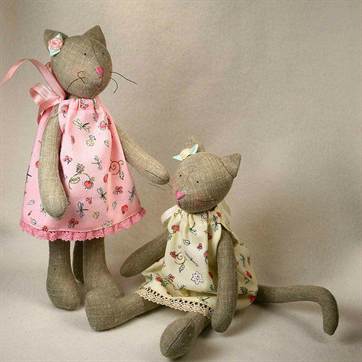
The dolls of the Norwegian artist are becoming more and more popular every year: simplicity of work, simplicity of style, the charm of a rag doll, laconic and smooth silhouettes, discreet colors - all this has contributed to the growth of love for tildes. They can be made in the form of a man or a representative of the living world - a cat, a hare, or, for example, a snail. How is such a toy sewn and how to decorate it?
Snail tilde pattern and sewing master class
First you need to choose the fabric on which the toy will be created. Craftswomen recommend paying attention to natural materials without a pronounced shine: linen and cotton work well. Thin chintz and cambric also look good. The color scheme is selected depending on the style of the product. If you want a toy in natural colors, then take a flesh or coffee color for the base and soft blue, pale green or dusty pink for the sink.
- The life-size tilde snail pattern is 6*8 cm for the shell, and 5*10 for the body itself. If desired, while maintaining these proportions, you can increase the parameters. Do not forget that you need 2 times more material, because... Each piece is sewn from 2 identical parts, because the tilde is a three-dimensional product.
The creation process itself is very simple and does not even require step by step photos. All you need is to have in front of you a printed pattern, fabrics, matching threads, padding polyester or fabric scraps, and a few safety pins.

- Cut out the parts (1 piece each), transfer them to the fabric from the wrong side. Stepping back 1 cm from the outline, cut out the parts - there should be exactly 2 of each. To make them exactly the same, fold the fabric on top of each other, pin it, and cut both layers.
- Now you need to sweep away the parts in pairs, leaving a hole of 4-5 cm: on the sink it is convenient to do this at the base, which will be hemmed, on the body - in the center of the back, which will close. Through these holes, each part must be turned right side out.
- Stuff the body and shell, then connect them, secure the meeting area with pins and sew. Try to do this carefully, but remember that this area will still be hidden by the decor.

At this point the sewing is completed, and the last stage remains, which requires imagination and absolutely any existing decorative elements: from acrylic paints to beads and stones.
The most interesting stage in any needlework is probably decorating the finished product. This is where unique things are created that seem to come from the same pattern. Tildes are certainly no exception. By looking at the photo of tilde snails, you can see how, based on 2 parts, you get perfect different models. What should I use to decorate such a toy? 
- Lace. This can be either a full-fledged canvas or a thin braid. With its help, it is very easy to hide the seam between the shell and the body of the snail: it is this area that is finished first, since it is never neat enough to be left without a “screen”. The lace is either glued or attached with matching threads, using very small and sparse stitches.

- Knitted elements. Most often they are made with crochet, thereby making them look like lace. A few small details are enough here - a flower seated on the snail’s head or along the spiral of the shell, leaves also spread along the edge of the shell.
- Fabric applications. It is also a fairly popular option for decoration, both with small elements and larger ones: for example, a butterfly landing on a snail, or a lush rose on its head.
- Beads and seed beads. Most often they are used to decorate a sink, creating patterns on it or completely covering it with beaded colored fabric. You can also use small beads as eyes and smile lines, or add them as flower cores.

The tilde snail pattern will be useful not only for those who like to sew toys, but also for any needlewoman to create an original pincushion.
Tilde- this is a style and a special technique for sewing a decorative toy. Usually dolls are sewn in this style, but there are also hares, cats, bears and other animals. The style was invented by the Norwegian Tone Finnanger and is considered the standard of Scandinavian home comfort.


Tilde toys are, first of all, interior decor that creates a special atmosphere at home, and therefore they are usually made from natural materials, soft cotton fabrics in pastel colors.
This master class on a tilde snail with a pattern will primarily please beginner craftswomen, as it is easy to perform and does not require any special skills. Snail - simple toy to start mastering the tilde technique. The result will definitely please you!

Making a toy
To work you will need the following materials and tools:
- fabric of two colors for the snail body and shell;
- pattern;
- holofiber or other filler;
- threads;
- needle (or sewing machine);
- pencil or piece of soap (chalk);
- stick or pencil for stuffing;
- scissors;
- pins;
- glue or glue gun for decorative details;
- ribbons, ribbons, beads, buttons and everything you can use to decorate the finished snail.
For the body of a snail, a plain fabric is suitable; for a shell, it is better to take a multi-colored one or one that contrasts with the body. The fabric should be strong enough, but soft, and not crumble.
The pattern version can be downloaded from the Internet and printed on A4 format - it will be enough to create a snail.
Here are options for patterns of larger and smaller snails, as well as dragonflies for decorating the finished toy:


To present the toy in full size, just transfer the patterns from the monitor onto sheets of paper, cut them out and put them together. This convenient way to understand exactly what size the snail will be (the picture can be scaled as desired), and also to make a pattern without printing the design on a printer. So, how to sew a snail?
- We cut out the details of our future snail from paper and transfer them to well-smoothed fabrics, folded in half, on the wrong side.


- We cut out the parts from the fabric, taking into account the seam allowances (you need to leave about 5 mm of fabric around). To prevent the fabric from moving apart under the scissors, it is better to pin it together along the contour. It is also recommended to use serrated scissors so that the seam holds its shape well when turning the fabric inside out.

- We sew along the contour of the part either manually or on sewing machine. Please note that those places that are indicated by a dotted line on the pattern do not need to be sewn. We will stuff the snail through them.

- Turn the stitched parts right side out. For convenience, you can use a pencil or stick (brush).

- We bend and baste the lower edges of the shell so that the final seam looks neater.
- Fill the body and shell evenly with filler. You can also use a stick for this.


- Sew up the hole in the snail's body.


- If desired, to make the body of the evidence darker and give it a little rigidity, you can coat it with a coffee-tea solution with PVA. To do this you need to mix a little ground coffee with tea leaves, pour boiling water, cook for 5 minutes, strain, and then add a little glue to the resulting solution.
Apply the solution to the snail's body with a brush or sponge and dry it in an electric oven for 15 minutes (at 100 degrees).


- Now we sew both parts together to make a full-fledged snail: a bagel, i.e. the shell is sewn to the body with a hidden seam. For convenience, the shell is first pinned to the body with pins, and then small stitches of a hidden seam are made. If such a seam does not work out well, it can then be covered with tape or braid.


- The resulting product can be decorated with felt applications, beads, lace, and accessories. The snail can be painted or embroidered with threads or beads, giving it a certain style.


Don't forget to draw or embroider some eyes!
You can use real blush to create rosy cheeks.
Tildas are decorative toys and are created primarily for beauty, but those who love practicality can use the snail, for example, as a pincushion or pillow.
Tilda Snail is one of the simplest tildes, and I believe that it is the most suitable for the first experience in sewing textile toys. For work we need threads, two types of fabric and decorations: flowers, buttons, ribbon or braid.
Materials:
- Two types of fabric (For the snail body and for the shell)
- Threads to match the fabric
- Acrylic paints or floss threads (for eyes)
- Decorations for our snail
- Stuffing for a toy
Tools:
- Chalk or special markers for transferring patterns
- Scissors
- Sewing machine (if possible and desired)
For the snail's body, the fabric can be dyed with coffee, then our doll will also acquire a delicate coffee aroma.
1. Print the tilde snail pattern and transfer its details to the fabric: 
I used a special marker to transfer the pattern, in my opinion it is very convenient.
2. It is necessary to pin two layers of fabric with pins so that the fabric does not accidentally move during work.

3. Parts must be cut out in the following way:
- We do not cut out the snail shell completely, but only its outer contour
- We cut out the snail's body, leaving 0.5-1 cm for allowances
You can sew by hand or with a sewing machine, I sew with a sewing machine. I have the simplest one sewing machine. I usually use a straight stitch, and choose the stitch length depending on the type of fabric; I sewed this snail with a 1.5 mm stitch.
6. The next step is to fill the snail with padding polyester or any other available filler. Don’t be upset if it doesn’t turn out quite evenly))) this will add a special charm and charm to your toy.
7. Now the most crucial moment: you need to carefully stitch the shell to the snail’s body with a hidden seam. And don’t forget to put a small heart in the body))

8. The eyes of our snail can be embroidered with regular floss threads or drawn acrylic paints. In general, it depends on who you like, but I think it’s better to use threads; if you make a mistake in the location of the eyes, then everything can be easily redone; with paints there is no such possibility. The snail's cheeks can be drawn using regular powder and cotton swab or use rubbed pastel.
Tilda snail is ready: 
I recommend decorating the seam on the sink with lace. The most suitable is cotton or knitted lace.
I hope you liked it))) I'm looking forward to your snails))


