DIY animal bookmarks. Master class with step-by-step photos
DIY corner bookmarks for books made of paper
Derkach Anastasia Sergeevna, Teacher additional education, MBOUDOD CDT "Commonwealth", Creative Association "Peacock", Novosibirsk
Description: This master class is intended for children from 7 years old, additional education teachers, parents and creative people who love to create beautiful and unique things with their own hands.
Purpose: Bookmark, souvenir, gift.
The bookmark - although small, is very useful thing when reading books. With its help, it is more convenient to read books and find the right page in them. A bookmark helps children, especially in primary school, navigate by lines, and at the same time it helps to foster a culture of handling books. And although there are a great many bookmarks on sale now, a child will be more willing to use and take care of a beautiful, original bookmark made with his own hands, since a piece of his soul is invested in it.
I am a beautiful bookmark.
You need me for order.
Don't turn the pages in vain -
Where is the bookmark, read there!
Target: Making bookmarks with your own hands
Tasks:
- teach how to make bookmarks from paper;
- develop interest in artistic creativity;
- develop fine motor skills hands, eye, imagination, aesthetic taste;
- improve application skills and abilities;
- develop independence and accuracy in work
Manufacturing technique:
- origami
- applique
Materials and tools:

- scissors
- PVA glue
- colored paper for copier
- glue stick
- black marker
Safety rules when working with scissors
1. Use well-adjusted and sharpened scissors
2. Scissors must have blunt, rounded ends
3. Place the scissors in the rings towards you
4. Watch the movement of the blades while cutting
5.Do not leave scissors open
6. Pass the scissors rings first
7.Don’t play with scissors, don’t bring it to your face
8.Use scissors as intended
Rules for working with PVA glue
1. When working with glue, use a brush if necessary.
2. Take the amount of glue that is required to complete the job at this stage
3. It is necessary to apply the glue in an even thin layer
4. Remove excess glue paper napkin
5. Try not to get the glue on your clothes, face, or especially your eyes.
6. After work, close the glue tightly and put it away
7. Wash your hands and workplace with soap
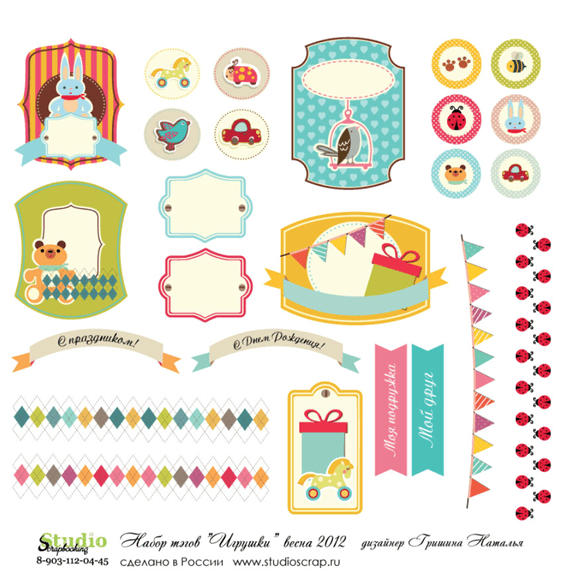
Templates:


Progress:
The basis of all bookmarks is done the same way,
Let's look at the example of making a bookmark - chanterelles
Bookmark - DIY paper fox for children. Master class with photos
We take orange copier paper.
We need a square measuring 10 cm by 10 cm

Cut it out

Fold diagonally

Bend the corners to the top


Expanding

Fold one top corner down

Raise the right corner up

We put it in the pocket

We fill the left corner in the same way


Turn it over. The preparation is ready! Can be decorated

Let's start creating the image
Cut out all the necessary parts from colored paper

Glue the head part onto the base

Carefully glue the pink ears and black nose

Eyes

Take a black marker and draw eyelashes and pupils

Our bookmark - the fox is ready!

I met a fox
Curious eyes
Hidden behind a tree stump
A bright red light,
And calmly watches:
Who is walking in her forest?!
T. Efimova
You can make a huge number of different funny bookmarks from paper.
These could be heroes of your favorite fairy tales, or just little animals.
Take colorful paper squares

Laying out the base of the bookmark

Cut out parts from colored paper

Gluing the animals together

Draw small details with a black marker

Glue the faces onto the bases - bookmark blanks

Bookmark "Puppy"


Little puppy
I have a funny puppy.
I gnawed everything I could:
Shoes and a chair leg,
And a little more sofa.

Kiskino grief
Pussy crying in the hallway
She has great grief:
Evil people to poor Kiska
They don't let you steal sausages!

Mouse
The little mouse cried
The cat scared him out of his sleep!
I had a very sweet dream,
It’s like I ate a hundred tons of cheese!
And also for dessert
They gave me a kilogram of sweets!
Only he doesn't eat candy!
It would be better if they gave me cutlets,
Or a bag of seeds -
A mouse could eat this!
He wanted to sleep some more
Just grab the cat by the tail!
He almost ate a mouse
I barely managed to escape!
What kind of arrogant red cat is this?!
Doesn't let the mouse sleep!


Hedgehog through the forest
Walked, walked, walked,
Under the bush
I found a fungus.
Walked around the fungus:
- This is a good find!
He brought the fungus home
The mushroom soup turned out great!

By the river, by the river
White sheep
They pinch the grass in the meadow,
Ant grass.
The fur will be soft and smooth,
Let's knit mittens for the kids.


The frog sat in the swamp all day,
In a swamp, a frog is not too lazy to sit there.
She really likes her native swamp,
The frog will not change it for another.

Why am I an octopus?
I have eight legs!
I swim fast with them,
I can have lunch.
Friends live in the depths
Me and my whole family.
All legs grow from heads -
These are the octopuses!
Bookmark "Piglet"

Pink belly
Pink barrel,
Curly ponytail
Piglet nose.
Grunting with happiness
He runs into a puddle
And in the arms of dirt
Lies happily.
Frisky fool,
He is a pig's child
Little eared
This? Piglet!

Yellow ball on the grass
It rolled merrily.
They say to the world
He was born yesterday.
He is glad of the sun and warmth
Like any child
Midges, crumbs, worms...
After all, the baby is a chicken.
7 153 882
When reading a book, it is important to remember and record the page you stopped on; in this case, a bookmark will help. It is not at all necessary to go to a stationery store to purchase this simple accessory; we recommend making bookmarks for books with your own hands. Believe me, it's very simple! We invite you to make several original bookmarks using colored paper, felt, thread and paper clips. Consider the ideas below.
So first let's look at a few simple ways and make a bookmark for the book with your own hands, using available materials.
From paper
Bright and very beautiful crafts You can make it out of paper with your children. Implement unusual ideas in life.Option #1 - Worm
You will need:- Sample;
- Strips of colored paper;
- Sheet of colored cardboard;
- Glue stick;
- Scissors;
- Ribbon;
- Hole puncher.

Option No. 2 - Heart
If you are looking unusual ways creating bookmarks for books from colored paper, then this option is just for you. You will need a minimum of time to work.You will need:
- Sample;
- Scissors;
- Glue stick;
- A sheet of colored paper.


Option No. 3 - Origami Hedgehog
Let's create origami from paper, we'll get wonderful bookmarks for books. So, let's begin.You will need:
- A sheet of brown and light brown origami paper;
- White paper;
- Marker black;
- Scissors;
- Glue.
- Fold the light brown piece of paper diagonally in both directions.
- Bend the sheet to form a triangle, fold the top of the sheet halfway.
- Now fold the right side of the triangle into the middle, and then the left.
- Next, we unbend the edges, the left part of the triangle must be folded parallel to the central vertical line of the figure.
- Repeat the same with the second side.
- After this, you need to bend both ends into the resulting pockets.
- Insert a sheet of dark brown paper into the corner of the bookmark. Draw spikes on the brown sheet with a regular pencil, cut out and glue.
- Make eyes, draw a nose. The creation of origami bookmarks for your books is now complete.
Option No. 4 - Origami Christmas tree
See a few more cool ideas that will be useful when creating bookmarks for a book, check out the proposed master class. You will definitely delight your children with these origami bookmarks.
You will need:
- Green origami paper;
- Brown paper;
- Glue;
- Scissors;
- Glitter.

Option No. 5 - Bookmark with weaving “tie”

You will need:
- 4 strips of paper in two colors;
- Scissors;
- Double-sided tape.

Option No. 6 - Bookmark - mouse

You will need:
- Simple pencil;
- Colored paper;
- Lace;
- Scissors;
- Stationery glue.

From felt
Not only bookmarks made from paper, but also felt, are quite interesting. Let's try to make them together.Owl

You will need:
- Sample;
- Felt scraps in purple, pink and white;
- Threads;
- Needle;
- Glue gun.

Dress
You will need:
Technique:

- Transfer the outline of the pattern onto the fabric and a piece of felt.
- Cut out these parts, glue them together, then you will need to stitch everything along the contours.
- Glue the dress to the elastic and you're done. Such a bookmark self made will be a real decoration for your book.
From threads
Make an original bookmark from threads using simple diagram manufacturing. It's very simple.Pompon
You will need:- Knitting;
- Scissors.
- Wind the threads around your fingers as shown in the photo.
- Tie the resulting skein in the middle, leaving a hanging edge.
- Then cut the tied skein on the sides to create a pompom.
- Shape the pompom into a ball using scissors. You can make such bookmarks from threads of various colors according to your own taste.
From paper clips
Even ordinary paper clips can become the basis for a unique bookmark. Just decorate this stationery with a bow, buttons or thread and you’ll get a fun bookmark. Another idea is to straighten the paperclip and bend it into a heart, star, or clef shape. Isn't it original?
Try making an exclusive bookmark yourself, it's very simple. Fantasize and admire the results of your own work!


Use different cool ideas scrapbooking, experiment and create.


Some more interesting ideas and master classes

Take a break from a busy day and spend some time doing some handicrafts. Handmade- The best way relax and do something useful. For example, bright bookmarks! To make your reading more interesting, we will tell you how to make original and fun bookmarks for your favorite book or diary.
#1 Magnetic bookmark
Materials:
Plastic folder for files
Bright paper with a fun print
White chalk or pencil
Ruler
Scissors
Glue
Magnetic tape on a roll
Step 1: Gather all your materials and find a free work space.
Step 2. Determine the size of the future bookmark and cut out two rectangles of the same size from bright paper. If you cut one long strip, the design with the arc side will turn upside down when bent. This applies to paper with an animal print, as in our version, and with patterns in which the top and bottom are clearly visible. If you choose paper with abstraction, you can safely cut out one long strip.

Step 3. Place the rectangle on the plastic folder in the bend area and trace it with a pencil or chalk. Then cut out the bookmark. When you unroll it, you should end up with one long strip with a curve in the middle.

Step 4: Glue bright paper to the outside of the bookmark on both sides.
Step 5: Measure and cut two pieces of magnetic tape. Glue them from the wrong side on both parts of the bookmark. Make sure that the second magnet is in exactly the same place as the first. This way, you can secure the bookmark between the pages and it won't fall out, no matter how hard you shake the book.

Step 6. After the glue has dried, be sure to test the bookmark!

#2 Bookmark made from a paper clip

Materials:
Scraps of fabric
Large paper clips
Scissors
Iron
Threads and wire
Hot glue gun
Step 1. Cut strips 1.5-2 cm wide from scraps of fabric. Let the length remain maximum to make it easier to form a bow.
Step 2. Iron the fabric well with a hot iron so that it holds its shape. Then form a bow by tying the center with thread.

Step 3. Using a small piece of wire, attach the bow to the paperclip and fill it with glue so that it does not slip.
Step 4. Cut a thin strip of fabric, 0.5 mm wide. When the glue is dry, cover the wire and glue with it.
Step 5. At the very end, cut long tails bow, and the bookmark is ready!
#3 Bookmark with buttons

Materials:
Buttons on the leg
Large paper clips
Hot glue gun
Place the button on the paperclip and secure it with hot glue in the leg area. In just half a minute you have an unusual and bright bookmark ready.
#4 Fabric bookmark with flower

Materials:
A few scraps of fabric
Button
Threads and sewing machine
Hot glue gun
A piece of cardboard or plastic
Step 1. Determine the dimensions of the future bookmark. Then fold the piece of fabric in half so that the fold is on the left or right side.
Step 2. Mark the dimensions of the future bookmark on the fabric and cut it out.

Step 3: Using sewing machine or hand sew the fabric at the bottom and sides, from the wrong side. Then turn the fabric right side out. Use a pencil to gently push out the corners.
Step 4. Make one line on three sides, stepping back a few millimeters from the edge.

Step 5. Take thick cardboard (or a piece of plastic) and cut a strip to the size of the future bookmark. Tuck it inside the fabric pocket. This way the bookmark will keep its shape.
Step 6: Make one stitch at the top to secure the cardboard so it doesn't fall out.
Step 7. Using a piece of fabric rolled into a thin tube, make a flower. Sew a button in the center.

Step 8: Hot glue the flower to the top of the bookmark. That's all!
Don’t stuff books with unnecessary pieces of paper, candy wrappers or calendars – make a beautiful bookmark with your own hands that will please the eye every time you see it. Moreover, it is very simple! We have prepared for you a selection of master classes on making a wide variety of bookmarks, most of which are done in less than 5-10 minutes, but the crafts look very presentable.
Satin bookmarks, bookmarks-clips, faces of different animals and much more - all this can easily be made with your own hands. You can also use most of the accessories to separate notes. If you are studying, be sure to take a closer look at these lessons and choose something that will be convenient for putting your notebooks in the right places. In addition, many homemade bookmarks fit perfectly into journals or scrapbooking albums. In a word, they are universal - choose what you like.
Satin
This is more of a female option, because such a bookmark should be made from some old pendant or earring that has lost its pair. Well, such an accessory looks very romantic - not masculine.

We will need:
- satin ribbon (15-20 cm);
- accessories for bracelets;
- any pendant;
- pliers and wire cutters.
One end satin ribbon, which will be placed in the book, it is better to slightly melt it with fire so that it does not fray (observe safety precautions!). We place the second end in the fittings and clamp it. We insert any decoration into the ring where the clasp is placed.

Take a look at the photo: these homemade bookmarks look like a stylish accessory, and not just a ribbon to secure a page.

There is no shame in giving such a bookmark as a gift to someone or using it in creating a notebook if you are involved in such creative work.
Felt
This bookmark will appeal to schoolchildren and simply lovers of cute little things. In this example, we will talk about how to make a felt bookmark in the shape of a teddy bear with your own hands, but you can choose any other template (you can look at ours).

We will need:
- felt of different colors;
- foam paper;
- Super glue.
Draw the image or trace it using a stencil. You can cut foam paper with a stationery knife or thin scissors, and you can sew large felt parts with contrasting threads, making large stitches. Small parts need to be glued with superglue (it is very convenient to use a glue gun).

The base of the bookmark is best made from foam paper, as it is soft and flexible: press the strip between two stenciled shapes and glue it together.

Try adding some to your homemade felt bookmarks interesting decor or embroidery - this will make them even more colorful and interesting.
From a postcard
Making a bookmark from a postcard is even easier, because it only takes a couple of minutes to create. If you are used to filling books with postcards or cardboard, take the time to make something more original and cute.

We will need:
- any postcard or glossy cardboard;
- colored paper;
- markers.
We take any template of a triangular or rectangular shape.

We cut it out and make sure that our bookmark has “ears” cut out - this will make it more interesting. Next you need to make a fixing part. If the stencil allows, we cut out the edge along the contour to create the back and front parts. If this doesn’t work, you can glue on “legs” or “wings”.

To decorate the bookmark, use colored paper and draw faces with “hairstyles” with a felt-tip pen. By the way, such bookmarks can be made miniature and used instead of stickers or note dividers.
Magnetic
It is very convenient to use magnetic bookmarks. They do not fly out, but at the same time they fix the pages of books, which sometimes like to turn over on their own during the reading process if you do not hold them with your hand.

We will need:
- magnetic tape;
- any base;
- Super glue.
As the main material, you can choose a postcard, colored cardboard with your applique, velvet cardboard and something else. You can make a magnetic bookmark with your own hands from almost any beautiful material, which is most often used to create this accessory.
Cut two pieces of magnetic tape that will be slightly narrower than the workpiece. We attach the tape with superglue. We do not recommend taking magnets that are too long and wide, since this is still a bookmark - too tight a fixation is not needed.

Decorate your bookmark as desired, change its shape (you can make it openwork).
With button
Bookmarks made from paper clips are very convenient for securing the pages of small books and personal notebooks. They turn out to be very bright and original, and even a child can make them with their own hands.

We will need:
- paperclip of any size;
- button;
- a piece of fabric;
- Super glue.
It's best to use colored paper clips, as they will look more beautiful and won't crease the pages. You can use non-fabric buttons, but bookmarks with patterned fabric look much more interesting. Covering a button is simple: drop a little glue into the center and spread it well over the button so that there are no smudges, and tie it at the back with thread or glue it.
Glue the paperclip by pushing it slightly under the fabric. If you don’t want to use a button, you can glue a piece of cardboard covered with fabric – it will also work out great. Bookmarks with a pearl bead on top also look beautiful.
Children's bookmarks on sticks
If you want to make a bookmark for a child, you can choose almost any image to serve as its base. This is a very simple video master class that even your child can master.
Flip through coloring books, sort through postcards, or just draw fairy tale hero(or any other image) on cardboard. It is most convenient to use culinary skewers as a base, as they are very thin.
By the way, you can color the skewers using acrylic paints. But don't do it with gouache or watercolor - the paint will imprint on the book.
As you can see, making a bookmark with your own hands is a simple task, but very useful. We hope you have found your own version or technique for making this accessory in this collection and are ready to complement it with your own ideas. Well, with colorful bookmarks, reading will become much more interesting, and taking notes will be much more pleasant.
Views: 1,974
Making bookmarks for books with your own hands is a pleasant experience. Any book lover knows that a bookmark is not only a mark in a book, but also a pleasant decoration for it. There's nothing better than brewing some tea and sitting down to read your favorite book with a cute bookmark.
A bookmark is an ancient attribute that probably appeared simultaneously with the book itself. With the advent of writing, the need arose for the invention of a book, which was valued as a source of knowledge and wisdom. It took years to create one copy of the book: the pages were covered with fine calligraphy, and the covers were decorated with gold and precious stones. Needless to say, the book was handled with care, carefully turning the pages and reliably protecting it from dampness and mold? Of course, when reading such valuable books it was impossible to do without bookmarks, marking necessary and important places in advance.
Best ideas
You can easily make original and beautiful bookmarks with your own hands from various available materials - paper, felt, fabric, paper clips, etc. Surely every home has buttons, threads, and yarn. These materials are also good for bookmarks.


On a quick fix just make a bookmark from a paper clip by bending the inner and outer parts into different sides in the shape of a heart.

If you decorate a paperclip with a piece of fabric or glue it to it with glue gun button, you get a stylish bookmark.

Note. Bookmarks are useful when you need to mark several pages in a book.
An origami corner bookmark can be easily folded from paper. To do this you need to prepare:
- colored square as a base;
- colored paper for decoration;
- glue.
How to fold:

- Fold a square sheet of paper diagonally;
- Bend the top corner down;
- Align the left corner with the top and smooth it out;
- Follow step 3 for the right corner;
- Alternately tuck the corners inside the triangular pocket;
- Decorate the craft at your discretion (make a muzzle, eyes, tongue, color).

You can fold a bookmark using the origami technique in other ways. You can see how to make origami bookmarks out of paper according to the patterns below:


Just make bookmarks from cardboard or thick paper. While creating cardboard crafts can be used various techniques: applique, scrapbooking, drawing. It is recommended to cut out funny bookmarks in the shape of animals according to ready-made templates. They can simply be inserted into a book, or they can be pinned to a page.
All you need for the job is a printed template (color or outline), scissors and glue.

Various pictures made by hand or translated using a template (or carbon copy) look good on thick cardboard bookmarks. You can color the bookmark with watercolors or felt-tip pens. Colored pencils are likely to leave marks on the pages, so after coloring with pencils, it is recommended to tape or laminate the bookmark.
Needlewomen who love cross stitch will easily create a cozy embroidered bookmark. Here are some patterns for embroidering bookmarks:


To secure the embroidery and at the same time make the bookmark denser, it is suggested to perform the following steps:
- Cut out a rectangle from the canvas according to the size of the bookmark with embroidery;

- Hem the embroidery in a circle with a needle back stitch (stitch in one or two cells), leaving a distance of about 1 cm to the edge;

- Perform step 2 in relation to the second part (exactly the same stitches);

- Fold the edges and sew two blanks, passing the needle through the stitches;
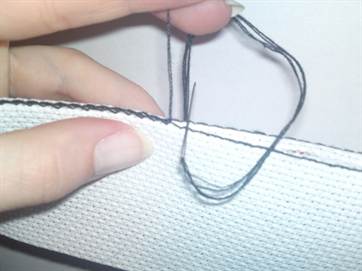
- Iron the bookmark.


Templates can also be cut and sewn interesting bookmarks from felt or fabric. Felt, like fabric, can be as thin as cardboard and can be easily inserted into a book. You can glue various elements onto felt or fabric, sew on buttons and ribbons, lace and patches.


A beautiful felt bookmark will be in the shape of a cat. For the craft you will need:
- thin felt (any color);
- threads (can be contrasting in the color of felt);
- ribbons and lace;
- rhinestones and glue;
- template and tracing paper;
- soft pencil;
- beads;
- acrylic paint and brush.
Progress:
- Place tracing paper on the prepared template, trace the contours of the drawing with a pencil and cut out the pattern;

- Transfer the pattern to felt and cut out two parts;

- Connect the two parts together using threads (sew around the edges);


- Mark a muzzle (nose and eyes) with a pencil on one side of the workpiece and paint them with paint;


