IN last years and in our country Halloween is celebrated on a grand scale, of course, American ones have not taken root here holiday traditions, like "begging" for sweets, but schoolchildren and adults enjoy taking part in costume parades and parties, so on the eve of the holiday they are worried about several things - and Halloween makeup, which must be unique. You can create a unique look with your own hands, complementing it with eccentric accessories and jewelry.
Women want to be beautiful every day, so every day they perform natural makeup, hiding minor imperfections of the facial skin, but there is only one day when the rule applies - the scarier the better, and this happens on the eve of All Saints' Day. For those who do not want to spend money on going to a professional, you can do a simple Halloween makeup at home. Correct makeup must definitely complement your outfit, so first of all, start sewing a suit or buy it in a store where it is presented wide choose various characters. You can transform into any terrible monster - become a zombie, a vampire, Dracula, a skeleton.

Halloween makeup
Even those women who know how to perform beautiful everyday makeup, may encounter certain difficulties when they decide to make themselves Halloween makeup at home conditions. If you have never applied special makeup to your face before, then it is advisable to first conduct a skin reaction test, otherwise, instead of terrible makeup, you can get a terrible allergy, and your whole face will be covered with red spots and itchy. A small amount of cosmetics should first be applied to the wrist, and after an hour look at the reaction, if skin remained unchanged, then you can start doing festive makeup.DIY Halloween makeup you should start doing it only when you have already put on a suit, especially if your dress has a narrow neck, otherwise you can then erase some of the makeup with the material and have to start all over again, but under time pressure.

First, your face must be thoroughly washed and dried with a towel. The next step is to attach objects to the face that should change its shape; you can attach warts or make a false nose; lately, false scars have been a particularly popular technique.
Next, the entire face must be covered with foundation paint, the color of which must be chosen depending on your character. Usually the face is made pale to create the image of a skeleton or a vampire, so it is covered with white paint. If you are a dead bride, apply Blue colour, and if the devil - red.

When applying foundation, use a sponge, but a brush will help you add texture to your makeup in the right places. To highlight your eyes you need to use dark eye shadow, you can buy the cheapest dark eye shadow in the store and it will do the job. You will also use dark shadows if you need to highlight certain areas on your face, for example, sunken cheekbones or eyes. You can apply shadows with a thin brush or a special sponge.
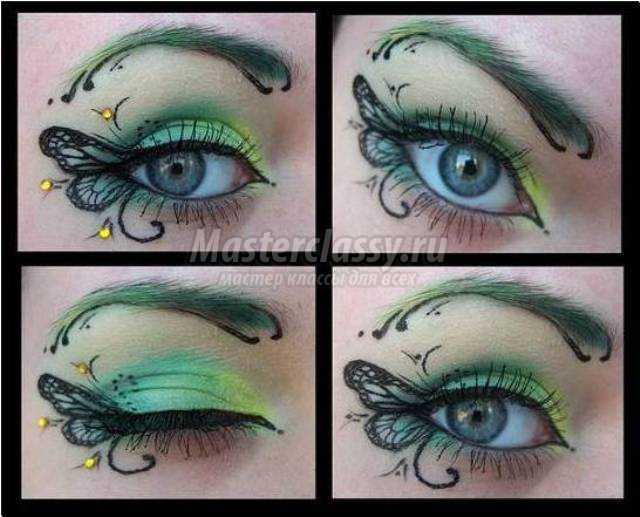
An eye pencil will help you draw themed designs, such as a web on your cheek or a spider.
Once you have applied the paint to your face, you need to apply the final layer - baby powder, to apply it we will use a large blush brush. Thanks to the powder, the paint will not smear.

Halloween makeup at home
We have covered the main points, how to do makeup for halloween, however, each stage has its own characteristics, which we must not forget that the makeup turned out to be not only bright and thematic, but also durable and lasted throughout the entire party. Applying each layer, proceed to the next one only after the paint has completely dried. To speed up this process, you can use a hairdryer, setting it to the “cold air” setting.The most popular holiday look is the vampire; it is chosen by both girls and boys. In order for the image to be complete, it is necessary make Halloween makeup at home, and for this you need to properly whiten your face.

Apply white paint For large areas you can use a sponge, but for narrow areas you need to use a thin brush. You can also make do with improvised means to create a white mass; to do this, mix flour and starch in equal quantities and add a little water. Stir the mixture until it forms a paste. Add three drops of glycerin to the finished mixture and mix again. If your cream turns out to be very thick and dense, you can add a couple more drops.
To choose Halloween makeup, photo You can look it up on the Internet, but first you need to decide on a costume, and only then choose the appropriate makeup. If your appearance is frightening, then your face should be ominous, but there are also cute, good-natured characters that you can dress up as on All Hallows' Eve, for example, if you choose an angel or fairy costume, then the makeup should be natural, done in pastel colors. Such images are especially suitable for schoolchildren. Various fantasy characters with bright, catchy faces, such as elves, are also popular. But the Witch always has a white face and black, as if drowned, eyes.

Halloween makeup: photos
It's not just the girls who are puzzled, how to make Halloween makeup at home, but also guys, because they also want to stand out at the holiday party. Of course, guys are unlikely to cope with even the simplest make-up on their own, and they will definitely ask their friends for help. Men's makeup should be very simple so that they can do it themselves. Most often, men settle on simple characters with a white face and dark eyes. You can also easily create the image of the Joker, but to do this you need to carefully draw an ominous smile.We agree that not everyone has the opportunity to buy a special make-up kit with which to create Halloween makeup, video master classes with various options There is a lot on the Internet, for example, you can do .

Blush and foundation can be made independently from available products; for example, to make bronzer, use corn starch, which is mixed with cocoa and ground cinnamon. Add additional ingredients little by little and stir thoroughly, the amount of ingredients is at your discretion until the desired shade is achieved. Add a couple of drops of essential oil to the mixture. base oil, you can add a couple of drops of vodka, thanks to these additives the bronzer will stick better.
Dark shadows can be created using activated carbon; the powder is easily applied to the eyelids with a damp brush. You can also make your own eyeliner: mix equal amounts of coconut and cocoa butter and add half a spoon of activated carbon powder.
Easy makeup for Halloween
Children can do easy Halloween makeup, for example, schoolchildren will love the image of a zombie, which is very easy to create. You need to apply concealer around your eyes, and also apply it around your lips, which will create a pale effect. The upper and lower eyelids should be covered with matte dark shadows, and they should also be applied with a large brush to the cheekbone area.Using a soft black pencil, draw vertical lines on the lips that would resemble seams. Girls can turn into a bright cat: they need to decorate their eyes with glowing shadows or multi-colored pencils, and draw a small circle on the tip of their nose with a black pencil. Moving from the nose, you need to draw a mustache on both sides. The ends of the antennae should be decorated with sparkles; they can be applied conveniently using cotton swab.
The whole family can create it, even preschoolers can do it light makeup, because they will watch the whole process with great interest and will also want to become part of this colorful holiday.
The image of a vampire is simple Halloween makeup for girls and for the guy, this way you can come with your date in similar themed costumes, like the main characters of the popular film "Twilight".

First, you need to draw two lines with a black pencil that will go from the outer corner of the eye. Then you need to fill the space between the lines: apply a white foundation to the face to remove shine from the face and whiten it. To create a pale, sallow look, you can make a mixture of gray, brown and pink eyeshadow and apply it to the chin, cheekbones, around the eyes and nose. You can give your appearance a sinister look by lining your eyebrows with a black pencil.
Complete the look with fake fangs, which will leave a bloody streak in the corner of your mouth.
When preparing for a party, be sure to prepare souvenirs for your friends, for example, a stylish present with an ominous poem inside.

Halloween face makeup
Individual elements and accessories become of great importance in your festive look; even a boring suit can be complemented by making a bright one. Halloween face makeup. For example, a simple bright dress can be complemented with “candy sponges”, to create which you will need multi-colored sprinkles for Easter. First you need to apply the base to the sponges, and then sprinkle with multi-colored crumbs.The eyes in this image can be painted with bright shadows: make a transition from crimson to yellow color.
Once your makeup has been thought out and the elements to create it have been prepared, you should think about home decor or additional accessories to complement your look. To prevent your hairstyle from looking boring, you can wear a bright wig or dye your strands with tonic, which will be washed off immediately after the party.

Can complement your hat, it can be attached to a headband using additional elements decor, make bows from satin ribbons or a base made of bright tulle. A simple hat can be made from cardboard and then decorated with material of any color.
Remember that after the party, when you return home, you need to wash your face thoroughly; this will help you remove the paint common remedy for washing off cosmetics. Make sure that cosmetics do not get into your eyes, so you need to wash them off from separate areas using a cotton pad.
Which Halloween looks are the hottest right now, and which ones are fading into the background? And is there a certain fashion for images?
 Whenever there is a make-up movie coming out before Halloween, everyone always carries that look over to Halloween. Therefore, I am sure that images of movie characters will be popular at all parties. Now I'm talking about the image of the Joker and. Also now the image of Batman and Superman from the film of the same name will be popular. In second place, in my opinion, the image where half of the face is beautiful and half is not so popular will be popular :) And of course, skulls will never go out of fashion, because they are primarily associated with Halloween.
Halloween is not a holiday here, but more of a reason to have fun and show off cool makeup and a cool costume
These three most popular images are constantly changing places: some become more popular, and some become less popular.
Homemade makeup fades into the background. Now everyone is trying to apply makeup beautifully and carefully approach the creation of the image and.
When the holiday first came to Ukraine, everyone tried to do their own makeup. And if before it was cotton wool, blood and everything smeared, now make-up artists are involved in creating images.
Also, not everyone wears terrible makeup these days. Of course, you can make yourself a Terminator, draw deep scars, but the guys like that better, in my opinion. Nowadays, if they draw a scar, it is somehow beautiful and more artistic.

How to put on your own makeup for Halloween so that it is stylish and without dirt on your face?
Well, firstly, you can safely open Youtube, select the make-up you are interested in and perform it step by step. There are also step by step pictures and photo instructions. But if you don’t have the skills, you need to try to do the same make-up many times long before Halloween, so that you already have your hands full for the holiday itself. Then everything will work out. But naturally, I advise everyone to definitely use professional makeup or children’s makeup - it’s cheaper. The latter are sold in art stores. They behave normally on the skin and, as intended for children, do not cause any allergies.
Sometimes people paint on their faces with ordinary watercolors - this is very dangerous for the skin. If you don’t want to burn or completely ruin your skin, use special makeup or face painting. And don't use glue (PVA) on your face.
How to apply makeup?
With a regular brush or sponge. Brushes can, in principle, be bought at an art store: they are much cheaper than professional brushes for makeup artists. They look a little different, but you don’t need any super brushes for makeup. A synthetic brush, which is sold in art stores, is sufficient.
What should this brush look like?
It's similar to a foundation brush, but flatter. To make good and high-quality makeup, you will need at least three brushes of different sizes. Brushes should be rounded. A flat-cut brush will leave streaks on your face.
How to give yourself scars or the effect of sewn skin?
For the effect of sewn skin, you need to use special silicone or latex.
There is two-component silicone (sold in specialized makeup stores). It consists of two jars that need to be mixed together, and then a scar is formed from the resulting mixture on the skin. Then, when the silicone hardens on the skin, you can take a regular needle and thread and stitch this scar on top, creating the appearance of sutured skin.

To make a burn at home, you can take an ordinary thin bag - transparent or, preferably, with a pinkish tint - stretch it, cut it, and stick this stretch on your face.
To avoid burning the skin, glue it with eyelash glue or special sandarac glue. And then apply makeup on top. This trick makes it look like you have a burn on your face and as if your skin has split open.
On Halloween, all kinds of lipsticks are in demand among girls. bright colors- blue, green, black, etc. Where can you buy them and is it possible to get the desired shade yourself by mixing lipsticks of different colors, for example?
Can. I once needed a purple lipstick, and I mixed blue eyeliner and pink lipliner on my lips and got the color I wanted. What I mean is that you can just buy cosmetic colored pencils and decorate yourself with them. If you need your makeup to last all day, choose waterproof ones. You can also use shadows to cover the lipstick color to get a different one (for example, on purple lipstick blue pearlescent shadows).
NYX, Atelier, Make Up For Ever, M.A.C., LimeCrime have a lot, Cailyn has very beautiful lipsticks. There are a lot of companies and American cosmetics are famous for their quality. It is hypoallergenic and very pigmented: whatever color you see in the jar is how it will be in life.
After Pat McGrath released the glossy lip kit, it became a super trend. And you also applied this trend to the main character, a vampire, in the show “The House of Secret Benefits.”
In general, the story with the glitter lips turned out to be very funny, because in fact, before , I've already thought through the image. And then I thought “damn, why didn’t I patent this?” But naturally, I consider her a very cool makeup artist and always rely on her.
Just as glitter is in fashion now, glitter lips will be one hundred percent trendy on Halloween. I think about seventy percent of girls will use glitter in their looks.


In order to do glitter makeup yourself, you don’t have to buy cosmetic glitter (they are very expensive). Construction stores sell dry glitter intended for decoration. They are absolutely no different from professional glitter.
.jpeg)
You can also use glitter for nails, but you need to check if there are small grains that are added to add volume to your nails. You need to make sure that the grinding is only made of sparkles.
How to apply glitter and how to make it last the entire party?
First, apply lip liner, then regular bold lipstick the same color as the glitter (for example, blue glitter - blue lipstick) or thick baby makeup. Use the flat part of a synthetic brush to pick up glitter and apply it to your lips. Then you put it on your lips again.
You can use your finger, but you shouldn’t dip the same finger in glitter. After the first application of glitter on your lips, you will have a greasy base on your finger and the next time you apply it with your finger, you will matte the glitter on your lips.
Therefore, you need to apply glitter with different fingers. Also, do not apply glitter on the inner surface of the lips, closer to the mucous membrane. There will be enough lipstick in this place, otherwise you will simply eat too much of this glitter over the course of the evening. If glitter sticks to your skin, remove it with an eyebrow comb (looks like a mascara wand).
Where else can you use glitter?
Now you can do it everywhere :) You can cover your entire neck with glitter and make your face matte. You can make your eyebrows with sparkles. You can apply glitter to your eyebrows.

On the eyes you can apply it to the entire eyelid, under the eyelid. At one of the specialized exhibitions in the States, I even saw men whose beards were completely covered in glitter.
Tell us about the image of Vicky Maremukha, whom you turned into Maleficent. Is it difficult to replicate such beauty yourself?
.jpg)


It's actually not difficult. I did Vike, and then I took eyeliner and drew wreaths with it. And if you powder these veins with whitish powder, you really get the effect that the veins are visible through the skin. Also me, moving from black to red.
Are there any rules and possible taboos regarding Halloween makeup? For example, if this is the image of a vampire, then the face must be matte?
I think anything is possible on Halloween! You can't limit yourself here. Who said you can't use highlighter or you can't have a matte face? Well, first of all, I love highlighters and I love when the face is vibrant and shiny :) But no one canceled matte, so if you come with a matte skull, why not? A shiny skull is even better! I love sparkles, I love highlighters, I love when something shimmers, it always looks more vibrant. But again, our holiday is inanimate, so there can be matte faces, shiny skulls, and whatever your heart desires.
Halloween is a holiday where anything is possible! In addition to daytime and nude makeup, of course. It has nothing to do with Halloween.
For Halloween, can you focus on your eyes and lips at the same time?
Yes. Halloween is the time to break the one-accent rule. Here you don't have to limit yourself to just one thing.
What can you add to the usual? evening makeup, so that it turns into Halloween makeup?
You can add a drop of blood that will flow from the corner of your mouth. You can insert unusual colored lenses - for example, white ones. And that's it, you're ready for Halloween!
How to make blood from improvised means?
Blood can be made by mixing glycerin and red pigment. But if you don't have red pigment, you can use red eyeshadow. You can not mix anything at all and just paint any blood with a brush. If you want it to shine, you can add glycerin on top. You can even draw with tomato juice. Blood with red sparkles will look very beautiful.
If you need to change the shape of your eyebrows for an image (for example, make an angry expression on your face), how can you disguise them in order to draw the desired shape on top?
In general, there is a special eyebrow putty. But if you don’t have it, you can cover your eyebrows with soap. Take a bar of dry soap and thoroughly smear your eyebrows with it until you feel when you touch it that you can’t feel the hairs. If you have thick eyebrows, comb them first to smooth them out.
How can I make it look as if half of my ear is missing or my skin is hanging down? Can you do this yourself?
If you are not involved with makeup, it will be difficult for you to do this. In general, you can actually use latex to make loose skin. Previously I used PVA glue. But if you are already applying PVA glue to the skin, then be sure to apply it first Foundation so that you don't have any allergies. You apply the glue with a sponge, wait until it dries (you can dry it with a hairdryer), then powder it several times, as if layering it. Then you just peel it off and it comes off, creating the appearance of hanging skin.
And if I want to transform into a zombie, how can I make dead, bluish-brown skin?
You can use purple-bluish shadows or just take a powder brush and completely cover your entire face with these shadows.
.jpg)
If there are no shadows, you can use lipstick, bold or childish makeup: choose several colors, mix them together and achieve the desired effect.
Do eyelashes have to be present in images, or may they not be there somewhere? Can they be painted on with mascara or do I need to use extensions?
It depends on the image, of course. For example, if you are making a skull on the half of your face, it will look more impressive if you paint the beautiful part of the face, and don’t paint the scary part at all. Then it will seem that one eye is large and the other is small. If you have drawn a beautiful skull all over your face, you can use false eyelashes with feathers. It will look very cool!

It all depends on what effect you want to achieve.
How to remove makeup? What remedies will cope with this?
If you use heavy makeup, then you need to wash it off with oil-based products - oils are best, but you can also use a two-phase product. It will even do baby oil Johnson`s baby: apply it to the areas that need to be washed off and wipe with a dry cloth. If it is face painting, then it is washed off with any makeup remover. If this is some kind of special makeup, then you only need special means. Sometimes they are on alcohol based. It is also better to wash off eyebrows rubbed with soap, as well as glitter, with a two-phase solution, but they need to be washed off locally, and not rubbed all over the face.
Sometimes a person finds himself in a rather unusual situation when he needs to do makeup at home. Is it possible to create an unusual image yourself and save time and money on visiting specialized salons? Of course it is possible. You just need to follow the instructions correctly.
Skin preparation
Before you start applying makeup at home, you need to properly prepare your work space. As for classic application, the skin must be thoroughly cleansed. IN otherwise the created image will not last long time and will let you down at the most unpredictable moment.
Wash with a product suitable for your skin. After this, wipe your face with tonic or lotion. This will help tone the skin. Next, apply the moisturizer you use daily. Let the cream absorb completely and start creating makeup.

Wrinkled face
This makeup is quite easy to create at home. You will need gelatin, pharmaceutical glycerin, some plain water and foundation. This look would be perfect for Halloween or carnival.
First, mix gelatin with glycerin and water. Place the mixture in a water bath or heat in the microwave. When the gelatin is completely dissolved, add foundation to the mixture. In this case, you should give preference to inexpensive products. Mix the solution thoroughly. After this you can apply makeup.

At home, you can use a brush or your own fingers. Distribute the mixture over the skin of the face, creating folds and wrinkles in the right places. Deep dents can be made using ordinary available tools. Once the look is ready, let the makeup dry thoroughly. Finally, you can apply foundation powder with a special brush and, if necessary, use pencils for face painting.
White face
This makeup is created at home using potato starch, flour, pharmaceutical glycerin and plain water. Mix all ingredients and mix the solution thoroughly. You should end up with a thin, creamy mass.
Apply makeup to your face using a sponge or brush. Spread the layer evenly over the skin and let it dry. Once you have a snow-white skin tone, you can begin to complete the look. To do this, use the usual decorative cosmetics or special felt-tip pens for drawings on the skin.

Creation of skin defects
Makeup at home can be done using additional products. This look is perfect for celebrating Halloween or Christmas.
Select matching accessories. This could be a missing eye, a false nose, warts or other skin defects. Usually such things are sold in specialized stores. They always come with glue. But if you simply glue an artificial body to your face, it will be noticeable. That's why it's so important to create the right makeup at home. Photos of the finished model can be seen in this article.
Prepare a mixture of gelatin, water and regular rich cream. Thoroughly dissolve the bulk substance and heat the mixture. Glue the artificial body part to the face and evenly brush the border area with genuine leather. If necessary, apply the resulting mixture all over your face and create additional imperfections. You can also apply finishing touches with After that, let your makeup dry. The image is ready!
Good luck to you in this interesting work and have a nice time!
Few people need to explain why artists use makeup. It allows you to create the necessary image, sometimes radically changing a person’s appearance, and almost any scenario requires this kind of preparation. In our article we will talk about how to make white makeup yourself, and without resorting to the help of expensive cosmetics.
In many ways, the process of preparing makeup at home depends on its purpose. Whether the artist performs in front of a camera or on a live stage plays a big role. Thus, it is convenient to classify makeup into two types: for theater and for cinema.
Let's start with theatrical makeup. Considering the fact that we strive to budget option, let’s try to limit ourselves to the most available “materials”. To obtain the fat we need, we will need lard, which we will then melt, and for painting we will need ordinary watercolors. The “cinema” type of makeup here will differ in that you need to use simple Vaseline as a base.
Much of the cooking process depends on the surrounding atmosphere. In particular, in cool air it is quite possible to prepare a light makeup using the ingredients in equal proportions. If the conditions promise to be hot, there is an increased likelihood that the makeup will run at the most crucial moment, and here the proportion of fat must be reduced, using it in a ratio of 1 to 2. This will allow the “makeup” to become thicker.
If you know how to cook pancakes, you will succeed with homemade makeup preparations. The ingredients are mixed gradually, added in small portions. It is important to constantly mix them to create a homogeneous mass. It is best to use glass as a platform, on which it will be convenient to carry out all manipulations.
When choosing paints, it is better to give preference to children's watercolors, since they have a low level of toxicity and are unlikely to cause allergies.
You should also keep in mind that the prepared “dish” will not have the properties you need for long, so white makeup must be done for a specific performance or event. Otherwise, special preservatives will be needed, and if absolutely necessary, the prepared mixture should be stored in the refrigerator.
White makeup, or any other, requires appropriate preparation before applying it to the skin of the face, as is the case with regular makeup. Pull your hair away from your face and carefully comb it back, tying it into a ponytail or securing it securely at the back of your head. To prevent small hairs from falling on your face, you can use a cotton bandage.
As preparatory measures before applying makeup:
- lubricate your face with a greasy base (Vaseline or baby cream will do);
- remove the leftovers fatty product using a cotton pad.
When applying foundation, do not apply excessive pressure to the skin. Do this with your fingers, using light massage movements, starting from the periphery of the face and moving towards its central part. Make sure your skin is dry and remove all makeup from your face, the presence of which could cause the makeup to “run.”
If you do everything correctly, the makeup will be applied in an even layer. At the same time, evaluate the degree of fat content of the paint used; the need for fat in the overall mixture will largely depend on this.
Nowadays Halloween is becoming more and more popular, in preparation for which it is important to use white makeup. For this purpose, white paints can be used as a coloring agent.

Applying the base
Your final result will depend on the quality of this phase. By the way, it is not at all necessary to prepare makeup yourself - you can buy ready-made products, and then apply them to your face at home.
These ready-made kits contain paints in the following shades:
- pale pink;
- deep pink;
- tan color.
Such a decision would be appropriate if you do not want to do makeup, but to somehow expand the range of possible solutions. And in this case, the work will be more painstaking: you need to get correct color makeup, take into account the specifics of the skin, apply the product evenly on it and shade it. In the case of white makeup, certain errors may be allowed that will not be so visible. Especially if there are some additional elements on top of it (black, red), which can often be seen at themed masquerades such as Halloween.

We should not forget about simpler solutions, such as using flour or toothpaste. The latter option has been known to many for its effectiveness since the days of pioneer camps, but it is important to remember that toothpaste It dries and tightens the skin greatly.
In any case, don't be upset if something doesn't work out the first time. The first pancake is lumpy, don’t be afraid to experiment. Only in this way will you arrive at optimal proportions, and perhaps even come up with a personal recipe that allows you to do effective makeup quickly, easily, and most importantly, on your own.
IN first part
In the story about theatrical makeup, we looked at the basics of this art, but even with this basic knowledge you can achieve incredible transformation!
Today we will learn how to age your face so that it looks as natural and impressive as possible.
As a rule, makeup old age is divided into two categories: to create the image of vigorous old age and decrepit old age. If you look closely at older people, you will notice the following characteristic features of old age: faded and uneven complexion, wrinkles in the forehead, cheeks, chin, neck and eyelids; pronounced depressions in the temple area; altered shape of the mouth and lips due to lost teeth; cloudy look.
How to do old age makeup step by step
First of all, as we already know , applied to the face tone. To do this, use dark body paint or a mixture of white, light flesh and gray, taken in a ratio of 2:1:1. For make-up of decrepit old age, a mixture of three colors is more suitable, because It is they who give the face a sickly, weak appearance.The next step is to do the makeup. eye: the upper eyelid and eye socket are sharply darkened if it is necessary to create an image of active, even despotic old age. How to darken your eyes to give them shine and brightness was described in first part our story. But in general, to create an older look, it is enough to slightly darken the edges of the eyelids in a tone that will be slightly darker than the eye socket.
Very often, a sign of old age is watery eyes. To create this illusion, the upper and lower eyelids are lightened flesh tone, and at the very base of the eyelashes draw a thin light red line.
Under the eyes in a light tone the so-called “bags” are outlined, and the upper part of the cheekbone is outlined with a brown outline and shaded with a finger so that it almost completely merges with the tone of the cheeks.
To complete the impression, thin strokes depict a network of radial wrinkles running from the outer edge of the eye to the temples.
Next we move on to the makeup. temples, eyebrows and forehead. As a rule, old people have rather sparse and uneven eyebrows. This effect can be achieved if, when applying a general tone to the face, you also touch the eyebrow area (directly on their hairs). For greater expressiveness, thin braids of artificial eyebrows can be glued to the middle of the eyebrow arch.
The forehead area usually serves as the main background for applying wrinkles. Beginners often make the mistake of simply drawing parallel lines on the forehead with black paint and then blending them out.
As is known from the theory of theatrical makeup, dark paint applied to the face appears to an outside observer as a depression, and light paint as a bulge. Therefore, it would be most correct to first mark wrinkles, which are folds of skin, with dark red and brown paint, and then lay light flesh lines next to them and shade them so that the appearance of shadow (depression) and light (convexity) is obtained.
It is best to draw wrinkles by first wrinkling your forehead and lightly outlining the natural folds of the skin, after which you can proceed to their final “drawing.”

To create the effect of a “dip” in the temple area, the depression in this place is shaded with gray paint. If the person doing the makeup has a good knowledge of anatomy and artistic drawing skills, then using a blue pencil on the temples you can draw a thin mesh of veins visible through the skin. These lines should not have clear contours, otherwise the “veins” will look more like an incomprehensible tattoo than blood vessels.
To avoid the impression of deathly, unnatural pallor, it is necessary to lightly touch the most prominent point on the cheekbones and the tip of the nose with pale blush.
In old age, you can often observe small folds in the nose area - to create complete authenticity, you should not neglect the makeup of this part of the face. Using short lines, draw the folds going up from the base of the nose, as well as in its lower part.

As a rule, the most conspicuous parts of the body that are subject to characteristic age-related changes- this is a forehead with wrinkles and a sunken mouth with pointed chin.
To “draw” such a mouth, the lips are whitened with a light overall tone with a very small addition of light purple shades, which are obtained by mixing dark red and gray-blue paints.
Then, dark brown paint is used to sharply mark the downward corners of the lips and nasolabial folds. If an imitation toothless mouth is created, upper lip the area where the mustache grows is darkened, fine wrinkles are drawn around the lips, and the teeth are painted over with black paint.
To create the impression of a pointed chin, two light highlights are applied to the protruding part of it, and the lower lip is shaded with a dark line drawn along its contour.
In the neck area, dark stripes indicate protruding muscles (sternoclavicular muscles), and the space between them is filled with light paint. The area under the chin, the middle of the neck and throat is darkened with a wide strip to create an imitation of skin folds.

We emphasize the outlines of the cheekbone: under the lower edge of the cheekbone we draw a very light dark shadow, we also shade the area located from the brow ridge at the temple to the parotid space.
A light shadow is drawn from the inner corner of the eye, parallel to the nasolabial fold.
And finally - a few useful tips from the book's publishers.


