This set of cat warmers will create a cheerful mood in any kitchen. The main thing in this model of warmers is to choose a nice fabric and play with it when sewing.
We measure the teapot or pan according to its largest diameter and add about 4 cm for free fitting. Divide the resulting amount by two. This will be the width of one half of the product. We cut out the two main parts, not forgetting the seam allowances.
We also cut out the overlay for the muzzle and ears (2 parts).


We cut out the lining for the ears from white fabric. For the tail, cut out a long strip.

From white fabric we cut out the linings for the main parts without allowances. You can immediately use a warm cloth for this.

The second option is to use synthetic winterizer for insulation.

We assemble the inner cap. On the outside there is synthetic padding.

We close the ears, lowering them a little colored fabric. Sew a small fold on the white fabric.

Finished ears - see photo.

We make a loop from colored fabric.
We fold the parts of the colored cap with the right sides inward, put in the ears, a loop and sew along the upper contour. When inserting your ears, make sure that their tops are directed toward the center.

We turn the part inside out and put it on the white cap.

Match the side seams and stitch the parts along the bottom edge.

Sew the tail along the long side.

Then on a short one. We turn the part inside out.

Fill with filler, pushing small pieces of padding polyester through.

To cover the muzzle, cut out an insert from cardboard. If desired, you can make the overlay fluffy by placing padding polyester between the cardboard insert and the fabric.
And if you want the cat to have beautiful and embossed underpads, as in the photo, then assemble the overlay along the contour, putting the filler inside. Sew a bean bag in the center - see photo above.

We process the edge of the part with a seam over the edge, slightly gathering it.

Place the fabric over the insert and tighten the thread.

It turned out to be a beautiful overlay.

We apply the overlay to the main part and sew it on.

In this case, we place the seam inside the fold, between the main part and the overlay.


Sew on the tail. We make eyes and attach them to the muzzle.
The heating pad is ready!

Warmer with cherry pits

This warming bunny will not only help keep you warm in cool weather, but will also become your child’s favorite toy. To make it we need cherry pits. They need to be prepared in advance - boil with a small amount vinegar, air dry and then in the oven.

The pattern consists of several parts. They need to be printed in full size on A4 format.

We cut out details from two colors of fabric - see photo.

We sew down the details of the legs and turn them inside out. We make a seam on the head and sew the head to the body.

Fill the paws with bones or filler and put them in place. We sew down the parts of the body and legs, leaving a gap for turning and filling.
We fill the torso and head with bones.

We lay a seam along the connection line to mark the bunny's neck. We do not do it to the full length, otherwise the head will hang unsightly.
We sew the tail in a circle and tighten the thread. Add some filler and tighten. Sew the tail in place. We don’t fill the ears with filler, we just sew them onto the head.

We draw the eyes with a felt-tip pen or embroider them with black thread.

The warming bunny is ready!
Set of two potholders and a heating pad in patchwork technique

To make a kit we will need:
- thin fabric for the base;
- shreds of different colors;
- fabric for the bottom lining;
- seal;
- needles, threads, pins, sewing machine.
Description
We cut out the base parts on which we will create the patchwork fabric. Determine the shape and size of the parts as you wish. If the heating pad is made for a teapot, you need to measure its largest circumference and height. The width of one base piece should be a couple of cm wider than 1⁄2 its circumference. For the heating pad we cut out two parts of the base, for potholders - one at a time.

In the center of the base we place a small but bright piece of fabric, orienting it with an inclination relative to the sides of the base part. We place the second patch face down on one edge of the central patch and secure it with sewing pins.
We sew at a distance of 0.5 - 0.7 cm from the edge.

Turn the sewn fabric over to the right side and iron it.

Then, moving clockwise, sew on the remaining patches. Each new flap should overlap the previous sections. Pay attention to the color combination of the flaps. Once completed, each seam is ironed along the front side.

In this way, we create a fragment of patchwork fabric on the base.

We cut the workpiece to the size of the base.

Similarly, we create patchwork blanks for the second potholder and heating pad. We cut out the parts of the potholders and heating pads from the insulation. From the lining fabric we cut out the lower parts of the potholders and heating pads.
We chop off a sandwich from the base, insulation and lining with pins and sew a stitch along the edge at a distance of 0.5 - 0.7 cm from the edge. Trim the edge as necessary.

We make bias binding 30 - 40 mm wide for turning potholders.
We make a loop. We attach the facing, folding it with the main part with the right sides. Don't forget to insert a loop into the seam.

We wrap the edge of the part with the facing, bend the cut and stitch it.


We fold the two parts of the base with the stitched patchwork fabric with the right sides facing inward. We insert a loop at the top. Sew along the contour, except for the bottom. Similarly, we grind two parts from the lining.

Turn out the patchwork cap. We insert the cap from the lining into the main part.
Finish the bottom edge with a facing.

Hen

Such a cute hot water bottle chicken can be made using the patterns presented below.

Another version of the chicken warmer can be sewn from felt or any non-flowing material.

Pattern and step-by-step master class are presented in the photo below.


Cockerel

To sew a heating pad for a teapot with your own hands using a pattern we will need:
- felt - pieces of different colors;
- braid, beads for decoration;
- filler;
- threads, needles, awl.
Description
Print and cut out the patterns for the heating pad.


We cut out all the parts in the required quantity. Using an awl, we pierce holes along the contour and at the joints of the parts.

Sew the eye bead to the head. We sew the head in place - see photo.

We do the same with the 2nd part.

Sew the feather to the circle with white thread.

Repeat for the remaining 13 parts.

We stitch the pink feathers with the needle forward.

Decorate the tail with pieces of braid.

Sew decorative feathers onto the tail.

Sew the tail, leaving a gap. Fill it with filler and sew up the gap left.

We sew the seam forward with the needle on the wings.

We connect the two parts of the wing with a loop seam, placing the filler inside.

We do the same with the 2nd wing.

Attach the feathers to one of the body parts.


Sew the head onto the body.

Repeat the steps for the 2nd part.

Sew on one wing.

Repeat the steps for the 2nd part.

We follow the contour with a buttonhole stitch, sewing together the two halves of the heating pad. We sew a comb between the two parts.

We also sew in the tail.

Sew on the beak.

We grind the beard.

We sew a loop stitch around the bottom edge of the heating pad.

The heating pad is ready!

Below are two more options for patterns for a cockerel - heating pads.


Owl

To sew such a heating pad we need:
- coffee-colored fleece;
- felt in white, yellow, black and blue colors;
- felt or fleece of carrot color;
- cotton fabric for the inner cover;
- threads, needles, scissors, sewing machine.
Description
We draw out 1⁄2 of the pattern for half of the main part according to the size of our teapot, and cut it out.

You can come up with patterns for decorating an owl yourself or print them from our website.

Fold the coffee-colored fleece in half and cut out the main piece with seam allowances. Then we cut out a second similar one.

We straighten out the details.

We cut out the details of the inner cover from cotton fabric.

We cut out decorative details - blue feathers, white eyes, black pupils.

We cut out the wings and beak from carrot-colored material.

We cut out feathers and eyebrows from yellow felt.

On one of the main parts we lay out the elements of the owl's face. We fix them with pins.

Sew on with matching threads by hand or by machine.

We fold the two main parts inside out and sew along the upper contour.


We put the main cover into a cotton fabric cover with the right sides facing each other.

Sew the bottom seam, leaving a gap for turning.

Turn the toy inside out and straighten it out.

We tuck the inner cover under the outer one. We sew up the gap with hidden stitches.

Warmers for the kettle.


The ancient custom of covering the teapot with special dolls has survived to this day. Interestingly, the dolls have hardly changed. We offer you several new versions of an old invention.
The heating pads, despite some differences, are made according to the same principle, using which in the future you will be able to invent and make your own.
The basis of any heating pad is the cover. Its pattern can be very diverse, however, the process of making the cover is the same for all models. From any thick fabric, remove the two outer parts of the cover. Sew them together along the ABC line using an over-the-edge seam. Cut out exactly the same two parts and sew them from flannel. You now have the outer and inner parts of the case. Now turn both parts right side up and fold as shown in the picture. From thin foam rubber, cut two gaskets in the shape of the cover, insert them inside the outer part and, as far as possible, sew the inner and outer covers together along the AOB line. Insert the inner part of the cover into the remaining hole and straighten it so that there is foam rubber between the parts on both sides. Now sew up the hole with a “blind seam” and the heating pad cover is ready.
Covers for heating pads “Cow”, “Lion” and “Cat” are made using one pattern.
PATTERNS OF EXTERNAL DETAILS OF THE COVER OF THE KETTLE HEATER
Source: M. Kalinich, L. Pavlovskaya, V. Savinykh “Handicrafts for children”

Sometime in 1996, I came across an original Hot Water Doll for a teapot in a store. A few years later, I came across a similar model in one of the needlework magazines. I will introduce it to you. Based on this model, I then created a series of warmers dedicated to the symbols of the year according to the Chinese horoscope. I made all the patterns arbitrarily, the main thing was to fit the size of the teapot (they are also different).
We will make a blank for a warmer skirt from light chintz measuring 50x80 cm. Fold the fabric in half and put inside a strip of batting (padding polyester) in several layers, measuring 24x79

This blank needs to be quilted for the strength and stability of the skirt. We sew and get a bell skirt.

From thick knitwear or other suitable fabric we cut out 2 parts of the Monkey’s head and body. First we sew on a dress and lace for each detail.

Only then do we sew the halves together, turn them inside out, stuff them with batting through the bottom seam and sew them up.
We sew the ears to the head-body. We sew the arms long, stuff them loosely, stitch the palm, marking the fingers with seams. We sew sleeves from small rectangles, decorate them with lace, and gather the sleeve with thread where it is sewn to the body. We sew the sleeves together with the arm. We sew the body to the warmer skirt. Decorate the face. We make a hairstyle from loose yarn. We cut out the mouth from a large oval, collect it with thread around the perimeter, tighten it and stuff the resulting lump with cotton. Sew the muzzle with a hidden seam. We embroider the mouth and use beads to mark the nostrils. From beads - eyes.

Now we need to sew the overskirt. We take a rectangular piece of chintz 28x85 cm, sew on lace, braid, an apron decorated with various braids, sew on the skirt, turning the top edge 1.5 cm in order to insert the tape later. We put the skirt on top and pull the ribbon into beautiful bow behind the doll.

It would be nice to give the doll a name and embroider it on the apron. This gives her a special charm.

If you get creative, you can sew other dolls, for example, a Pig.

Do-it-yourself heating pad for a teapot

The procedure for sewing a heating pad for a teapot, regardless of the model, is almost always the same. The basis of any model differs only in configuration and additional components, such as an apron, hat, bows, and the like. For any teapot warmer you need a base fabric, lining fabric, synthetic padding, various braids, threads, buttons, patterns.
We cut out the main fabric, lining fabric and padding polyester according to the pattern, having previously folded the fabric with the right side inward.
Kettle warmer PEACOCK
First of all, we decorate the cut out main part, that is, we sew on a bright braid. You can sew on colorful patches to imitate the colorful tail of a peacock. We sew the padding polyester and the lining of the heating pad together, insert it into the tail and process the edge.
For the body of the bird, a plain fabric is best suited. We cut it out according to the pattern, sew it on the wrong side, turn it right side out and carefully fill it with padding polyester. There is no need to fill it tightly with padding polyester. We cut out a beak from leather and sew it to the peacock’s head. Determine the location for the eye and sew on the button. We sew a crest onto the top of the bird's head. It can be made from braid with lurex. Now we connect the peacock’s body with the tail, and secure the head with several stitches.


Kettle warmer MOUSE
The basis of the warmer is the mouse's dress. First of all, we cut out boots 4 parts. After sewing and turning it right side out, we fill it with padding polyester. We sew the boots into the mouse's dress while processing the edge of the heating pad. When the dress is almost ready, sew a frill of fabric or lace along the edge.
Mouse head: We cut out 4 parts of the ears, sew them in pairs, turn them inside out and along the front side we will lay a stitch along the edge of the ears. We cut out 2 parts of the mouse's face, put ears between them and stitch them. Turn it inside out, fill it with padding polyester, and sew up the hole. Hair - from any thread, we braid it, tie bows. Next, we sew on a nose button (or embroider with black thread), freckles (beads), and button eyes. Ready head sew it to the body dress.


Warmer for a teapot CAT or CAT
The cat's body is simply a cap with a frill made of fabric or lace.
Cat's head: We cut out 2 parts of the head, sew them together, turn them inside out, fill them with padding polyester, and sew up the hole. We cut out the mustache from cloth. We cut out the overlay for the muzzle, gather it around the perimeter with a strong thread, fill it with synthetic padding and sew it to the muzzle along with the mustache and tongue. Sew on the nose-button and eyes. We sew the head to the body. You can sew a tail on the cat and decorate its head with a hat.
Winter has come with its long and dark evenings. We spend more and more time at home. So, finally, you can do some handicrafts! In this article you will see models of covers and warmers for a teapot, handmade using knitting needles, crochet or sewn sewing machine. It seems, why is it needed, this cover for the teapot? I agree practical use its quite controversial. But you can’t deny the decorative quality of these products. It will decorate and refresh your kitchen, and will certainly attract the attention of guests. This article presents the following models of covers and warmers for the kettle:
- made from fabric
- fabric warmers with applique
- warmers made using patchwork technique
- crocheted and knitted
Let's take a closer look at the models of heating pads sewn from fabric on a sewing machine.
Here is a completely simple model. The two fabrics are chosen to your liking and sewn together, right sides together, as if you were sewing a bag. Do not sew up one side and turn the product inside out through this hole. Then, tucking the edges of the fabric inward, sew up the fourth side of the future heating pad. (By the way, thin batting or padding polyester could be laid between these two fabrics.) Stepping back 3-4 centimeters from the edge, sew a drawstring on both sides of the future cover. Now just place the kettle on the finished “creation” and lift both edges to the kettle lid. Insert a string into the drawstring and tighten it around the teapot. The heating pad is ready!
The next model is probably no more difficult to sew than the previous one. The pattern is simple: draw a regular oval and divide it into two parts. The width of the oval should be more than half the circumference of the teapot by 2-3 centimeters. The height of the heating pad can be equal to the height of the kettle, or maybe more.

Of course, the design of your heating pad should match the decor of your kitchen. And, if you are crazy about cats, then sew a cat. But choose suitable color fabrics.

If you are so skilled that you can embroider on a teapot warmer, then your work will become even more attractive.

New Year 2017 will be the Year of the Rooster eastern calendar. Perhaps someone would like to sew a heating pad in the shape of a cockerel or a chicken for themselves or as a gift for someone else.

Watch a useful video that may help you achieve your plan.
Not sure if you can handle sewing a rooster-warmer? Then just sew a heating pad with a New Year's theme.

I think any creative work(including sewing a teapot warmer) deserves respect. Moreover, the work done in appliqué technique. The products are made as follows: any shapes are cut out of fabric and sewn to another fabric chosen as a background. They turn out perfect original products. Such works are also often combined with embroidery.

Watch a master class on making a hot water bottle for a teapot in the shape of a house.
Products made using patchwork technique, require certain skills for their production. You need to learn how to combine and sew fabrics together. First you need to try sewing simple patterns in patchwork style. If you are satisfied with your products, proceed to more complex forms.

Watch a master class on how to sew a patchwork warmer for a teapot.
Let's move on to knitted warmers, crocheted or knitted. Of course, those who know how to knit just need to look at some model they like, and then it’s a matter of skillful hands and several hours of work. And novice needlewomen will have to learn a little or ask more experienced housewives. Start with simple models. Here is a heating pad knitted on knitting needles. Two identical fabrics are knitted, and then they are sewn together, leaving holes for the handle and spout of the teapot.

There are many simple models. If you are not yet confident in your knitting capabilities, learn from simple examples.
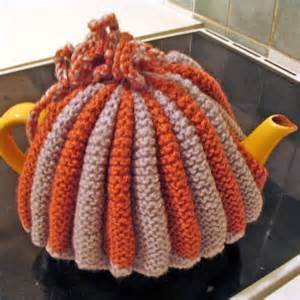
To decorate simple warmers, you can use buttons, beads, sequins and others. small items that are at home.

Usually, heating pads are knitted onto a specific teapot. Therefore, be sure to try on the product while working.

To make the teapot look elegant, just tie a decoration on the lid.

If you know how to knit well, choose any pattern and get to work.
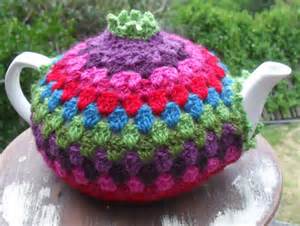
A lot of various models You can come up with some warmers and finally knit some for your teapot. For example, crocheted various fragments can be sewn together to create a heating pad for a teapot.

Tea warmers decorated with flowers have always been and will remain popular. Boundless scope for creativity: who will get what kind of flowers.

And the hot water bottles turn out one more beautiful than the other.

But these “roses” can be assembled even from an ordinary narrow knitted strip!

Not only the floral theme is very popular in knitting warmers for dummies, but also berries.
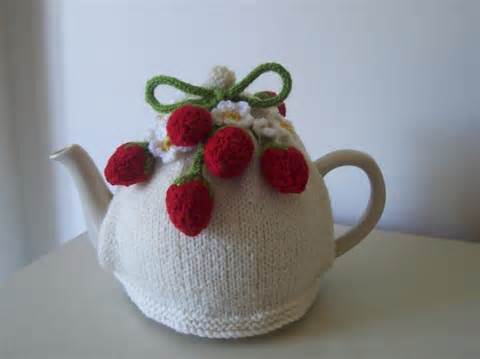
You can combine both berry and flower if it’s difficult to choose which you like best.

Another detailed master class How to knit a heating pad for a teapot using a crochet hook.
Approaching New Year and many are trying to come up with something original in the form of a Christmas tree. For us this will be a heating pad for a teapot.

Another example of a Christmas tree warmer for holiday tea parties.

And someone will want to knit a snowman or Santa Claus and decorate a teapot warmer with these New Year's symbols.
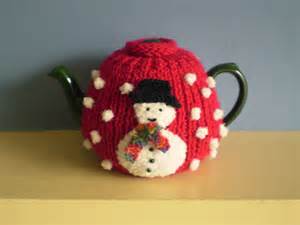
It’s easy to knit a Christmas tree and a snowman on knitting needles, and then sew them onto the finished warmer.

Christmas star on dishes, figurines New Year's toys and a teapot in “winter” clothes: pleasant evening, just right for tea.

The symbol of the approaching New Year is the Rooster. Chicken is also suitable for a teapot warmer. You can, of course, knit this “bird” that is brighter and more expressive. It's up to who likes it more.

And here is a teapot warmer in the shape of a chicken.

If you want more ideas for decorating a warmer for a teapot, watch this video. Best wishes to everyone!
For many people, drinking tea is a reason to spend time having intimate conversations with their loved ones, family and friends. What could be better than delicious hot tea? warm evening with gingerbread and pies in good company. If you like to cover tea table, you probably have a teapot and beautiful tea cups. Just like in the good old days, when there were no electric kettles yet, and the kettles were heated on the stove, you can keep freshly brewed tea warm with a kettle warmer. In the old days, there were a wide variety of hot water bottles that were placed on top of both teapots and even samovars.
Today, with the help of a teapot warmer, you can decorate your table, thereby adding a certain zest to the interior of your kitchen, emphasizing your individuality.
We will share with you some ideas on how you can make unusual warmers for teapots.
Making hot water bottles is similar to sewing oven mitts.
With a little effort and imagination, you can make a bright, creative heating pad that will delight you with its appearance, surprise your guests, and give everyone good mood, and also keep a warm, delicious drink on your table.
We bring to your attention the following ideas for decorating your kitchen:
You can sew a hot water bottle in the shape of animals quite simply. To do this you just need to cut out the parts the desired shape and with the help of applique details give the look. The heating pad in the shape of an owl is made using this technique:
If you complicate the process a little, you can make a heating pad, to the main part of which (the animal’s body) the head, legs, and tail are sewn. For example, this way you can sew a cat warmer or a teapot hot water bottle in the shape of a cow.

You can also make a heating pad for a teapot in a simple semicircle shape, which you can decorate with embroidery or sew on with various decorative elements. All you need is to master embroidery of simple pattern elements or cross stitch.

Well, if you know how to crochet or knit, then you can knit a cover for a teapot in the shape of berries and fruits, as well as animals and birds, which will certainly be warm and very beautiful.
If you experiment with different fabric, shapes, then you can even sew a house for a teapot or a heating pad in the shape of a tea cup:

Recently, teapots with a press, called French presses, have become popular. You can brew both tea and coffee in this kettle. You can also make a heating pad for such a teapot - for this you can sew a rectangle with ribbon ties and decorate it decorative elements and tie it to the teapot. This method is even much simpler than sewing warmer covers for ordinary teapots, and very much reminds us of the process of making potholders.
We hope that you will like these ideas for creating tea warmers, or perhaps they will give you an idea of how else you can sew an original, unusual cover for a teapot.
The following items will help make your kitchen cozy and unique: soft vase, cups, teapot made of fabric. Find out how to sew a ball from this material.
Beautiful soft vase with your own hands

To sew one, take:
- several cuts of different cotton fabric;
- rope or cord;
- needle and thread;
- pins;
- bowl;
- scissors.

When this fabric is wound, take the second piece. Place its beginning at the end of the first one, and also wrap it around the lace.

Continue twisting the base, making turns around it. To make it more convenient, place the work on an inverted bowl or other vessel. suitable shape. Pin the coils together.

Having fixed the row in this way, stitch it with the previous one. Remove the pins and fasten it to the next one.

Having completed the work to the end, all you have to do is cut the lace, tuck the fabric under it, and sew it to the previous turn. You have a beautiful soft vase, and also a very original one. If you want to make another one, check out how to do it.

This vase for all sorts of little things is made from scraps of fabric and old denim items. To create it, take:
- denim;
- cotton fabric;
- interlining;
- cardboard;
- sewing supplies;
- rope with a lock.

We put cardboard on the wrong side of the denim square and non-woven fabric on it. In the photo, the white dots show where the edges of the jeans are folded. Before doing this, cut off the corners on it.

Bend the side blanks in half, tuck the sides on one side and the other, and iron. Sew them to the front side of the square.

Sew the sides to the edge, retreating 1–1.5 cm. Thread a lace into the resulting hole in the side panels, connecting them in this way. By pulling it up, you can disassemble and assemble the soft fabric vase.

Sew a fabric rectangle on the other side of the bottom, and your new original piece of furniture is ready.
Fabric teapots
They will decorate any home. Such dishes can be given, sold, or presented to children so that they can play with a safe object, arranging doll tea parties.

Enlarge the pattern on the screen, attach a sheet of A4 format to it, and redraw it.

The pattern will tell you how to sew such a teapot. As you can see, it consists of five templates. The two circles are the bottom (the larger one with wavy edges) and the lid of the teapot. You can make the edges not like this, but even. For the sidewalls, you need to cut 8 wedges for the outside and the same number for the inside. Above on the right in the photo is the curved handle of the teapot, below on the same side is its spout. You will need to cut two such blanks from the fabric.
Here's what was needed to reproduce this model:
- plain fabric and variegated, matching color;
- loose interlining;
- thread and needle;
- cotton lace;
- sewing machine.
In this example, the blanks for the façade consist of two parts. They put a braid into the seam between them, thus grinding the canvas down, then opened it.

Applying the wedges to each other, stitch them on a sewing machine into a single fabric.

In the same way, connect the wedges for the inside of the teapot.

Applying the bottom template to the variegated fabric, cut out a circle from it. Place the inner and outer sides of the teapot right sides together. Align their bottom with the round bottom, stitch along the edge.

Turn the sides right side out and place interlining between them. To separate the slices, sew between them on your hands.

Sewing a teapot with the hands of a craftswoman, that is, with her own, is very exciting. Let's start finishing it. To do this, cut 2 ribbons from fabric, each 5 cm wide. The length depends on the length of the arc of the teapot neck and bottom.
Cut out two round pieces for the bottom and lid. You will also need two cardboard circles, slightly smaller than the fabric, so that its edges can be wrapped.

Place a little non-woven fabric on the bottom fabric circle, and cardboard on it. Hand stitch the bottom to the bottom of the side panel. Turn the teapot over and sew the ribbon to the top of the teapot on the face. When placing padding polyester here, wrap this tape inward and sew it to the second edge on your hands.

Open the spout and handle of the kettle, sew paired parts on the sides. Insert padding polyester into the resulting hole.

Sew the spout on one side to the teapot on your hands, and its handle on the other.

For the lid, you also need to cut out a circle from cardboard, slightly smaller in size than the fabric blanks. Place padding polyester on the back of the fabric lid, then cardboard. Sew the front part of the lid to the back part of the lid, laying a ribbon along the edge, which we also stuff with padding polyester.

Using the same principle, make a small handle for the lid and sew it into its center.

These wonderful sewn teapots are the result of fascinating needlework.

If you want to make a set, then look at how to sew such a wonderful cup and saucer.

It is created according to the same principle as a teapot: wedges are cut out from fabric for façade and reverse side, the gap between them is filled with padding polyester, and stitched between the slices on the hands. All that remains is to sew a small bottom on the bottom, hem the cup on top and sew a rounded handle to it.
The saucer can have beautiful wavy edges. It consists of two fabrics of equal size; between them you need to lay a thin rolled synthetic padding polyester or non-woven fabric. You can limit yourself to a circle made of cardboard. You will find the dimensions of the wedges for the cup and the template for the saucer in the following pattern.

Do-it-yourself heating pad for a teapot
Continuing the topic we started, let's see how to sew it. A heating pad will help the tea to brew well and will not allow the drink to cool for a long time. Let's start with simple example, which even dressmakers with very little experience can master.

This interesting little thing will soon appear in your kitchen. Take:
- textile;
- interlining;
- scissors;
- pencil;
- ruler;
- small ribbon;
- pins.
Each side consists of two pieces of fabric, between them there will be a slightly smaller interlining. Pin the interlining with the fabric and quilt these 2 layers. To do this, draw oblique lines along a ruler with a pencil. Some of them are located parallel, others perpendicular.

Take threads to match the façade fabric and make stitches according to the pencil marks.

Also decorate the second part of the façade quilted fabric, fold them with the first right sides, and sew them on the sides.
From another fabric, cut out two blanks for the inside, sew them together on the sides, and turn them right side out.

Insert the inner part into the front part so that the seams of these parts are on the inside. Sew along the bottom, folding the edges of the fabric inward.
When stitching along the edges of the blank for the front and interior, leave 1 cm unsewn at the top center. Place a loop of braid here and sew up the hole on the arms.
Having mastered this simple example, you will be able to sew a chicken on a teapot, the pattern of which is attached.

Each side also consists of three layers - two fabric layers, with interlining between them. Cover the comb and beak from red fabric. Give these parts volume, stuff them with non-woven fabric, and sew them in place.
You don’t have to sew the wings, but stitch them with lace braid to define them.

Having coped with this task, move on to a more complex one. Look what a wonderful chicken and chicken recipe you can make.

Here's what you'll need:
- fabric for a dress size 35x100 cm;
- fabric for the underskirt (quilted synthetic padding or insulation);
- 1 m of bias tape;
- 1.5 m lace;
- filler (sintepon, padding polyester, holofiber);
- for the eyes, pieces of felt (white or black) or plastic;
- felt or fleece;
- shadows, blush or pastel pencils;
- pattern paper;
- silicone gun or fabric glue;
- threads, needle;
- tailor's chalk;
- regular and zigzag scissors;
- tape measure.
We decorate the side edges and the bottom with bias tape, in the photo it Pink colour. We collect the upper side, which is not framed with bias tape, using thread. In this case, the opposite edges should overlap.

We cut the overskirt from fabric measuring 35x100 cm. Finish the edges with an overlocker, hem the bottom of the skirt, and stitch lace onto it. Connect the side edges and stitch.

From the same fabric, cut out a semicircular pocket measuring 16 by 10 cm, and sew it on all sides with an overlocker. Gather a strip of lace 40 cm long and stitch it to the rounded part of the pocket.

Place the pocket on the front panel of the skirt, pin it in place, then sew it here. Gather the top of the skirt with a strong thread and secure. Place the top of the skirt on its bottom, sew on the waistband on the arms.
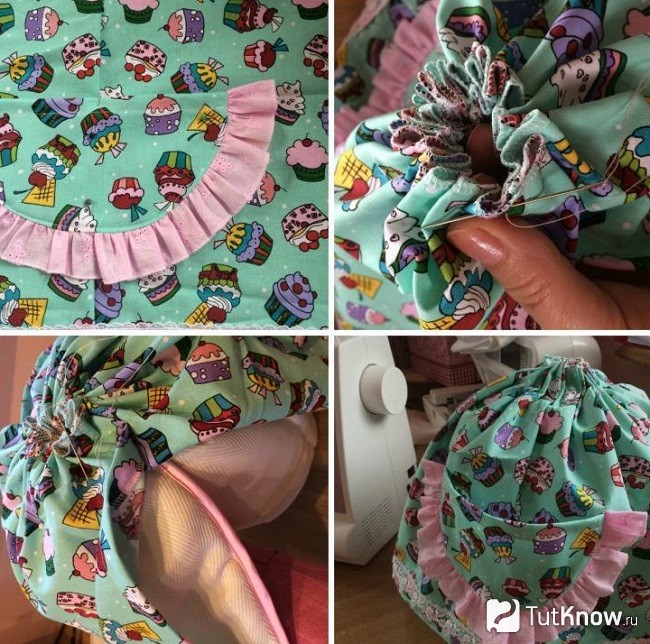
Here's how to make such a heating pad for a teapot; you need to cut out the sleeves for the chicken's dress with your own hands. To do this, take two rectangles of fabric measuring 15 x 35 cm. Process them with an overlocker, fold the 2 short sides together, and stitch. Just above the lace, gather the bottom of the sleeves onto the thread with a needle. Stuff the sleeves with padding polyester and sew them in place.
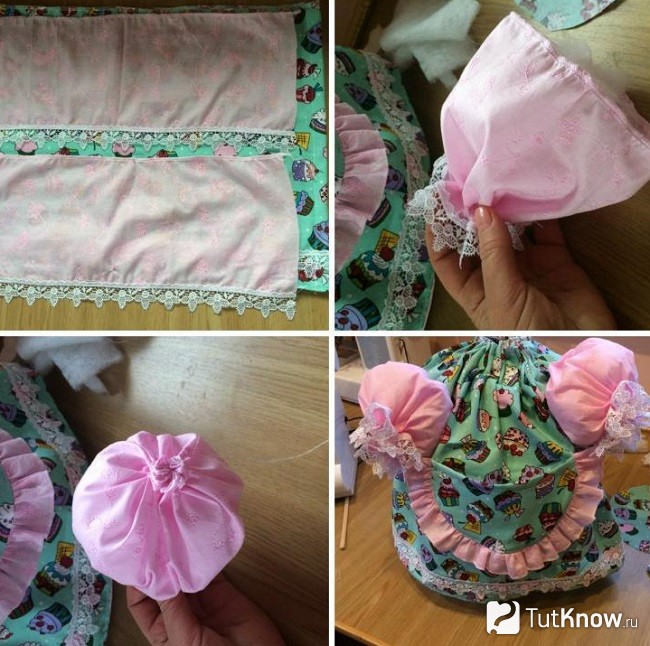
From the main fabric, cut a square with sides of 15 cm. Cut off its corners to make a circle. Sew along the edge with a basting stitch, tighten the thread, but not completely, but so as to fill the resulting part with padding polyester. You will sew it inside the skirt.
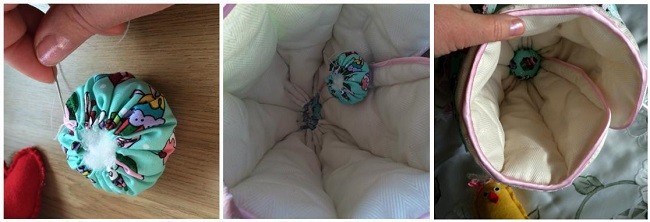
There is very little left to get the teapot warmer ready; do-it-yourself hen and chick patterns will help you complete the job.

Reshoot them.
Where it says “do not sew” on the pattern, there is no need to sew down the details. Please note how many blanks you will need for each item.
Cut the chicken out of felt or fleece yellow color, cut the chicken's head from white, comb, beard and beak from red material. Sew paired wing blanks on the wrong side, finish the edges with a zigzag, and turn them right side out. Place it in the sleeves of the dress and sew it on.
Glue the eyes in place, sew the beaks of the hen and chick. Sew paired parts of the comb and beards, stuff them with padding poly, and sew them on the hands to the heads of the characters.
All that remains is to add beauty to the chicken by applying blush to her cheeks. Instead of chicken, you can put tea and coffee bags in her pocket.
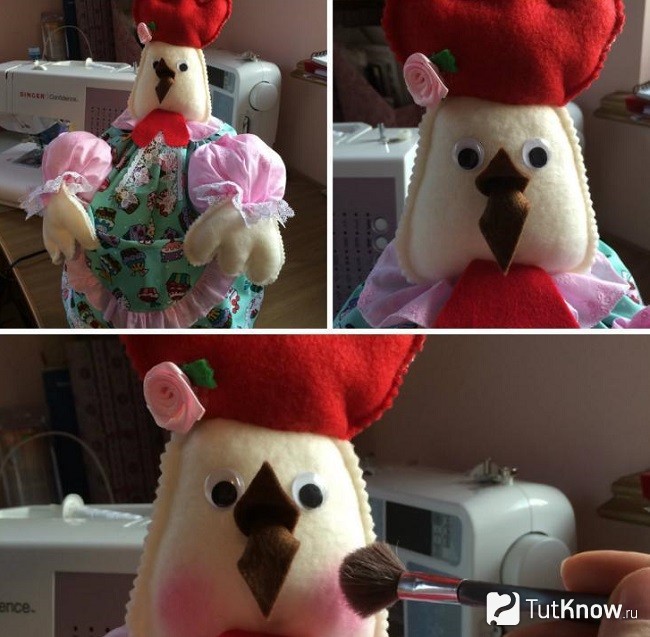
This is such a wonderful teapot warmer in the shape of a chicken. Let's see how to make another interesting fabric item to delight very young children.
Soft fabric ball for children

This one is intended for children under 2 years old. They will be able to touch the ball by its ribs, roll it, and throw it up. For needlework take:
- several pieces of fabric of different colors;
- soft filler;
- a needle;
- saucer;
- threads

Sew these circles in pairs, leaving one small pocket on both sides for stuffing them with padding polyester.

In total you need to create 5-6 such blanks. To ensure that there are no unnecessary gathers at the seam, cut it in several places with scissors. Fold these blanks in a stack so that the pockets for stuffing the filling are on the outside, stitch them in the center.

Gradually fill each slice with padding polyester and sew up the holes.

One ball is ready. If you want to see how to make the second one, check out the process.

To make one, take: scraps of fabric; filler; threads; a needle; scissors.
For one ball, you need to cut out 8 oval blanks and two round ones, bend the edges inward by 6 mm and iron them.

In the photographs, three balls are created at once. Stitch all the pieces on the sides one by one.
To make sewing easier, pin the parts of the sides of the ball in pairs and stitch them on one side. Then pin together the paired elements and sew them together.

As a result, you should end up with a ball like this, which you need to stuff through the remaining unsewn hole with padding polyester. Once this is done, sew it up on your arms.

To make the ball neat, sew a round piece of fabric on both sides, after which another masterpiece of needlework is ready. See how to make a teapot out of fabric.
In the second video we have selected for you interesting ideas. After familiarizing yourself with them, many will also want to create a knitted heating pad for a teapot or from fabric.


