Gone are the days when money was thrown at weddings glass jars. Now the attribute of celebration is a chest for money. It is in it that guests throw envelopes with monetary gifts, Greeting Cards, bride price. There are a great many types of wedding accessories: stylish elegant boxes trimmed with satin and lace, heart-shaped piggy banks, multi-tiered cakes. Chests are bought in bridal shops or online stores. Or you can make it yourself, since making a box for money is quite easy.
An example of a ready-made box for money for a wedding
The base can be any box. If there is no ready-made box, it can be made from cardboard. Decorative elements: organza, satin, silk, lace, rhinestones, beads, scrapbooking paper - all this is sold in supermarkets or specialized stores.
The easiest way is to take cardboard box with a lid, make a slot for the envelope. Then apply acrylic primer, paint and varnish. After all the manipulations, the money box will look like marble. The top of the box is decorated with lace, braid, rhinestones, pictures, etc. For inspiration, you can look at photos on the Internet, there are a lot of them.

Example of a blank for a box
When painting and decorating the box, you should take into account the decoration of the hall, the style and dress code of the wedding. If you are invited as a guest, and the details of the celebration are unknown, it is better to opt for traditional light colors. As a rule, white or milky color is a win-win option.
Another way to make a classic money box. You will need:
- box;
- corrugated cardboard;
- padding polyester;
- satin fabric;
- lace, ribbon flowers, beads and other decorative elements;
- scissors;
The base is made from the box. To make the lid, corrugated cardboard you need to draw stripes at a distance of 1 cm along the entire perimeter of the cardboard. Gently bend it into a semicircle. Exactly the same semicircles must be cut on the box itself, and a slot must be made in the lid. Now you need to assemble the box, cover it with padding polyester and satin. You can start decorating. Flowers made from ribbons, rhinestones, and beads look beautiful on satin.

Using Ribbon and Flower on a Money Box
You can make a lovely box for money using Raffaello’s candy box as a base. All that remains is to paste it over, decorate it and make a hole for money. The box with money can be used by the newlyweds in the future as a piggy bank or storage for money.
Read also
Currency and monetary units in the CIS countries
There are always competitions at weddings. Most of them are created by the toastmaster, but there are also traditional competitions. Comic competition to determine the sex of the unborn child takes place at almost all weddings. The witness collects money for the boy, and the witness for the girl. For whom the guests will give more money, he will be born. For the competition it would be appropriate to make 2 boxes: one pink and one blue.
How to make a chest for money?
A chest for money in the form of a casket looks very nice. To make it yourself, you will need:
- a glass box or any other with a lid;
- scissors;
- construction tape;
- paper or fabric for decoration;
- elements for decoration;
Master class on making a casket:
- Draw a semicircular outline on the side, characteristic of chests, and do the same with the second side panel.

- On the front (front) you need to draw 2 stripes. Connect the lower points of the side arcs and draw a line determining the height of the future cover.
- Cut off any excess with scissors and create a bulge for the lid.
- If the lid is very dense and does not bend beautifully, it is necessary to make grooves at a distance of 1 ─ 2 cm from each other.

Box frame
- Using a sharp knife, cut along a line on three sides.
- Finish the lid of the chest, using construction tape to secure the lid parts.

- Trim off any excess and secure with tape.
- On the inside of the lid, draw the contours of the hole into which the envelopes will be thrown, cut with sharp scissors or a knife. The cut should be at least 3 ─ 4 mm.
- Cover the casket with paper or gold foil, satin, brocade, etc.

Covering the chest
- If the lid seems a bit heavy, before gluing it is necessary to glue the ribbon with one end to the front wall of the chest, and the other to the edge of the lid.
- Tape the inside of the chest.

Taping the inside of the chest
- Glue cardboard onto the front wall and partially onto the side walls so that it sticks out 1.5 ─ 2 cm. Cover the cardboard with the same material as the chest.
- Decorate with pearls, beads, rhinestones, flowers, lace.
- The wedding money chest is ready!

Ready-made chest for money for a wedding
How to make a money box in the shape of a cake?
Making a money box in the shape of a cake is generally very simple. For this you will need:
- 3 boxes of different sizes, rectangular or round;
- Acrylic or spray paint;
- Cardboard or other thick paper;
- Ruler, pencil, scissors;
- Wedding figurine: swan, bride and groom, etc.;
- Decoration elements.
Procedure:
- Take a medium box and cut the bottom in it, leaving 2 ─ 3 cm at the edges for gluing.
- In the same way, you need to cut out the upper part in the lower box.
- Make a hole in the middle box so that envelopes and cards can easily fit into it.
- Paint the boxes, for example, white or cover them with fabric.
- Using a roller, paint the lids a soft pink.
- Cut out curly edges for lids and hearts from paper.
- Paint the cut edges and, after drying, glue them onto the lids.
- Attach the heart to the middle box using fishing line or glue.
- Connect all the parts of the “cake” together.
- Decorate the top with a wedding figurine.

Example of a cake shaped box
You can decorate a wedding accessory different ways, it all depends on imagination. Houses are made in the same way. Various options registration wedding boxes for money you can watch the video.
We all want to please our family and friends by giving them wonderful holiday gift. It can be Balloons, decoration or what ours is about close person I've been dreaming about it for so long. However, sometimes we don’t have enough time to buy a gift or we simply don’t know what to give. In such cases, we present the birthday person with money.
Classic version for packing money it is an envelope. It can be made with your own hands or bought in a store. This option is simple and well-known to everyone; they are unlikely to surprise the recipient. How can you replace the envelope and present it? money in original packaging?
Box with a surprise - this is a modern interpretation of an envelope for money. To create a box with a surprise you will not need much time and effort, and the result will certainly surprise and delight the recipient of the gift. Even a novice master can handle such a money box.
A clamshell box that fans out pages with banknotes or photographs can be made, for example, for your mother’s birthday. Or it could be a beautiful wedding box for money. Anyone who appreciates handmade items will be delighted with the original design of this money storage box. How to make a cute money box with your own hands - see our MK.
Scrapbooking technique continues to win hearts craftswomen all over the world. To make a scrapbooking surprise box with your own hands, you will need:

Gallery: box with a surprise for money (25 photos)


- If you don't have patterned paper at home, you can use old wallpaper or any pieces of kraft paper for scrapbooking. You can also use a photocopier colored paper or old postcards. The main condition is the compatibility of materials. Master classes on color combinations can be found on the Internet.
- Choose a color scheme and use colors that go together. If you decide to make a box in pastel colors, use only muted and delicate shades. In this case, it is better to avoid bright colors.
- Don't forget to trim the edges of the paper with curly scissors to make the craft as personalized as possible. . Your imagination is capable work wonders, so don't be afraid to experiment!
- Use shape punches to create holes in tags or create patterns along the edges of cardstock.
- Should not be applied acrylic paint with a brush - a layer that is too thick can ruin the paper or cardboard. It is better to use a foam sponge, which will not leave dirty prints and distribute the paint evenly over the surface. You can take advantage of a step-by-step master class on using watercolors in scrapbooking.
- Before starting work, cover the surface old newspaper so as not to dirty the workplace.
- Don't forget about good mood! The recipient will be much more pleased to receive a gift made from the bottom of his heart.
Box with a surprise, master class
Following step by step master class, you can make an unusual box with your own hands using the scrapbooking technique, which is sure to attract attention. The master class contains 13 steps, after completing which you will receive a beautiful box.

Designs for creating a surprise box
- Butterflies and flowers.
 Using the quilling technique or parchment paper, you can create a whole flower meadow with butterflies fluttering above it. This composition will certainly decorate gift wrapping. Money can be hidden in the wings of a butterfly, twisting them into a thin tube.
2. Hearts.
To your loved one you can present a beautiful packaging containing wishes, declarations of love and small gifts. To do this, just cut out plastic bottle thin strips, attach hearts cut out of red colored paper to them, and place the heart bouquet on the bottom of the box. On four walls you can place shiny red postcard letters: L, O, V, E. Removing the cover, the recipient will find a pleasant surprise, which you hid inside the gift wrapping.
3. Pigeons.
Box with pigeons perfect for a wedding. It can be presented to newlyweds by hiding money in the package. In the box you can write wishes, add decorations from polymer clay(master classes on making items from this material can be found on the Internet) or glue three-dimensional postcard. The design is limited only by the imagination of the master.
Hello, dear readers, guests of the Domovenok-Art blog! If you have been with us for a long time, then it is not news to you that one of the leading topics of the blog is homemade gifts and creative gift giving. Today I propose to consider this question: a do-it-yourself money box.
I won’t surprise you if I write that money is the most popular, most universal gift for most people. However, such a gift also has back side: lack of emotions and feeling of magic when receiving. But! I wasn’t me if I hadn’t said that there was a way out!)))
Money can be given in a way that will be remembered. And I'll tell you more: It’s not just possible, it needs to be done unusually. Moreover, it doesn’t take as much time to create interesting packaging as you might think.
In this article we will look at just one of the creative ways to give a cash gift - making an unusual box for money. But in the next article (it is already available here:) I will show you a few more ways to give this gift.
Until then, boxes! The article is divided into two parts:
And for everyone who reads to the end, another very beautiful idea for donating money in a box. But let's take it in order)))
What do-it-yourself money boxes can be like?
Idea 1. Magic boxing

Idea 2. Box with a gift and a compartment for money
Do you know that if you glue some kind of envelope to the top-opening lid, you can turn any box into a box for money. Making it is also quite simple. Moreover, with this option, when in addition to money there is also a small but pleasant gift inside, the impressions are enhanced. This has been verified.

I suggest you take a look at my favorite master class: . It perfectly demonstrates what I wrote above. I placed coffee soap inside that very package. self made on the one hand, and on the other - the same envelope with money. But who said that you should limit yourself to only these gifts)))
Below you can see a sweet version of the gift (the photo is not mine, I specifically leave the name of the master’s account).

Idea 3. Chest of drawers
A cardboard chest of drawers is a thing that can not only serve as an unusual handmade box for money. After all, if you look closely, this is a 3-in-1 gift! This lovely little thing can serve as an independent gift in itself. Plus money...
In addition, you can add something small, some pleasant trifle, to a monetary gift: candy, a mini-album for photos, handmade magnets, a postcard, gingerbread, etc.

Of course, this method is not the fastest. If you make such gift wrapping yourself, you will have to spend time creating it. But the effect of such a gift will be very, very noticeable! And it's been verified!
In turn, to make your task easier, I offer a choice of two master classes: and.
Idea 4. Treasure chest
A very logical way to give a cash gift. You can play up the presentation of a gift using a quest, when the recipient, together with a team of like-minded people, will look for the treasure))) It's fun! And verified 😉

There are a great many chest assembly schemes on the Internet. I suggest this (click to enlarge):

Idea 5. Quick DIY box
While I was writing the previous paragraph, I remembered a recent article about the creation of mega fast ones. Why not options for unusual DIY money boxes? By the way, there was also a chest there, only of a different shape.
All these boxes ⬆, or rather most of them, can be safely used as containers for your own universal gift))) Still, this is more interesting than a simple, familiar envelope.
Idea 6. A box like for sweets, but instead of sweets there is money
What if you create a beautiful box with transparent windows, the kind I usually use for sweets or... like for mini soap, for example (I talked about such a box). But instead of candy or soap, put money inside. Neatly, in small packages.

You give such a gift and observe the surprise of the recipient. It's unexpected! He expects anything in such a box, but not banknotes. And here's a surprise!
Idea 7. A small box for money similar to a matchbox or sweet box
You can find many similar examples on the Internet. simple boxes for money with your own hands according to the principle matchbox. I did it in a similar way. Only if you are making this box for cash gift, then you should take care of how to secure the bills. Usually this is a small arc under which twisted money is pushed.
I'll attach a few of the options I've seen to the gallery. The trick is in the details! 😉


Idea 8. Ordinary box. Ha ha!
Okay, don’t be scared))) Brownie-Art wouldn’t be art if everything was completely ordinary. A box for money can be even the most ordinary one, that’s true. But if, in addition to money, you add unusual or pleasant details inside...

For example, a model car, or a tag postcard, or a keychain, a bag of goodies, etc. And then lay it all beautifully on a bed of raffia or sisal, or even just unusual napkin. Even a simple banal box will look super advantageous!
Unusual DIY money box. Master Class
And now the master class! We will create an unusual box for money with our own hands using the scrapbooking technique. She looks, of course, not quite familiar. But it looks, you see, very cool.

For work we will need:
- beautiful light cardboard (can be embossed, or glossy, etc.);
- a couple of sheets of scrap paper that match each other;
- a sheet of contrasting plain paper;
- decor;
- glue moment Crystal;
- glue stick;
- glue gun and rods;
- foam tape;
- transparent plastic;
- paper butterflies and roses;
- border hole punch.
Making an unusual box for money using scrapbooking technique
Step 1. Preparing the base of the box
We mark the cardboard according to the diagram (click to enlarge):

This will be the back and bottom of the box. Cut and bend along the line.


I don't remember the sizes. Measure them along the red line from the previous drawing using a piece of paper. Cut it out

Step 2. Preliminary decor.
Before gluing both parts together, they should be decorated. My version of the decor for the front side looked like this: a strip of light green scrap paper and a red, thinner strip, punched out with a border hole punch.

For some reason I wanted to decorate this part with silver chips. To do this, I applied a thin strip of hot glue and immediately sprinkled it with this dust. It is not necessary to do this)))

For back wall cut out the following details: the red one is slightly larger than the light green one. We punch the side parts of the smaller part with a border hole punch and glue money boxes to the blank (click on the photo to enlarge).


Step 3. Assembling the box.
First, glue the teeth and sides to the bottom from below.

Then we fix the two remaining petals at the back, on the back wall. It turns out this is a pretty nice box. If you don't turn it over.

In the photo you can also notice two rectangles (polka dot and white) and two butterflies. I have already started decorating the product.
Step 4. Decor of the money box.
I won’t say anything specific about the decor. I'll give you my version. But I know that each of you can come up with your own. And place the elements in your own way. Twist and twist, you will certainly find a solution.

I cut out a couple of rectangles from contrasting paper (white and red). I glued them together and then placed a wooden bear and a pencil on top of it.

This element is attached to the box using double-sided foam tape. In this way.

The lower part also received a piece of its own decor (according to the rules of balance - in the opposite direction). Why a stroller? I will answer right away. Because the gift was for a newborn princess))) I was always horrified by the tradition of shoving money under a child’s pillow. In my opinion, it’s not just more interesting, but also more hygienic :)
Nowadays, money is one of the most common gifts and, it would seem, there is nothing simpler than. But sometimes you really want to add something unusual to such an ordinary gift. And it’s not at all difficult to do this; all you need is the desire and the most simple materials. So, we suggest you make a money box with your own hands, following our master class.
Money box scrapbooking – master class
Required tools and materials:
- 2 types of scrap paper (backgrounds for it can be found on the Internet and printed or bought ready-made);
- white and colored cardboard;
- watercolor paper;
- pencils and watercolors;
- brush, pencil, stationery knife, metal ruler, scissors;
- an inscription or picture (you can also print them yourself);
- glue (preferably “moment-crystal”);
- double-sided tape (you can limit yourself to glue);
- decorations (beads, half-beads, buttons, pendants - whatever you see fit);
- ribbon.

Performance:
- First, using a ruler and a stationery knife, you need to cut cardboard and paper. The dimensions of paper and cardboard, as well as the principle of distribution of colored and white cardboard, are shown in detail in the photo.
- Next, we take the largest square (18x18 cm) and line it. The next step is to do the creasing (mark the places of the folds) - in addition to a special stick, many objects are suitable for this (not writing pen, plastic card and even the handle of a simple teaspoon). I used an ice cream stick. The principle of ruling and scoring is shown in the photo.
- The next step is to make cuts and trim off the excess.
- And finally, we coat the necessary parts with glue and fold our main box.
- It's time to make the second part of our box, and for this we will line and crease the largest rectangle of cardboard. This must be done as shown in the photo.
- This is the kind of box we should get. Now it's time to start decorating.
- We glue narrow strips of paper (1x9 cm) onto strips of cardboard (1.5x9.5). The next step is to glue these double borders onto the box (2 each for the inside and outside), and also sew on a bead that will serve as a handle.
- Now take 2 11x11 cardboard squares and two 13x13 paper squares.
- We coat the cardboard square with glue, glue it to the wrong side of the paper and cut off the corners.
- We fold the excess paper and glue it to the cardboard. We do the same with the second pair and get two neat squares.
- We glue our dense squares to the outside of the box so that an equal amount of cardboard protrudes along the edges.
- We crease a 10x20 cm cardboard rectangle and fold it in half - this will be a card for wishes.
- Now you need to glue the ribbon and upper layer paper - square 9x9.
- We paint the inscription with a thin layer watercolor paint, trace around the edge with a pencil and glue it to a cardboard rectangle, 0.5 cm larger than the inscription itself.
- Flowers are great for decoration and you don’t have to buy them - you can make them yourself. Let's draw a few large flowers and a few smaller flowers on the wrong side of the watercolor paper, and then cut them out.
- We wet our flowers with a damp brush. Immediately after this, add color to taste (the saturation depends on your desire), and then we give shape to the petals - we twist them around a pencil or (as in my case) the shaft of a brush.
- Let's add clarity and volume to our flowers - lightly outline the petals and draw veins, and then glue them in pairs and stick a rhinestone or half-bead in the middle.
- And here's the finale: we secure everything decorative elements on a postcard, and glue the postcard itself to the box.


So, all the most difficult things are left behind, but it’s too early to stop, because only half the way has been completed.


It's time to decorate our creation:


Our box may well become a package not only for money, but also for others small gifts, and later not to get lost, becoming a place to store useful and pleasant little things.
A wedding is a special day for every girl. During the day, when everything should be perfect. What makes a perfect day? It consists of little things, of memorable moments. One of important points at a wedding is the presentation of gifts to the newlyweds. To ensure that this process is not ordinary, so that the money in envelopes does not scatter across the tray, and certainly not get lost, the bride will need a money box (chest) for her wedding with her own hands.

Types and shapes of boxes (chests) for money
There are several most popular types and shapes of money boxes that can be used in their manufacture:
- regular box
- box
- box
- heart
- house
Let's look at each of them in more detail.
Regular box
This is the simplest shape that can be easily made from a shoe box. There is nothing unusual here, no complex elements. Examples are shown in the photo.


Here is a small master class on how to quickly make such a money box with your own hands.
We will need:
- Shoe box
- PVA glue
- Scissors
- Lace
- Pearl beads for decoration
- Satin ribbon
- Colored wrapping paper
- Glue gun


Step one
Use scissors to make a slit in the top of the box for envelopes.
Step two
Cover the box with color wrapping paper(preferably colors Ivory or with an unobtrusive small pattern or choose a color that will be a priority at your wedding) and let it dry. The main thing is to do everything carefully so that the paper does not gather anywhere and no bubbles form.
Step three
After we have covered the box with paper and it has dried, we can begin to decorate the box. We cover it with satin ribbon around the perimeter, on top satin ribbon glue the lace and decorate everything with beads. To do this, it is better to use a glue gun so that the decorations stick better. You can always make the design of the box to your taste: it can be satin bows, lace, beads, crystals, beads. That's it, in three simple steps You have a money box ready for your wedding.
Casket
This form means that it must open; most often it is made with ties or a lock. This is very convenient for storing envelopes; nothing will be lost during transportation.


You can see how to make a box in the video:
Box
The name here speaks for itself. It can either have a hole for an envelope or open like a box. It looks very impressive and looks very beautiful at the wedding table.


However, making it yourself is not so easy; to make a chest you will need to be patient and watch the video tutorial:
Cake
This money box is made in the shape of a cake. Usually they make two or three tiers. The main thing here is not to confuse it with a real cake.


A master class on making a cake-shaped money box is presented in the video:
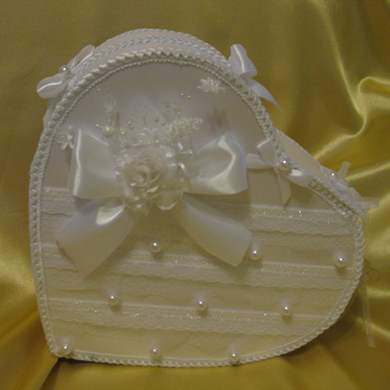
Heart
Heart as a symbol eternal love is very suitable form for a money box at a wedding. This box will fit very succinctly into any wedding interior.

Let's see how to make a heart-shaped box:
House
The box in the shape of a house is a symbol of the hearth created by new family. It looks very cozy and unusual.

The stages of making such a house are shown in detail in the video tutorial:
When making your money chest, pay attention to the following:
- Choose thick cardboard so that it does not wrinkle when accidentally pressed.
- To glue the decor, it is better to use a gun with good glue, otherwise something may fall off.
- There is no need to sculpt everything and more; try to make it not only beautiful, but also tasteful. It is best if you have one large decoration, and around it a scattering of smaller beads and crystals.
- Choose a color that suits your celebration or a neutral color (for example, white or ivory).
- Depending on the number of guests, choose the size for your casket so that all the envelopes fit.
So the money box is ideal solution to collect envelopes with money that guests will give to the newlyweds. It is very important that it is beautiful and matches the style of the wedding. Making it with your own hands is not so difficult; on the Internet there are many video master classes on making such crafts with your own hands. If you don’t have enough time, you can, of course, order or buy a ready-made casket, but will it be as beautiful as if the bride herself had made it? And then, on finished goods The price they set is not even small, exceeding the cost of the product several times. Why overpay if you can do it yourself the way you need it, saving quite a bit of money?


