Attractive packaging is half the fun of a gift. How to wrap a gift with your own hands in a beautiful and original way? Actual question for those who are tired of standard paper bags. We will talk about holiday wrapping methods and share ideas for decorating gifts without special financial expenses.
How to wrap a gift in paper yourself
The simplest and affordable way- pack a gift in paper, and for this you need to choose the appropriate material. What type of packaging paper can be used?
A gift item, quite thin, decorated with drawings and prints of various themes. Sold in wide width rolls.
Kraft paper, also known as wrapping paper. It gives a lot of scope for decorating a gift, because bows, lace, stickers, drawings, postcards, buttons, tinsel and all other gift decor look great against its emphatically laconic background.
Foil. Looks very elegant, especially on New Year's holidays.
Designer paper. It is distinguished by a variety of textures. Such paper can be artificially aged, embossed, parchment, rice, interspersed with natural herbs or flowers. Ideal for original packaging.

Once the paper has been selected, you should prepare your workspace and tools. You will need:
Scissors;
Scotch tape is regular and double-sided;
Pencil for marking;
Present;
Selected wrapping paper;
Accessories for decorating the finished gift.
All is ready? Now you can move on to the packaging process.
1. Measure the required paper size. It should completely wrap the gift in length and width, with a small margin of 2-3 cm, the end of the box should be completely closed.
2. Place the gift in the middle and wrap it around the long side of the box, securing the paper with pieces of tape. There is also a neater option - attach a strip of double-sided tape to the edge and wrap the gift.
3. Lower the paper onto the end of the box, fold in the free edges and lift the opposite side of the paper so that it rests on the end.
For a better understanding of the process, watch the short video, and in two minutes you will become a true packaging professional.
This option is the simplest and most common, but there are other packaging schemes. For example, it is convenient to pack small square gifts in an envelope, as shown in the diagram.

How to pack a sweet gift with your own hands
Not all gifts are sold in boxes that are convenient to wrap in paper. Sweet gifts, especially homemade ones, require a different approach. There are a few simple ways for stylish packaging of a sweet gift:
1. Fold a box of thick paper or cardboard.
2. Pack in transparent paper and then wrap in regular gift paper.
3. Place in basket.
To fold the original box, use one of our diagrams.

Using this template, you get a box with a lid that can comfortably fit sweets, lollipops, small cookies or cakes.

According to the diagram, it is easy to fold a bonbonniere box for chocolate, sweets, and cookies.

In the resulting boxes you can pack a set of sweets or marshmallows, marshmallows or marmalade, cookies, dragees and gingerbread cookies.
Don't want to hassle with folding boxes? Then wrap the sweets in transparent cellophane, and then pack them in paper and decorate.

Secrets of custom packaging
Paper is far from the only packaging material. The fabric packaging looks great. There is a special Japanese technology, which is called furoshiki. With its help you can pack any gifts: boxes, toys, clothes.
How to wrap a gift in fabric?
1. Lay out the fabric on the table.
2. Place a gift in the middle.
3. Cover the gift on both sides with opposite ends of the fabric.
4. Tie the loose ends in a knot.
A short video will help you quickly master the furoshiki technique.
More ideas for original packaging
Glass jars. They are suitable for small items: fruits, sweets, cosmetics, money.

Envelope. You can put a book, a set of CDs, a box of chocolates, a photograph, a stole and many other things in a large format envelope.
Industrially printed paper. Newspaper, music paper, maps or magazines - anything will do, especially if you use your imagination.

How to decorate a gift wrapped with your own hands?
Wrap the gift nicely and neatly or put it in original box- this is only half the battle. You need to choose an original decoration for a gift. What could it be?
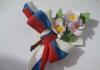
1. Bows. Ready-made or hand-made, the latter is preferable.
3. Lace.
4. Jute cord.
6. Tinsel.

7. Contrast paper.
9. Stickers.
10. Drawings by hand.
11. Candy.
12. Beads.
13. Small toys.
14. Fresh flowers.
15. Dried flowers - branches, leaves, berries, moss.
There are a huge number of options for decorating gifts; it is impossible to describe even some of them in one article. But you can give a few recommendations to ensure that the gift looks perfect:
1. Choose three or four decorative decorations, including the tape, more looks tacky.

2. By choosing paper and decorations of the same tone, you will get an elegant packaging option. Contrasting colors will make the packaging bright.
3. It is better to choose one style for packaging - naive, ecological, sophisticated, retro or vintage. This will give the gift a certain mood.
In order to wrap a gift beautifully and originally with your own hands, you will need a little patience, accuracy and imagination, but the result will give you a lot of pleasant impressions!
In a gift, not only the content is important, but also its appearance. One of the popular types of holiday packaging is wrapping in mica or gift paper. There are many ways to wrap, so there are ones that anyone can handle!
An envelope for you!
Do you remember what the envelope looks like? On the reverse side it has four triangles that come together. How to use it? First, take a look at the item being presented: if its shape is square or rectangular, then you can prepare scissors and a ruler.
- On the thing you need to draw two diagonal lines connecting opposite corners. This can be done with a pencil, chalk or a piece of dry soap, so that the lines can then be easily erased. You now have four triangles.
- Place the item on the wrapper and draw an identical triangle on each side, only reflected upward.
- Then connect the vertices of the triangles with a line. It should look like a rhombus (if the shape resembles a square).
- Add 2-3 cm on both sides of the drawn figure and draw lines again. Cut off the excess.
- Fold one triangle over the item being packed. The blank will be slightly wider than the sides of the gift. First iron the fold line at the top, then along the sides. Fold the resulting triangular piece upward.
- Now grab the two side triangles. Fold the sheet towards the item being wrapped, iron the fold line. From the bottom end of the triangle, turn the edge diagonally outward, then fold it inward. Now your fold starts strictly in the corner. Ready. Do the same on the opposite side.
All that remains is to decorate the top part. Its production differs only in that diagonal bends must be made on both sides at once. Attach double-sided tape to the finished triangle-lid.
To decorate the packaging, use twine and stamps. Write the address and surname of the birthday person.
Updated classic
The classic method of wrapping is bad because it leaves a “raw” cut that needs to be hidden under the tape. How can you make sure that all the cuts look neat? It's worth changing the technology a little.
- Unfold the roll of gift mica and place the box with the gift in the middle. On both sides of it, set aside an amount equal to the height and width of the box, and from the top and bottom edges - equal only to the height. Trim off the excess.
- Place the left side of the packing material over the box and secure it with a small piece of tape.
- Place the right half of the wrapper on the box as well, but do not secure it. Smooth the fold line with your fingers. Unfold the sheet: the fold strip should be clearly visible and divide the sheet into two unequal parts. Divide most of it in half and make marks with a pencil at the edges.
- Next, you need to bend the corners inward from the middle of the sheet height to the marks made. Secure the resulting corner with strips of tape and cover the gift with it.
- Now all that remains is to decorate the two sides of the package. Fold the top of the wrapping paper inward, forming neat “ears” in the form of triangles.
- Then fold the triangles over and secure with duct tape.
- All that remains is to slightly tuck the edge of the lower remaining part and also place it inside and glue it with tape. The same is done on the other side.
If desired, you can tie a ribbon or any other decoration on top.

Bulk packaging
You can pack an item beautifully not only in a box, but also without it. To do this, you should choose denser varieties. wrapping paper. And the sequence of actions is as follows:
- Prepare a sheet approximately twice the size of the gift. Place the gift in a vertical orientation in the center.
- Wrap it with the left and right side of the wrapper. It is important not to push through the fold lines!
- Sew the bottom of the resulting bundle with thread, stepping back from the wrapped object and leaving about 1.5-2 cm of paper after the seam. You can sew a seam either by hand or using a sewing machine.
- Place the bundle on its side and press the side folds on its top edge. You now have the top edge perpendicular to the bottom, and the packaging itself has become voluminous.
- A seam should also be laid along the top edge.
- The final touch is decorating the cuts. They can be given an interesting shape using curly scissors or decorated with lace, sparkles, etc.
You can sew the edges of such a bundle not only with threads, but also with ribbons or braid.

For children
Children's packaging may differ from adult packaging. For example, you can make a cute dog or cat from craft paper:
- Place the gift on craft paper. Place rectangles with the width of the gift itself up and down from it. Their length should be equal to the height plus half the length of the gift.
- To the left and to the right, lay down strips with rounded ends, equal to the size of the rectangles already laid down.
- Draw two protrusions at the ends of the rectangles. These are the future animal ears and the “lock”. In the semicircular elements at the edge in the center, make slits into which the protrusions-ears will be inserted.
The template is ready, but first make eyes, a nose, a tongue, paws, a tail, ears from any available materials (not necessarily craft paper) and glue the parts to the reamer.
This way you can make almost any animal: fox, wolf, bunny and others.

Complex shape is not a hindrance
If the gift is placed in a round box, then this is not a problem:
- It is easy to measure the required width of the wrapper: cover the box with paper and cut off the excess.
- On a workpiece of the required width, you now need to determine the height. To do this, measure the radius of the bottom and lid (if the latter is larger), as well as the height of the box. Then mark on the wrapper first the radius of the bottom, then the height of the box and the radius of the lid.
- Place the gift on the sheet according to the marks, fold the edges over each other and stick a strip of adhesive tape in the center of the overlap.
- To decorate the bottom and top of the box you will need more patience: take one edge and press it to the center of the lid, moving in a clockwise direction, using your fingers to pick up the paper towards the center, forming neat folds. For convenience, you can periodically secure the paper collected in the center with tape.
- When the assemblies on the lid and bottom are ready, all that remains is to decorate them in the center. For the bottom, cut out a circle from the packaging material, and glue a bow to the lid.
If you want to make the lid removable, then pack it separately according to the same scheme. Don't forget to leave hem allowances on the inside of the piece.

Be sure to try to give the item a real gift look yourself. You will see that it is not only quite simple, but also exciting.
The most common way to wrap a gift is to gift wrapping. Despite its apparent simplicity, there are a huge number of packaging options, which gives the gift an original and interesting appearance. It also provides the opportunity to add individual notes specific to the recipient of the gift. How to wrap a gift in paper beautifully yourself will be discussed below. Practical advice
will help you present a gift in which not only the content, but also the outer wrapper will be beautiful.
What to wrap a gift at home
The packaging format depends on the appearance and volume of the selected gift. For example, for home packaging you can use a regular envelope, if it completely contains the gift. The envelope can be standard, in which case it should be decorated with drawings, inscriptions, and appliqués. Most in a convenient way is to make an envelope from gift paper, since it can be of any size, but retain its classic shape.
If you don't have wrapping paper at home, you can use:
- colored paper;
- a piece of beautiful wallpaper;
- old newspaper or pages of colorful magazines;
- piece of fabric.

As packaging material, you can choose whatever is at hand, the main thing to remember is that the present must be original and beautiful. For example, a surprise related to music can be packed into sheets from a music book, adding original decoration in the shape of a treble clef.
Any packaging must be decorated, it could be:
- laconic rope in a minimalist style;
- ribbon;
- classic bow;
- hanging figurines;
- natural materials (for example, a small spruce branch if the gift is being prepared for the New Year holidays).

What to pack a gift at home depends on the type of gift itself, as well as its stylistic orientation, hobbies and individual characteristics of a person and for which it is intended.
How to make a gift box without glue and scissors video
Do gift box from paper alone, without resorting to scissors, glue and other auxiliary tools, is quite possible. For this purpose it is used origami technique. You can make not only a box, but also a removable lid for complete packaging of the gift.

To create such a box you will need a square of wrapping paper. Its dimensions are determined individually in each case, based on what size should the box be?. First of all, you need to fold the cut out square of paper in half and unfold it. Then, alternately bend each corner towards the center, obtaining a smaller square.
The following manipulations should be done with the resulting workpiece. First, divide visually or using a ruler into three equal parts and fold them. Then turn it around and do the same procedure on the other side. Now, having expanded the square completely inside, you can see the division of the zones into 9 equal squares. Now you need outline auxiliary folds, which will be necessary in the process of forming the box. To do this, you need to unfold the paper with the front side, fold it in half and press the outer squares without touching the center. The same thing should be repeated on the other side.
We proceed to the formation, 1 corner is folded to the center and rises up. Then it bends along the diagonal outlined earlier and, thus, you need to lift and bend all subsequent corners. As a result you'll get a box, in which you can pack a gift.
Now you know how to make a gift box without glue or scissors. The video demonstrates this process more clearly.
How to pack a box in gift paper
In most cases, purchased gifts are already in the original packaging in the form of a box. Therefore, the ideal option in this case, of course, is use of wrapping paper. At the same time, it is worth considering that there are also boxes different forms, oblong and flat, voluminous and tall.
How to wrap a box in gift paper if this is your first time. Pre-recommended try wrapping the box in newspaper or another piece of paper to decide on correct sizes paper that you will need to implement your plan.
The first thing to do is cut the paper into a rectangle the right size. The box containing the gift is placed in the center of the paper on the inside, so that all side edges can wrap it tightly. First, the paper is wrapped alternately with long sides boxes, fitting it as tightly as possible. If you use special packaging paper, you need to remove the protective film to glue the paper on the box together. Also You can use a thin strip of tape.
Then you need to correctly fold the paper from the end sides. You must first press the longer edge of the protruding paper firmly against the end of the box. Then fold both short ends under and finish by folding in the last long edge. After this, all bend points are fixed with tape or adhesive tape. All that remains is decorate a wrapped gift with the help of additional decorative elements.

How to wrap a gift with paper yourself
Even the most original packaging a gift using paper can be made using your own efforts, which is only will add value to your present. In most cases, all packaging options are similar. The only exception may be the initial shape of the present itself or its main packaging, for example, a round or square box.
Basically, the main difference between a packaged gift is the presence additional elements, acting as decorations. If you don’t have any special skills and don’t know how to wrap a gift with paper with your own hands, then it's best to stop at classic version
, which is the simplest. But the design should become the main prerogative, where the emphasis should be on originality and, of course, individual characteristics recipient.

How to wrap a book in gift paper
Since the book is rectangular in shape, it can be wrapped using wrapping paper based on the box principle which was described above. You can also resort to the following option. Cut the paper into a square shape and place the book diagonally on the inside of it. Then, bend the corners one by one, securing them with tape.
When thinking about how to pack a book in gift paper in an original way, you should pay attention to the option appearance resembling an envelope. Which is formed directly with the book already inserted into it. When making such packaging yourself, you should pay attention to the color scheme. For example, for men, it is best to choose more neutral and subdued shades. For this, you can choose paper in bright colors, with prints and designs. It would be appropriate to combine paper with other finishing elements, such as transparent mesh or textile decorations.

How to pack a mug as a gift without a box
Is it possible and how to pack a mug as a gift without a box, using gift paper? The simplest, but no less interesting and beautiful method is the following:
- cut out the wrapping paper into a square shape, the size should be large enough to completely contain the mug;
- place the mug in the very center of the paper;
- All that remains is to simply pick up the edges of the paper and close them over the mug, securing them with a bow, ribbon, rope or any other dressing material.

When choosing paper, you should do this as slowly and carefully as possible to give the gift a neater shape. All that remains is to decorate the wrapped gift and present it to the hero of the occasion.
Do you have your own ways to wrap a gift beautifully in paper?
Some items, often chosen as gifts, still do not have the classic rectangular shape of the store-bought cardboard packaging. And above all, this applies to children's and sports items and accessories. But besides them: tricycles, rackets, individual items of dishes, small home exercise equipment, bottles of alcohol, clothes, Stuffed Toys, - in fact, the list is huge.


You can, of course, spend a lot of time and still find a separate one for sale. cardboard box perfect shape, but do you know how difficult it is? Especially if you need a box that is, say, very long and at the same time very narrow or elongated, like the packaging of a thermos. You can just throw the thing into the big one gift bag, but it looks and is perceived as frankly “not comme il faut.”
The article below will tell you how to solve this problem with ease and elegance.
1. If you have it in your hands soft clothes, blanket, scarf or other formless ones, but they are not too large analogues

Then we put what we received on thin cardboard(can be covered with colored paper) and twist it together with the cardboard into a cylinder so that the edges of the cardboard overlap at least a little.

Using transparent adhesive tape, glue the edge of the cardboard to the cylinder in one place - this will be enough.

We wrap the roll in a large sheet of decorative wrapping paper, the edge of which is also sealed with transparent adhesive tape in several places.

We squeeze the side parts of the paper extending beyond the boundaries of the cardboard cylinder with our fingers, forming a kind of large candy.

Finally, we tie the sides with ropes, raffia or something similar (ribbons will look too vulgar and tasteless, but if the gift is for a child, you can take very thin ribbons of a soft shade). Ready!

2. For single glasses/mugs and analogues In terms of shape and size, medium-density fabric with beautiful design. We place the mug in the center of a large piece of material, gather the material at the top above the mug and tie it with a large ribbon of a contrasting but matching shade. Straighten the top of the bag over the bow. Ready! You can place a circle of thick cardboard covered with colored paper on the fabric under the mug - to stabilize the gift and give an improved shape to the bag. The mug can be glued to this circle with double-sided adhesive tape at the bottom.


3. Rackets put it in a long rectangle of thick cardboard, folded in half, but folded so that the height of the fold is equal to the height of a stack of rackets or one wide tennis racket. And then we pack all this beauty in paper, like a regular rectangular gift.


4. Under huge soft toys or their analogues, which are dangling parts on thin “handles”/“legs”, we place cardboard approximately the same width as the toy itself. At the same time, we place the “bumpy” toy in some beautiful pose. Next, we place the beast on cardboard on a huge piece of beautiful thin fabric or crepe paper - in the center - and also collect the material at the top, as in step 2. We tie the gift on top with a medium-width ribbon. The point here is that the fabric is not colorful, and the ribbon has an interesting, complex pattern.


5. In case alcohol bottles You can come up with a lot of things (wrap it in a wide strip of crepe paper, put it in a bag or “bag” made of fabric, as described above, etc.), but our option is to start by cutting off the sleeve from a clean unnecessary shirt. The length of the cut is equal to the height of the bottle. We turn the sleeve inside out, glue or sew together the edges of the sleeve at the cut site. We turn the resulting bag right side out, put the bottle inside, gather the sleeve at the top, and tie a bow. Turn the sleeve over onto the bow. All!


6. Finally, if none of the methods described above suit your gift non-standard shape If it doesn’t fit, still take a gift bag that fits the size of the present, but buy a large amount of decorative filler for it, for example, in the form of many crumpled thin strips of colored paper, and put the filler wherever voids form under and above the gift in the bag. Then completely cover the gift in the bag with a good layer of the same filling, staple the edges of the bag on top in several places, and place a bow of the appropriate size on the front edge. This is the only way the gift in the bag will be truly wrapped, and not just “thrown” into a bag.

You will need
- - wrapping paper;
- - decorative tapes;
- - scissors;
- - tape measure;
- - double sided tape.
Instructions
First define required amount paper you will need to wrap your gift. Place the prepared box face down on the paper. Using a measuring tape, measure the circumference of the box crosswise. Add another 2-3 cm to the hem. A rectangle of wrapping paper is exactly the length you will need to cover all sides of the box. Determine how much paper is needed to cover the sides. Measure the height of the sides and divide the resulting value by two. Therefore, the width of a rectangular sheet of wrapping paper is equal to the sum of the length of the box and its height.
Place the cut rectangle of wrapping paper face down. Place the gift box in the center. Wrap the left and then the right edges of the paper sheet tightly around the box and secure with tape. Try to place the seam of the packing slip on the edge of the box on the bottom side.
Adjust the box so that the edges of the paper protruding from the sides are the same. Place strips of double-sided tape on the sides of the box and press the sides of the paper tightly, gluing them. Carefully fold the top and then the bottom edges of the wrapping paper, pressing them against the end of the box. Repeat all steps for the second side.
Decorate the wrapped box decorative ribbon suitable color. To do this, glue a piece of double-sided tape in the centers of all sides of the box. Stretch the tape vertically under the box and cross it in the center of the front side, making sure it is secured to the tape. Wrap the box with tape across the width, also gluing to pieces of tape. Tie the edges of the ribbon in the center of the packed box.
Attach a pretty wrapping bow if desired.
Try decorating the box with something other than ribbon in an original way. To do this, cut a strip 3-5 cm wide from another paper that matches the color of the main package. Wrap it around the entire length of the box and carefully connect the ends with tape. Then decorate the strip with contrasting thin ribbons or cords.
Video on the topic
note
The box must match the size of the gift. To avoid damaging fragile or breakable elements of the gift, securely secure it in the prepared box.
When choosing packaging paper, pay attention to the fact that paper with small patterns is more suitable for small boxes. A large pattern or the drawing will look good on big boxes.
Gift wrap- not a cheap service. For making a box, albeit beautiful, but made from extremely cheap materials, you may be asked for an amount equal to almost half the cost of the gift packed in it. Isn't it easier to make such packaging yourself?
Instructions
Choose the right box. Although it should be spacious, it should not be much larger than the gift to be wrapped in it. Be sure to remove any markings that are not related to the gift. Who enjoys receiving, say, a painting in a shoe box? It is best to paint the box with spray paint and then dry it thoroughly. Then you can apply it in the form of, for example, a maple or other leaf (a real leaf will do), letters, various shapes, apply a second layer of paint, and then carefully remove the template.
Place the gift in the box so that it is not damaged while you carry it to the recipient. Use bent cardboard holders. It is best to give equipment in its original packaging, preserving all shock-absorbing elements. Such a box, of course, does not need to be repainted, since its design matches the contents.