Options New Year's stencils for window decoration.
New Year's holidays are a great reason to spend time with your family in order to improve your relationship with your children and get closer to them. You can involve them in decorating your home for the New Year celebration. To do this, start decorating your own windows.
How to make a stained glass window, cut out window decoration parts from paper with your own hands: tips
Most often, larger details and drawings are located at the bottom of the window. These are mainly drawings of a Christmas tree and Santa Claus, various houses under the snow and forest glades. Thus, the upper part of the window sometimes remains empty and does not look very organic. Make paper decorations or make a stained glass design.
- Choose simple designs with a minimum of details. They are easier to cut.
- For cutting, use sharp nail scissors with rounded edges.
- For painting, use white stained glass paints or a mixture of gouache and soap.
Paper icicles: templates and stencils for cutting and sticking on the window
To complement the drawing, icicles, snowflakes, and New Year's mittens are often drawn at the top of the window. This is a great way to fill the whole picture and make the window unusual and beautiful.
Regarding drawings and stickers of icicles on windows, they are usually painted as a single piece across the entire width of the window. They are most often not separated from each other, but are made in the form of a kind of frost or a layer of icicles. In fact, this is how they usually hang from the roofs of houses. These are simple and cute patterns. At the very top of the window there will be a white canvas, with various figures of different lengths extending from it.
Now he supplements with icicles and christmas tree. Therefore, icicles are not always placed at the top of the window. Sometimes this kind of decoration is used to decorate a New Year's tree. In this case, the shape of the icicles is somewhat different from those at the top of the window.
There are two options for window decoration using icicles:
- Cut from white thin paper, and then stick it on the window.
- Use a stencil, which should be painted with white paint with added soap, artificial snow, which is sold in cans, or use a sponge with toothpaste. These kinds of homemade substances also look great on a window and help complement it.


Mittens: templates and stencils for cutting and sticking on the window
One of the cutest options is to draw and use stickers in the form of mittens. This tradition came to us not so long ago. But in Europe and the USA, mittens, like New Year's boots, are often used as bags for gifts. They are usually hung near the fireplace, and then they contain interesting gifts from Grandfather Frost.
Therefore, mittens and icicles can be considered full-fledged attributes of the New Year and Christmas. They can be placed on the window and thus complement its decor. Most often, the simplest mittens are used, which consist of a large compartment and thumb, such mittens are decorated with fur. Typically this type of product is worn by children.


Stars: templates and stencils for cutting and window stickers
You can use not only icicles, but also all sorts of stars as Christmas tree decorations. Mostly, fairly large, simple drawings are used, which are most often either cut out and glued to the window, or, conversely, serve as original templates for drawing. In this case, they are glued to the window and the inside of the star is filled with artificial snow, toothpaste, or painted over with white paint. It turns out quite beautifully; below are the most common options for stars for decorating a New Year's window.
You can also use interesting cute stars either as decorations on the Christmas tree or as an element for decorating the empty part of the window when the main design is applied. In this case, small stars and snowflakes serve as decoration and addition to the existing three-dimensional landscape.


Snowflakes: templates and stencils for cutting and window stickers
Snowflakes can also serve as individual decorative elements for window decoration. In this case, it is not necessary to apply some kind of large design at the bottom of the window. It is enough to use stencils of different snowflakes. The use of stencils looks very unusual. In this case, the stencils are glued to the window, and the entire area around them is painted with artificial snow, which is applied from a spray bottle or can. Thus, it falls in small droplets or mist, leaving gaps in those places where snowflakes or stars are glued. After the snow dries, the stencils are removed and transparent areas remain, precisely in those areas where the snowflakes were glued.


Clock: templates and stencils for cutting and window stickers
Clocks are a kind of symbol of the passing year; they are also often depicted on windows. Below are beautiful clocks for window decoration.


Numbers: templates and stencils for cutting and window stickers
Typically, numbers are used to decorate a window, sign congratulations and indicate the year. They can be both large and small. Below are beautiful numbers for window decoration.


Christmas balls: templates and stencils for cutting and window stickers
To draw New Year's balls, it is better to use a stencil, since it is quite difficult to draw a ball by hand. Because the circle turns out to be crooked and looks little like New Year's ball. Below are the cutest ones, simple options New Year's balls.


Christmas decorations on branches: templates and stencils for cutting out and window stickers
You can also decorate the window with fir branches with New Year's toys. Typically, stencils are rarely used to draw such patterns. These kinds of designs can be easily applied using a brush, sponge or finger, which is dipped in toothpaste or white gouache mixed with soap solution. These kinds of branches turn out very cute, fluffy and seem voluminous. If you don’t have a talent for drawing, and you’re not very good at holding a brush in your hands, you can use ready-made stencils of fir branches with toys.


Bells: templates and stencils for cutting and sticking on the window
Bells can also be considered symbols of the New Year. They perfectly complement winter and forest landscapes. 
How to decorate windows with icicles, mittens, stars, snowflakes, clocks, numbers, Christmas balls, toys on branches, paper bells: ideas, photos
Decorating a window before the New Year is quite simple. There is no need to buy existing kits from supermarkets. You can draw the pictures yourself or print them from your computer and then cut them out. You can use them as stencils or window stickers. This activity will take you very little time, but Christmas mood you are guaranteed. Some good ideas shown in the photo below.


The set includes more than 15 educational tasks for children from 1 to 4 years old.
Examples of tasks included in the kit:
Consolidation geometric shapes- Insert patches onto the mitten. Development of fine motor skills - lay out pebbles, plasticine, pom-poms.


Development of thinking - Game "Patches". Labyrinth.


Development of memory, consolidation of colors - Game "Memory, find a pair."


Creation- Template for creativity. Make a snowflake on a sheet of paper with paper tape, give this sheet to the child to paint over with finger paints or a brush. Remove the tape and place the cut out stencil on top.
Learning to count - Game "Mitten". 2 mittens are printed. This game also requires sequins; they can be purchased at craft stores, or they can be replaced with plasticine, stickers, etc. Players take turns rolling the dice and placing as many sequin snowflakes on the mitten as there are dots on the dice.


Fixing colors, developing fine motor skills - Paint the mitten in the indicated color. Development of thinking - Find identical mittens.
Teaching the concept of set - Arranging signs >< =.


Development of observation and logic.

Learning to count, the ability to correlate numbers with numbers, developing fine motor skills - Playing with clothespins. Count the mittens and attach a clothespin to the desired number.


Learning to count, developing fine motor skills - Game with a cube. Cards are printed according to the number of players. Players take turns rolling the dice and coloring as many mittens on their card as there are dots on the dice. Whoever colored all the mittens the fastest won. You can make the game more difficult and roll 2 dice - with colors and dots.
Development of fine motor skills - Trace the outline of the mitten. Draw a mitten by numbers.


I plan to use this kit in several thematic lessons on the following books, so I included several activities in the kit specifically for them.
Based on the English song "Mittens". A book for children based on it was recently published. For children learning English, the lesson can be conducted in English:

An interesting activity for children 2-3 years old can be done based on the wonderful book by Jen Brett “The Mitten”:

And of course I want to teach a lesson on our wonderful fairy tale “The Mitten”: 

And even based on everyone’s favorite Soviet cartoon “Mitten”:

Can also be organized with children table theater or watch cartoons based on these works, which children will undoubtedly really like.
Very good to use in classes finger game"Mitten":
The cheerful mouse found a glove,
We open our palm, fingers spread (glove). We turn our hands first with the palm, then back side up.
Having built a nest in it,
We fold our palms into a “bucket”
She called the mice.
We bend and straighten our fingers ("calling" gesture)
She gave them a crust of bread to bite,
Using the tip of your thumb, tap one by one on the tips of your other fingers.
Petted (spanked) everyone
Use your thumb to stroke ("slap") the rest (sliding movement from the little finger to the index finger)
And she sent me to bed.
We press our palms together, put them under our cheeks (sleep)
Also included is ideas for creativity.
To get a themed kit, simply doREPOSTthis message to any social network or your blog and send it to me by emailactive link to it.
IMPORTANT! Send me an active link to your pen by email This email address is being protected from spambots. You must have JavaScript enabled to view it.. Here, unfortunately, I don’t always have time to follow the comments.
I will send the kit within 1-2 days.
If you liked this kit, I would appreciate your feedback. I will be very pleased and interested to know how you did with it))
Save Save Save Save Save Save Save Save Save SaveMaria Brovkina
Description of material: Direct master class educational activities in the preparatory group (6-7 years old) - application "Mitten"
Target:
Foster creativity, independence, develop imagination and abilities.
Tasks:
1. master new technology cuttings - inside a sheet of paper,
2. consolidate skills in using scissors,
3. develop compositional skills (composing harmonious combinations according to the plan;).
Required material: white cardboard, white paper, colored paper, pencil, glue, scissors.
The favorite time of the year for all children, and what’s more, and adults is, of course, winter. This wonderful time of year gives us all a lot of fun and interesting activities: you can skate, ski; you can race down the hills on ice skates, sleds, "cheesecakes"; you can play snowballs with friends; build snowmen and fortresses out of snow; you can roll around in the snow. !Winter is a wonderful time of year, but it is cold, so you need to dress warmly and keep your hands warm. We all wear mittens or gloves in winter. Let's make it interesting today winter craft"Mitten".
Fold a regular sheet of white A4 paper in half. On cardboard (the size of half a landscape sheet) draw a mitten (either on your own or you can take a template from the Internet, cut it out along the contour.

Place the mitten template on the left half of a landscape sheet, trace it with a pencil, and cut it out inside the sheet


We cut colored paper into strips and then into squares.

Then we paste in any sequence (according to the child’s plan) on right side leaf.


The children were very pleased with the interesting process of making the craft and the result!

Publications on the topic:
This is the Angel of Good we made with our grandson Radomir for our great-grandmother Valya for the day of an elderly person! I present to you a master class.
It seems that the New Year holidays have long ceased to be noisy, the pre-holiday preparations and bustle, unexpected and made with love, are far behind.
The most precious person in everyone's life is their mother. As we all remember the last Sunday in November is Mother's Day. I present it to your attention.
Unlike adults, children firmly believe that the world was created only for them, in fairy tales and magic. A child under the age of seven needs miracles.
Master class of NOD “My Bashkortostan” (preparatory group) Integrated program tasks: Educational: -continue to introduce children to their native land, -consolidate knowledge of the cities of Bashkortostan, rivers.
Master class "New Year's mitten". Senior Group. 1. To make mittens we will need: Blue cardboard, decorative buttons, tinsel.
Good day to all! Today I present to you a master class on making a paper ballerina! And now I will show you the stages of this.
For the successful all-round development of a child, activities to develop fine motor skills are of great importance. One of the types of such activities is applications made from colored paper, templates for which were developed by methodologists taking into account the characteristics of age groups preschoolers.
It is important that the complexity of the task corresponds to the age of the child, that classes are carried out systematically, gradually becoming more difficult, and are carried out under the supervision and assistance of adults.
What are the benefits of template applications for development?
Paper applications – creative process, thanks to which children learn the world and acquire many skills. In addition to the development of fine motor skills of the hands, this includes coordination of movements, the study of colors and their combinations, the concept of composition, familiarity with various materials and textures, the development of observation, imagination and fantasy.
Working on an application in a team promotes organization, restraint, and accuracy. It is also necessary to note the development of spatial imagination: when doing appliqué, children create a whole from several components and, conversely, learn to divide the whole into parts.
Scientists have proven that in the cerebral cortex, the center responsible for fine motor skills is located next to the speech center and contributes to the development of speech skills.
Types of applications according to the template
There are three main types of application:
- subject - the cut out parts have a simple, clear shape and proportions, an image is created that is not associated with any plot;
- plot-thematic - correspondence to a certain plot (taken from a fairy tale or invented independently);
- decorative – decorating postcards and photo frames with patterns of geometric shapes.
Simple applications for children 2-3 years old
Simple applications made from colored paper using templates can be practiced from the age of 2. However, some experts believe that children as young as 1 year can perform feasible tasks.
Initial lessons represent gluing pieces of paper onto a sheet in any form. At this stage, the child must understand and remember the basic actions: spread, turn over, apply, smooth. Kids are still attracted to the process itself; they will strive for the result later.
At the second level of complexity, templates are used. The child must place the elements also chaotically, but within the contour, and a certain image appears.
 Application template from colored paper “Hedgehog”
 A template is a schematic image of a future picture, drawn or printed on a printer. Simple templates for applications made from colored paper can include, for example, a Christmas tree with balls, a tree with apples, and others.
For such work, you need to prepare elements: balls, apples, etc. The child must determine for himself how to arrange them on the templates.
 Palm tree applique template
  Flower applique template
 For small children, it will be interesting to perform a simple cut-out appliqué. The child watches the adult tear the paper into long strips, then tears them into shreds himself. These pieces need to fill the outline. 
If the child wants to tear the paper himself, then these uneven, awkward strips can also be used to create an applique, for example, grass. Ants are drawn using finger paints.
Further, the task becomes more complicated: you need to hit the element on a specific place in the template or drawn outline. So, using cut out circles, an image of a caterpillar is created. At this stage, children are no longer interested only in the process, but also in the result. 
When making appliqués from colored paper using templates and contours with children under 3 years of age, prepared cut out elements are used.
A three-year-old child can already be taught the skills of working with scissors with rounded ends.

At the same time, it is necessary to explain how to properly hold scissors and paper so as not to get hurt. You need to start with straight cuts, then work on bends and roundings.
At this age, children are already able to create simple plot pictures. Elements pasted onto the template allow you to create a specific image.
The background for the application can be a drawn outline with partially drawn elements. For example, children can populate a template aquarium with algae and stones at the bottom with inhabitants: fish, jellyfish, etc.
Interesting activity there may be connection and gluing of the cut picture. If a child copes with such a task easily, it is recommended to complicate it: add raindrops to the umbrella, glue windows to the house with an attached roof. Such activities develop imagination, observation, and a sense of proportion.

Applications for children 4-5 years old
At this age, colored paper applications and templates for them become more complex. By preparing, together with an adult, elements for a future picture, the child shows more independence: cuts, selects colors and, thus, gains an understanding of composition.

Such activities develop logical thinking, allows you to show creative inclinations.
For children 4-5 years old exciting activity is to make cards, which they then give to parents and friends.
The base is folded in half and elements are glued inside the card to form story picture.
The templates developed by specialists are only examples indicating the direction of work.
Parents and educators can contribute their ideas. For example, using a cut out outline of a baby’s palm in an applique – such pictures evoke amazement and delight in children.
 Applications with palm
 The technique of appliqué using only circles reveals for the child the relationship between the parts and the whole.
When developing a child’s creative imagination, you should show him various techniques for working with paper: for example, folding it in the shape of an accordion. For such a picture you need to prepare a base and draw contours. The gluing process also becomes more complicated. 
Complex applications for children 6-7 years old
Children of senior preschool and junior school age already have certain skills.
Practicing appliqué work from colored paper using templates during this period helps further develop fine motor skills, thinking, memory and concentration, and develops the ability to plan one’s activities.
An important circumstance is that the child foresees the final result of his work. 
At this age, children develop the skill of cutting out individual parts and solid silhouettes, symmetrical elements from paper folded in half, as well as the ability to create compositions and correctly arrange their individual parts on a base.
At this stage, children study color combinations, analyze and compare details. The texture of the material also becomes varied: in addition to ordinary colored paper, creped (“crumpled”), streaked (glossy), textured (embossed or imitating velvet), and foil are used.
During this period, you can move on to volumetric symmetrical compositions. 
To complete this task, templates (clouds, Balloons) are cut in the usual way. Next, two identical templates are folded in the center and fastened together (can be sewn). The prepared elements are glued to the base.
To make a three-dimensional bird, the template is folded in half and glued together, except for the wings, which are folded along the dotted line. 
The resulting result can be pasted with one side and a wing onto the base (in the form of an applique) or turned into a craft by tying it to a thread and hanging it on a branch. 
Having mastered the basics of composition at the previous stages, children aged 6-7 years are able to create entire paintings - landscapes, still lifes, using ready-made templates for appliqués from colored paper or making them with the help of a teacher or parents.


Applications using a disposable plate
Disposable plates are a convenient material with which you can create original and beautiful compositions. Made of polystyrene or cardboard, of different colors, with different embossed patterns, they can be both the basis for an applique and elements for it. 
You can involve children with disabilities in making applications from colored paper on a disposable plate using templates. younger age. On a prepared colored background, children place complex elements in the form of a pattern.
A more complicated option is to use two or more colors for the background and more complex elements. Children 6-7 years old create thematic compositions on plates or use them as material for individual elements.
Examples of gradually more complex appliqués on plates: 
Combined applications
When making applications from colored paper, the patterns can be diversified by combining various materials.
Cereal applications
This type of application can be done even with small children. The algorithm of work is as follows: an adult applies glue to the prepared drawing, the child sprinkles cereal on it and lightly presses it with his finger. 
The remaining grains that are not glued need to be shaken off. This activity instills attentiveness and accuracy in the child.
Older children can use different types croup In this case, the glue is applied one by one to individual areas. To make the picture more colorful, it is recommended to first tint the cereal with gouache in different colors. You can use your child’s own drawing as a template; this will stimulate him and inspire him.

Button applications
To perform such an application, preliminary preparation is necessary. After studying the drawing and choosing colors, the child, with the help of adults, selects buttons that match the color and size. Then you should lay them out in a picture to visualize the desired result, and begin gluing. 
For younger children who do not yet have the necessary skills, you can apply a drawing according to a template on a layer of plasticine - the child will attach the buttons by pressing. This technique is also applicable when working with cereals.
For combined applications, cotton wool, napkins, eggshell, natural materials - leaves, petals, seeds and much more.
Multilayer applications
Multilayer (overlay) applications made of colored paper or other materials are made using templates designed or made independently.
This kind of work develops spatial imagination and cultivates aesthetic taste. They are made from paper, fabric, leather, felt - the main thing is that the edges of the material do not fray. 
Multilayer applications, like other varieties, come in varying degrees of complexity. For little ones, this is a simple matter of gluing parts on top of each other. By fastening elements only on one edge, you can create a three-dimensional effect.
More complex appliqués have more details and require good scissor skills and a sense of proportion and color.

Older children with developed fine motor skills hands with the skills to make complex parts create real works of art - unusual compositions and even portraits. Light and shadow effects give them special color.
Multilayer appliqué is a truly creative process in which the child’s imagination and artistic abilities are revealed. It is necessary to think through the image, color scheme, and sequence of action, so this type of work requires a certain level of intelligence.
Piece applications
Appliqués made from cut or torn pieces of colored paper using templates are quite simple and can be done even by small children. You need to apply a drawing to the base sheet. Besides ready-made templates You can use children's coloring books or come up with a sketch yourself.
The production of appliqué elements is carried out together with the child - small children happily tear the paper into pieces. If you already have skills in working with scissors, you can allow these elements to be cut out.
Important detail: than younger child, the larger the fragments should be.

 Having picked up required colors, you can start gluing. The glue is applied not to small parts, but to the template, in sections.
When working with children, this process is carried out by an adult; older children themselves apply the glue with a brush. When gluing pieces of paper, the child must accurately fall into the outline.
A type of applique made from pieces is trimming. This technique is quite complicated, but children 6-7 years old are quite capable of it, especially with teamwork.
To master the cutting technique, teachers and parents are offered master classes on this topic.

Autumn themed applications
The bright colors of autumn make it possible to create colorful pictures of autumn nature. For applications on this theme, both colored paper and natural materials are used: multi-colored leaves, petals of late flowers, seeds, spikelets, twigs and other objects. 
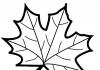
When making autumn-themed applications from colored paper using templates and in a free composition, the main attributes are preserved - flowers, mushrooms, fruits, acorns, and tree silhouettes are cut out and painted. Required component - autumn leaves.
When working with natural material, you need to prepare it. The collected leaves must first be leveled and dried under pressure. If the leaf needs to be given any shape, then a fresh leaf is used for this, which is then dried.
For collages and mosaic paintings, you can prepare cardboard templates onto which the elements are glued. 
Autumn nature is fertile ground for the flight of children's imagination. Leaf applications placed in a photo frame will decorate any interior.
Autumn lanterns will also be a spectacular decoration. To do this, the outside of the glass vessel is covered with multi-colored leaves (paper or natural), and a small candle is placed inside.
Winter themed applications
To create winter and, in particular, New Year's applications Any of the described techniques is used, depending on the age of the children.
The most common type of winter applique is snowflakes - this is a subtype of silhouette type applique. It is recommended to fold the sheet correctly, trim the edge and sharp corner, and make cuts on plain paper first - this is how the skill is developed.
In addition, pendants made of such snowflakes decorate the room. Thin, airy snowflakes can be glued to windows and other surfaces. 
For small children, it is better to prepare templates (circles with an outline) and make a broken snowflake from pieces. For flat, voluminous, multi-layer snowflakes, you need to prepare patterns for cutting.
To make a traditional Christmas tree, kids use triangles from green paper, the snowman is made from white circles, the teacher or parent helps to complete the application with details. 
Older children can be asked to make a Christmas tree from strips of paper or create a picture winter forest using templates using small pieces of paper or cotton wool. 
A Christmas tree made of paper balls looks bright and voluminous. For this purpose, a template and elements are made from crepe paper. The main color is dark green; multi-colored balls are made for the garland.


Interesting application with an image winter accessories Allows children to express their creative imagination.
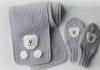
The hat and mittens can be decorated with any ornament, animal figures, winter pictures, beads or rhinestones.
Cotton wool is used to imitate fur. 
By using disposable plate You can make a craft-mask of a polar bear. Holes are cut out in the plate - eyes, the surface is covered with pieces of paper, used for the nose disposable cup.
Senior preschoolers and elementary school students are able, under the guidance of adults, to create complex winter landscapes using mixed techniques. 
Spring themed applications
Snowdrops and lilies of the valley, starlings and flowering trees - these signs of spring are traditionally used in children's applications made from colored paper using templates. The little ones perform simple tasks, placing prepared elements on the contours. These same images can be complicated by adding pictures of spring nature. 
More complex compositions - voluminous, multi-layered, with a large number of elements - are created by children who have the skills to work with glue, scissors, a brush and use different techniques.
Lilacs in a vase made of cereals, a spring picture using drawing and appliqué techniques - these and many other ideas are offered by experts to parents and educators for educational activities with children. 
Application is visual activity. Having achieved desired result, the child experiences aesthetic pleasure, thereby joining the world of beauty, the world of art. A simple and accessible way for children to create artwork makes appliqué one of the favorite types of educational activities for children.
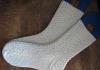
There are still three weeks until everyone’s favorite holiday, but you should start preparing for it now: think through the menu, entertainment program and, of course, decorate everything around! Why did our choice today fall on mittens? Abroad, the symbol of Christmas is socks hanging by the fireplace, in which Santa Claus leaves gifts - but for our Father Frost, mittens are more suitable. It’s easy to sew them yourself from felt or an old sweater, and the unnecessary gloves themselves can be turned into Stuffed Toys. We will also make postcards, applications and other interesting things. Join us!
DIY postcards

Nowadays you won’t surprise anyone even with the most beautiful New Year's card from the shop. To make a truly memorable greeting, you need to put a little creativity into an ordinary piece of cardboard and turn it into an interesting holiday card.

There are many options: you can stencil cut out mittens from colored paper or colorful flannel, and then decorate a cardboard card with them. You can fold a piece of cardboard in half and shape it into a mitten - so New Year's greetings will appear as if in two “palms” (and if the fold is made on the other side, thumbs form a heart). You can make a postcard with a hiding place if you glue two cardboard halves of a mitten together (or sew them into beautiful woolen threads over the edge), leaving the “elastic band” that fits on the wrist free: inside you can hide both always current banknotes and tickets to the cinema, theater, circus, etc.

Such mitten cards can be decorated with markers or paints, decorated with embroidery and ribbons, beads and buttons, foil and natural materials- as your imagination dictates. For work, you should stock up in advance on cardboard and paper, PVA glue and scissors, colored threads and various small items for decoration. To make a template, you can put a real mitten on your hand and trace it. As an option, draw by hand or copy from the Internet.
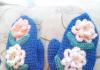
Mitten as decoration

With the onset of cold weather, you can often come across the following picture: a bright mitten hangs alone on the branches of trees or bushes, lost by the owner and carefully hung out for viewing by some passerby. Of course, it’s difficult to call it a decoration - it’s more like a “lost and found property.” But here in holiday decor home and New Year's tree, mittens can be very useful!

Moreover, it is not so important what they are made from: cut out of cardboard, sewn from scraps of fabric or baked from salt dough and painted - each option has its own advantages. Light cardboard will not damage even a small Christmas tree, and crafts made from it can be easily secured in other places using tape. Fabric mittens look more elegant, plus, like in a vase, you can place a Christmas “herbarium” of twigs and berries, as well as tangerines, sweets, nuts, some inserts with wishes or New Year’s riddles... Crafts made from salt dough cannot be distinguished from real cookies , so they look quite cozy in decor. The main thing is not to get confused :)
Applications from “gloves”

Simple and original: take it colored paper, turn it over with the colored side on the table, place your palm on it and trace it with a pencil. Then we cut out the stencil and repeat the procedure many more times - until we get many figures of different colors. As practice shows, they make quite interesting applications: a Christmas tree with toys, a snowman or Santa Claus with a bag of gifts. You can attach your palms to a painted wall using double-sided tape, or to whatman paper - however, you can draw these same prints on it by dipping your hands in paint.
Glove toys

Most often in the pantry we store old things that we no longer wear - but which we still hope to one day use for “household purposes”. Well, why doesn't this happen today? Find gloves among your supplies and, armed with scissors and a needle and thread, sew funny soft toys from them. By the way, in some handicraft shops you can find similar crafts made from mittens or socks, which connoisseurs of modern art eagerly take apart for souvenirs.

All you need is to find a pattern of a suitable animal on the Internet and slightly alter the gloves (not only mothers and fathers who are far from sewing, but also children can handle this). All that remains is to stuff cotton wool or padding polyester into the finished “skins” of giraffes, octopuses, bear cubs or elephant calves. The last stage of metamorphosis is to sew beady noses and button eyes onto the toys. The mouth can be designed in different ways: embroidered in the form of a smiley face or a toothy Hollywood smile, or complemented with a tongue made of pink ribbon. By the way, if you decide to make an octopus with your children, don’t forget to embroider its tentacles with beads on the underside - this will make it even more realistic!
Event calendar

Only the lazy ones still talked about this Western tradition, which is slowly taking root here too. Usually the event calendar starts from December 1, but, in principle, it can start in the middle of the month. You probably know why you need it: each mitten (sock, envelope, box) hung on a garland and has its own number - according to the number of the December calendar. Sweet gifts are placed inside to maintain the pre-holiday mood, as well as tasks to prepare for the new year for the current day. Sometimes such “pendants” are cut off after a day, but this somehow does not add much to the beauty. Therefore, fans of this method of counting the days until the New Year suggest the following: take a nice clothespin and simply rehang it every morning on a new “date”.
Delicious mittens

It is known that on New Year’s Eve, housewives, excuse me, have no time for cookies: here you can crumble Olivier and roll curlers... You can treat your children and household members to fragrant glazed pastries with “winter” motifs now, because the main part of the holiday is its waiting! Why put off all the pleasures for a festive night?
What would you give as a gift?

Why not mittens? Of course, these should not be simple mittens, but with a twist: positive hedgehogs, foxes, dinosaurs, cat paws... They can be sewn from scrap materials, knitted from warm threads, or simply supplemented with original factory-made mitten parts. And for those in love th couples a good gift will become a “common” mitten, wearing which you can hold hands. Cherche la inspiration!