A blanket made of “quick” squares in a “patchwork” style is a warm and soft home decoration. Read here how to make it yourself. Schemes, patterns and step-by-step instruction for beginner needlewomen.
Content:
Grandma's colorful blanket, patchwork rugs and bedding, bright pillows and potholders with multi-colored appliqué have been familiar to us since childhood. Such cute little things always filled the house with warmth and comfort. Unfortunately, only grandmothers remember the technique used to make those cozy and cute blankets. And every girl and woman should get acquainted and make friends with patchwork in order to be able to fill her hearth with something dear and close.
Fabric for making a patchwork blanket

Patchwork is patchwork from the fabric of various household and decorative items - beds, blankets, bags, clothes, tablecloths, kitchen utensils, etc. The technique, known for thousands of years, is popular all over the world. Skilled craftswomen create all sorts of outlandish works of art using the patchwork method. And novice needlewomen are advised to start with wide blankets made from “quick squares”. Such products are practical and aesthetic, and are also optimally suited for mastering such a delicate science.
Today, patchwork is considered one of the most popular patchwork techniques. It consists of stitching together various pieces of fabric according to the mosaic principle. In the hands of experienced needlewomen, bright pieces of material are transformed into luxurious products that surprise and delight. But not all fabrics are equally good for patchwork patchwork.
To select the appropriate material to create patchwork quilt, you can follow the traditions of our grandmothers: simply save all the scraps and leftovers from sewing clothes or bed linen. From such different-sized scraps you will certainly get a motley blanket. Or you can do it much simpler - purchase a set of fabrics for patchwork in any specialized store. Since the most difficult process in the patchwork technique is working with the material, the fabric must certainly not only be beautiful in appearance, but also of sufficient quality.

The ideal material for patchwork is cotton fabrics, because they meet all the important requirements:
- Do not wrinkle;
- Don't rush;
- Do not shrink;
- They do not shed;
- Easy to cut.
Sewing material stores offer customers a huge selection of cotton fabrics of different colors and densities. But, unfortunately, they are not always suitable for patchwork. Some options fray too much when cut, others are hard to iron or sag after washing. It is, however, recommended to buy special fabrics for patchwork that have undergone special pre-treatment. This material is very easy for beginners to work with.
Popular types and patterns of patchwork

The patchwork style is a wide field for ideas and experiments, which has no boundaries in combinations of shapes, colors, and types of material. Here, any creative idea of the author can be brought to life. Fancy patterns, applications with animals and flowers, geometric mosaics and others no less interesting options Easily folds into a warm blanket or comfortable blanket.
Of course, you can create a diagram for a product with your own hands, armed with imagination and a sharp pencil. Or you can use ready-made ones, of which there are hundreds of thousands, depending on the types of patchwork.
Let's look at the most popular types of patchwork:
- Classic English. In this version of patchwork, all parts of the same shape and size are used, usually in two primary colors. Patterns for English patchwork are very primitive. For example, squares of two shades arranged in a checkerboard pattern, or symmetrically stitched triangles.
- Eastern patchwork. The manufacturing principle is similar to the classic one, but differs in the use of various decorative elements- ribbons, beads, zippers, etc. Most patterns for oriental patchwork products allow greater freedom in the shapes and sizes of parts. For example, these can be arched and wavy patches, connected and decorated with satin ribbons.
- Crazy patchwork. The most “free” look. Characterized by its aesthetics and attractiveness. As a rule, the shape, color and size of parts are not limited by anything other than the pattern used. And the designs can be incredibly diverse: images of nature or flowers, floral or geometric patterns, complete abstraction.
Making a patchwork blanket step by step
Of course, an abundance of different complex circuits and the variations of products using the patchwork technique surprise even those craftswomen who have devoted decades to this type of art. And for beginners, there are more primitive, but no less beautiful and functional options. For example, a blanket of “quick” squares. It’s better to start from there.
Preparatory stage

First of all, you should decide on the color scheme and size of the future product. Although for the first time any available pieces of various shades will be suitable. Prepare in advance a piece of fabric for the wrong side of the blanket, corresponding to its future dimensions, and the same piece of padding polyester. Don't forget about the fabric for the edging. It is better to buy it with a reserve. In our case, to make a blanket from squares you will need chintz of three colors, scissors, a ruler, pins, chalk, a template and a sewing machine.
It is recommended to pre-soak chintz fabric in hot water, then rinse with cold water, starch and iron. A tablespoon of starch is diluted in a glass of cold water. Then the mixture is poured into 2 liters of hot water and stirred thoroughly. The chintz is rinsed in a slightly cooled solution, ironed while still wet and dried.
After preparing the material and collecting all the right tools you can start preparing those very “quick” squares that will make up the blanket.
Preparing “quick” squares for a blanket

The production of the elements we need begins with the preparation of the strips. From two pieces of fabric of different colors, cut two strips of the same width. Then, placing them face to face, stitch along one edge. At the next stage, cut a wide strip from the third piece of chintz, corresponding to the size of the previous two together. Sew the resulting third strip to the first two on both sides, first folding them face to face, just like the first time. As a result, you will end up with something like a sleeve turned inside out.
At the next stage, cut the resulting sleeve with an even zigzag into isosceles triangles. To do this, use a square, triangle or triangular ruler template. As a result, from one long “sleeve” you will get several double triangles, and, accordingly, squares in the spread.
Assembling squares using patchwork technology

To create a product in the patchwork style, a wide variety of patterns and styles are used. The squares you have can be folded into zigzags, scales, triangles or diamonds. The choice of style depends only on the taste of the craftswoman. It is not recommended to rush in such a matter. It is better to fold the parts in several different ways, among which it will be easier to determine the most successful one.
The assembly of “quick” squares is carried out as follows: first, the parts are sewn together into longitudinal strips, only then the strips are sewn together. The main thing is not to forget to iron the finished seams. Essentially, the front side of the quilt is complete at this stage.
Making a blanket from “quick” squares

You can use any fabric, preferably natural, as the back side of the blanket. Batiste or chintz will do the job best. To quickly assemble a blanket, place the prepared fabric for the wrong side face down, then spread a layer of padding polyester and place a piece of squares on top, face up. Using a sewing machine, stitch around the perimeter of the future product. The border can be the edges of the picture or the edges of the squares.
Before the process is completely completed, all that remains is to make the edging of the luxurious blanket. To do this, you need to cut a strip of suitable fabric 8 cm wide and slightly longer than the side of the product. Apply the resulting strip to the front edge of the blanket, aligning the edges. Use a sewing machine to stitch the strip to the blanket, then fold it over to the wrong side, turn it under, and stitch again to the right side. Finish the remaining edges of the blanket in this way.
At this point, making a blanket from “quick” squares is considered complete. For the first time, such a product is considered optimal in terms of complexity. But even if the result is not entirely ideal, you should not be upset. The second try will certainly turn out better!

Nowadays, patchwork creations have become more popular than ever. In between the noisy bustle and tiring workdays, you really want to touch something warm and cozy. Even those women who have never thought about needlework before begin to confidently master patchwork. Experienced craftswomen can create decorative sofa pillows, aprons, coasters, colorful panels, curtains for a country house, ultra-modern bags and many other things.
Beginning needlewomen should pay attention to a few useful tips:
- Before using new fabric, it must be washed, ironed and only then cut. This will prevent accidental shrinkage, loss of color, or other problems.
- The color of the thread used should match the color of the shred or differ by a couple of tones.
- For drawing, use a pencil or soap. It is prohibited to use a pen.
- Cutting is done along the shared thread. In this case, the part will not warp.
- When cutting, leave a 1 cm indent on all sides. If the fabric is loose - 1.5 cm.
- Ideal templates are made of plastic.
- Without a ruler, patchwork is impossible.
- The resulting fragment must be ironed after each line.
Patterns for making a blanket using the patchwork technique

Depending on the chosen patchwork technique, the needlewoman may need one or another pattern pattern:
- Square technique. It involves creating a product from square patches or square blocks of different colors. In this case, a pattern in the form of a regular square or a pattern of strips from which a square block will be made will be useful.
- Strip technique. This is parallel or circular stitching of strips of different colors and lengths. To create a product using this technique, you will need to cut out different strips.
- Triangle technique. Much like squares. Most often, patterns of isosceles triangles, identical in size, but different in color, are used for it. Parts can be sewn along a short edge to form a strip, 4 pieces to form a square or in the shape of a star.
- Honeycomb technique. It got its name thanks to the end result. Upon completion of the work, the design of the product will resemble the pattern of a honeycomb. For production, patterns of symmetrical hexagons are used.
- Lapachiha technique. It is considered the most interesting and at the same time difficult. Pieces of fabric with raw edges are attached to the canvas, thereby forming a three-dimensional drawing of a certain pattern or a chaotic image of a three-dimensional abstraction. If a specific pattern is chosen for the product (bird, animal, flower, etc.), patterns for each part will be needed. If you plan to randomly sew on different patches, you can do without patterns altogether.
Products made using the patchwork technique are not only beautiful and cozy home decorations, but also positive emotions from the process of making them. Agree, several pieces of fabric, sewing machine and imagination combined can work wonders.
The patchwork style is a godsend not only for needlewomen, but also for lovers of extraordinary things. This direction has found application in various areas of life - in the manufacture of clothing and shoes, in the design of premises, in the production of furniture and carpets. Today we will look at how you can incorporate patchwork into your interior, get acquainted with the techniques for doing it, and give some interesting patchwork ideas.
A little history
Sewing from scraps - patchwork - is an ancient direction of applied art. Even in Ancient Egypt, Persia, Africa, India and other countries, the production of textile products from multi-colored pieces of fabric sewn together.
Was no exception Kievan Rus. Our ancestors also highly valued colorful bedspreads, rugs and other interior items made using this technique.
This direction gained the greatest popularity in the 19th century. It was at this time that mass production of bright printed calico, cambric, calico and cotton was established. This led to the fact that many needlewomen began to perform bright pillows, towels, carpets, scarves and blankets in patchwork style.
DIY patchwork: where to start?
If you're eager to try your hand at patchwork, let's figure out what you'll need.
- Textile. You can find suitable scraps of fabric in any home: take a good rummage in the closet or pantry - there you will find remnants of fabric from sewing clothes, bed linen, and so on. A variety of fabrics are suitable for patchwork, but it is desirable that one product contains materials that are similar in texture and density.
- Sketch. If you have experience with patchwork, making it yourself is not difficult. But if you are still new to this area, it is better to use drawings from specialized magazines or look for sketches on the Internet.
- Lining fabric. Usually, a plain bright material is suitable for it, which will go well with the color scheme of the front side of the product.
- Scissors, thick cardboard for templates, chalk or a small piece of soap for marking future flaps, pins and a needle and thread for basting.
- Sewing machine for stitching finished product or a crochet hook with threads (if you use the knitted patchwork technique).
As you can see, the list necessary tools It’s quite simple, and you can find it in the home of any craftswoman.
Advice! If you have never encountered patchwork before, and you do not have the necessary tools, patterns and materials, there are special patchwork kits on sale. They include the required number of patches, templates and diagrams.
Interior use of patchwork technique
It’s easy to guess that many ethnic interiors are “friendly” with patchwork. In styles such as Indian, Oriental and some other styles, patchwork products look very organic.
However, not only national and “village” interiors go well with patchwork products. Many designers are not afraid to include them in such sophisticated styles as art deco, art nouveau, vintage and so on. Refined armchairs in patchwork technique, as well as small poufs and couches that look great even in Baroque style.
Strict hi-tech and loft can also be decorated with stylish interior details, made in the spirit of bright sewing. Well, kitsch and its variegation and riot of colors are simply created for patchwork patchwork.
How can such a trend manifest itself in the interior? First of all, these are all kinds of textile parts - curtains and curtains, screens, lamp shades, furniture covers, tablecloths, napkins, oven mittens, pillows, bedspreads, blankets, bedside rugs and large carpets, wall panels. It is interesting that a set of patches can be made not only of fabric, but also of paper - wallpaper pasted in the form of geometric shapes, intricate patterns and asymmetrical patterns looks very interesting. flower arrangements on the wallpaper.
Also, when decorating a room in the spirit of patchwork, hard materials can be used - wall tiles, flooring, tiles and so on.
What types of patchwork are there?
- Traditional patchwork. This direction is based on a game with geometric shapes– most often these are squares, rectangles, rhombuses and triangles, which are stitched into a single fabric. An indispensable attribute of this patchwork technique is the presence of a lining consisting of a single piece of fabric. In the spirit of traditional patchwork, both small interior items (pillows or potholders) and more complex ones (blankets, carpets and bedspreads) are created.
- Crazy patchwork differs from its traditional counterpart in the chaotic nature of its patterns, which can have any, even the most bizarre, shape. As the name suggests (crazy means “crazy” in English), the more intricate the scraps used, the better. Custom appliques, wavy lines, beads, beads, buttons and decorative stitches are also welcome. Patchwork bags made in this style look very beautiful.
- Knitted patchwork implies two options: in the first case, the fabric flaps are connected using crochet hook and threads of contrasting colors, and in the second - the elements are knitted initially. It will take a lot of time to make a patchwork bedspread of this type or any other large product, but the result will be amazing.
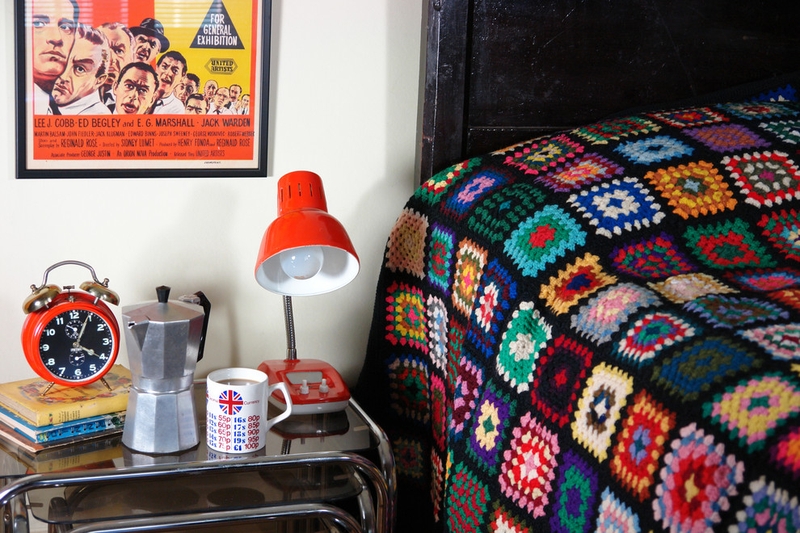
Knitted patchwork is an excellent home decoration for those who appreciate vintage accessories and unexpected combinations
Patchwork masters know how to create a large, complete blanket from small pieces. Patchwork is another name for this art, which develops accuracy, cultivates patience and enriches emotions. The painstaking combination of different fabrics into a whole pattern, they say, originated from poverty, but today it has already been elevated to the rank of art and creative hobby.
Where to start with patchwork?
The easiest and safest way to get started patchwork technique– master – sewing from old things –. Old Men's shirts, jeans and dresses - everything can be useful for your first experiments. Ideally, fabrics should be ironed and steamed well, not stretch and not require additional processing of seams. This means that all cotton fabrics fit this description.

An iron is an indispensable tool for patchwork sewing. All elements need to be smoothed not only before work, but also after each machine stitch. And not just use the iron, but steam it at high temperature.

For one product you need to select fabrics of the same thickness and density. Take another one life hack from professionals: fabric blanks need to be wetted and starched, and then ironed.
To start decide on the size of the future product. Estimate the size of the squares and start selecting materials. Such simple circuit requires colorful, bright fabrics, otherwise the design will turn out boring. Draw a square on cardboard and make required amount the same fabric blanks with seam allowances. If you are using more than two colors, first lay out the fabric squares on a large surface. This way you will avoid annoying mistakes that can ruin the whole picture.
If you are planning to sew a bright blanket, you you will need padding polyester and fabric for the wrong side and facings.
Operating procedure:
- sew the required number of squares into a strip along the width of the product;
- for the next strip, change the arrangement of colors in a checkerboard pattern;
- when all the squares are sewn together, you will get several identical strips;

- Carefully iron all stripes, smoothing the purl seams in different directions;


- now sew the strips together until they form a fabric the right size.

Now you can make a blanket from the canvas:

Such, it would seem, simple technique will help you create more than just a simple blanket. The most prestigious fashion houses create bags using the patchwork technique. If you are interested in this idea, find out how to sew a bag with your own hands.

Any master class on patchwork sewing for beginners begins with a photo of the finished product and an explanation of the main principle of this sewing technique. A main principle sounds like this: accuracy and attention to detail. And if the squares still have a chance to correct the situation as work progresses, then already at the stage of creating the mill, all the flaws will immediately come out.
The “mill” pattern is created on the basis of the same squares, but some will be cut and sewn on the diagonal. For practice, you can create a small fragment of the drawing.

You will need:
- fabric of several colors;
- diagram of the future ornament;

Operating procedure:
- cut out squares of the desired size from the fabric, but remember to allow seam allowances for parts that will be cut into triangles;

- cut some squares diagonally into triangles to create the correct pattern;

- lay out the resulting fragments on the table and make sure that they coincide with the drawn diagram;

- start stitching from triangles, in the end you will get all the same squares, but from different shades fabrics;


Using the patchwork technique, you can make useful things for your baby. Find out how to sew bumpers into a crib with your own hands.

Patchwork according to the rose pattern
The rose pattern is not only used for floral motifs. This is the general name for a design that resembles a flower in outline. Above in separate fragments you will need to work hard, but in the end you will get beautiful thing and appreciation of your skill.
You will need:

Operating procedure:

You can sew other products on the basis of patchwork squares. Find out for yourself and please your loved ones with your skills.
Appliques for patchwork sewing
Patchwork will help not only decorate your home, but also delight your children with funny appliqués. Ready-made blankets, pillows and napkins can be decorated with images of animals, cars or cartoon characters. This is where all the small scraps, including knitted ones, come into play.
Newfangled trends have brought back to life the production of products from scraps of fabric, returning patchwork to its former popularity. Patchwork will be useful to everyone who wants to decorate their home in an original way, have exclusive clothes and accessories, or please their loved ones with a cozy gift.
At the very beginning of the journey to amazing world patchwork for beginning needlewomen, it is extremely important to remember a few rules that will make learning easy and enjoyable.
Patterns for patchwork
Let's learn some rules before self-production products using patchwork technology.
Sewing blocks from scraps is the key and most difficult stage in the creative process. Templates will come to your aid, thanks to which you will learn how to cut out and sew patches.
Sample- this is a cardboard or plastic pattern of a piece of flap of the appropriate shape. Templates can be purchased at craft stores, or you can make them yourself. In order to create a template for the required element, draw it on paper without any margins for the seams. Next, make an indentation of 5 mm on all sides and mark the second outline - this is the seam allowance. Cut out both of these outlines from thick cardboard and as a result you will get 2 blanks for each part.

Remember: the side that must exactly match the dimensions of the finished product element is called the inside side and is the sewing line. The outer side is the cutting line, its size includes seam allowances
Especially for beginning needlewomen, we decided to publish on Krestik a selection of existing patchwork templates with examples of finished products.


At first, do not take complex designs such as circular patterns, patterns with rounded edges. In patchwork, it is easier for beginning craftswomen to cope with simple figures: square and triangle.
Cutting rules
Before the cutting step, keep the following things in mind:
- Before cutting, new fabric must be washed and then steamed with an iron. This is done in order to prevent possible shrinkage and discoloration of the fabric after washing the finished product.
- Scraps that have already been used before need to be starched and ironed.
- It is recommended to draw fabric with a pencil, chalk or soap, but not with pens (ballpoint or gel), as traces of them may appear on back side fabrics, they cannot be removed from the finished product.
- It is always customary to cut in the direction of the grain thread, then during stitching the patchwork parts will not warp. Using new fabric focus on its edge.
In order to cut out the desired element, attach a template with indents to the back side of the fabric, outline it with chalk, then attach the template on top without allowances and trace it again along the contour.

After you have cut out all the necessary parts, you can sew them according to the chosen patchwork pattern.
Patterns for patchwork
Oddly enough, it is better to start mastering the patchwork technique with big things, for example, making a traditional bedspread from patches.

IN modern fashion and the trend now is for things made with one’s own hands, that is, by hand, so it’s no secret that many girls, in order to keep up with fashion and modern trends urgently begin to learn the basics self made so that you can later boast about exclusive works done with your own hands. One of the techniques that has become popular among fashionistas is called “patchwork” or, more simply, the patchwork technique. In this article we will take a detailed look at how to create patchwork for beginners step by step.
Thanks to the patchwork technique, you can decorate any product using textiles. But one of the most common is still considered to be the production of bed linen; here the choice is huge; you can make pillows, blankets, bedspreads, blankets and much more using this technique.
Even table textiles are filled with patchwork elements. So popular for their decoration are tablecloths, napkins, towels, potholders, in general, everything that can be associated with this technique.
Patchwork is truly considered a universal art, because there are simply no certain boundaries for its production, so in any interior you can make and select furniture covers, curtains, wall panels, rugs.
They even sew clothes - vests, skirts, sweaters. Handbags in this design look very original. This turn of events turned patchwork into an art movement. Patchwork patterns are used in interior decoration, as well as in various fields, industries, and industries. So, from the finishing of telephones to the finishing of urban transport, the patchwork technique is used. Read about it here.
Patchwork for beginners step by step
In order to work in the patchwork technique, you just need to find and prepare pieces of fabric and a base on which all the elements will be connected. But at the same time, if you are determined to create a work of real patchwork, in this case any kind of fabric will not be suitable.
1. First of all, you need to create sketches, sketch out options and choose the one in which the color, texture, and ornament will be thought out. As a rule, they are still selected from those fabrics that are at hand, regardless of the origin of the fabric, whether it is natural or synthetic.
2. Before starting work, it is recommended that after the fabrics have been selected, wash them, starch them and iron them. As a result, the fabrics will be prepared for work and the product will immediately be protected from unexpected shedding, which can create an unpleasant result of the work.
Patchwork fabrics:
- The most suitable fabrics are considered to be linen, wool, silk, but semi-synthetic fabrics will also look great and complement the colors of the prepared sketch.
By choosing only linen, you can obviously help yourself a little with this, because it washes well, it’s quite easy to cut from it, and then sew small parts. As a result, cotton fabrics make excellent products, such as napkins, towels, potholders, pillowcases, and blankets. - From fabric such as drape, you can create products such as a blanket, rug, bedspread.
- Silk is unsurpassed in the manufacture of various types of clothing or artistic panels.
- Often, needlewomen try to combine several types of fabrics in one product, which are different not only in color and tone, but also combine completely different types fabrics such as chintz and calico, corduroy and denim, silk and chintz, linen and wool.
- If it is necessary to create a base, they usually use a fabric of strong density such as synthetic padding or batting.
Additional materials in addition to fabric that should be considered and prepared include threads, braid, cords, ribbons, and trims. You should also choose scissors for the job, set aside pins and needles for doing the work by hand, and when all the parts are connected, you should prepare the sewing machine for work.
There are certain tips in the patchwork technique for beginners. And before you start studying handicrafts, you need to learn it a little, because it’s not immediately possible to do everything correctly and quickly, and sometimes your eye fails due to inexperience.
At first you have to deal with a lot of problems, from which all the desire to continue working disappears, but it’s good that you can look at the works of experienced craftswomen, take note of some details, remember the most profitable options and bring them to life.

So, where does the preparation begin? Every craftswoman should remember that the most important thing in work is accuracy and precision, so each stage of the work should be performed with maximum concentration. Fabrics must be pre-treated, so this is done by decating. It consists in washing, drying and ironing the fabrics.
After this, they are sorted and put aside to certain patterns. These blanks should be prepared in advance by cutting them into a specific shape, taking into account seam allowances. They are made mainly from cardboard, or from strong and thick paper. In order to ensure that all dimensions are met, you can stick graph paper on them, and only then cut them to the required size.
If the seams are curved, then notches are made on the contour, which are needed to connect the remaining parts. Both highly artistic patchwork and simple designed products are made using the same technique. To do this, templates of the same shape from squares, rhombuses and triangles are prepared in advance.
In their work, craftsmen mainly use templates on which they outline additional contours, the outer one is necessary to separate the cutting line, and the inner one is needed for the line connecting the seam with other patches.

The distance between the contours is considered a normal seam allowance. Using such ready-made templates You can immediately protect your product in advance from further problems that could damage it as a result of distortion or unnecessary bulges. Most often, it is beginners who encounter such problems.
There is a certain plan of action when creating patchwork for beginners:
- So, first you need to come up with and create a sketch of the future product, it can be anything - a rug, a blanket, a bag, a pillowcase. In this drawing, you must immediately think about the color scheme and the drawing that will be made during the work.
- The next stage will be the selection of fabric; templates are made for it, which are then cut out and sewn into a single piece.
- To connect all the flaps, you must first fold them sequentially, and then sew them along the inner contour of the templates. More dense patterns should first be secured to the lining and sewn, and if the parts do not have allowances, then immediately sew onto the seams.
The most complex ornaments in shape look much more advantageous on the product. In order to create these, fabrics of various colors are prepared in advance, but if the work is being done for the first time, it is better to stick to more simple options fabrics and ready-made patterns.

When working in the patchwork technique, there are three main types of work:
- The first type considers a canvas that is assembled from scraps of fabric. The flaps may have different shape either geometrically correct or free.
- The second type uses a whole piece of fabric on which a pattern is created using stitches.
- The third type is similar to appliqué.
Patterns can be very diverse, depending on the patches themselves. Using traditional patchwork, you can create a canvas from identical templates that have exactly the same shape and size. But all of them should ultimately create a single pattern, in which there should be symmetry.
Asymmetrical patterns can also be used, but there is another direction for this, which is called crazy patchwork. To execute it, the patterns are stitched chaotically, without a specific sequence. But this direction is not used so often, since it does not fit the traditional direction, which has a sequence in the execution of the product.
More often it is used to create something new in fashion or art. Crazy technique, in addition to the listed materials, additionally uses such decorations as fringe, beads, braid, ribbons, and sequins. This technique is clearly not similar to the traditional technique, which uses ordinary geometric figures to create perfectly smooth silhouettes and patterns.

If we continue to compare traditional patchwork with crazy, we can also note that in traditional version They often use the technique of sewing from patchwork blocks, that is, they first sew them from ready-made rag squares and create a single element, which is made from the main large parts.
So from these squares you can make more complex shapes. These figures can be repeated; for this it is necessary to prepare templates in advance, which should consist of fabric and paper, which were then traditionally fastened together.
The remaining seam allowance is folded over and hand stitched again. Thanks to this English sewing technique, modern patchwork appeared.
There is a technique that is more popular in the United States of America. It is called the block technique. Pieces of fabric are sewn into these blocks, which have the shape of a triangle or rectangle, from which the pattern is created.
Even the most seemingly simple blocks are made from large quantity details. They are sewn together, and the time spent on their production is significantly less. Each block has its own brand name, and it depends on the number of stitched parts. So if a block is sewn from nine squares - a nine-part block, from five squares - a five-part block and a four-part block, which includes from four to sixteen parts.
The strip technique is also considered very popular. It is made in the same way as described earlier, only strips the width of one piece are first assembled, and then they are sewn into a fabric. Both described techniques are very convenient to use, since the patches are immediately sewn on a sewing machine.
When working on a product, you can sew patterns to suit every taste, because their number can amaze any imagination. In addition to patterns, there are also many techniques for making patchwork.
Patchwork tools
An iron is considered one of the most important tools in work. It is he who is responsible for creating perfectly even seams. During the manufacture of the product, they will need to be constantly ironed and, by the way, before work, all fabrics must be in excellent condition, and for this they are ironed from all sides.
Both the fabric and the seams are ironed in the same direction to make working easier. The seam allowances are ironed more often from the inside out to avoid wrinkles.
When working with blocks, iron them in the opposite direction to each other, and iron them only in those places where they are stitched. If necessary, moisten the fabric a little, especially if it is strong in origin.
It is also necessary to use templates; they are made in the form of a frame. The inside length will be equal to the length of the template, and the outer edge will be the same as the part with seam allowances. When performing it, you first need to circle it on all sides, then cut out the part. The outline inside means a seam.
The prepared pattern is then applied to the fabric and usually outlined with chalk, soap or a special pencil. It is necessary to cut the fabric lengthwise so that the finished flaps do not become distorted in the future. You can cut it with simple scissors, or someone can perform the procedure using a cutter.
Thanks to it, you can complete the work much faster, since it is capable of not only cutting geometrically correct forms, but also curved lines and shapes.
To carry out your work carefully and not waste all your efforts, you need to ensure that all the details are made flawlessly and sewn perfectly. If the work is being done for the first time, beginners are advised to work according to templates and using graph paper.
Before starting more complex samples, you can try to make a trial version, which will help avoid many problems, so that the next work will be carried out as expected without errors and errors.
History of patchwork technique
Translated, patchwork means “sewing from scraps.” This sewing technique began to be practiced more than three thousand years ago, so this technique has no homeland. It is known that literally all peoples and countries had the makings of this handicraft, which was also called textile mosaic.
But it was in America and Great Britain that this technique developed into something more than sewing. There, needlewomen began to create real masterpieces of decorative and applied art.
It is believed that patchwork sewing was originally developed not out of love for this needlework, but primarily in order to save a little on material. But later the craving for beautiful things affected the history of its origin.
They say that in the 16th century, fabrics of unusual colors were brought to England. These luxurious and colorful fabrics were only available to very wealthy citizens at that time, so it was believed that anyone who owned items made from these fabrics must be a very rich person in Great Britain. But soon the government banned the import and distribution of Indian calico, which made it completely inaccessible even to the wealthy population.
Thrifty housewives came to a common solution to the problem and began to make various products, linens sewn from chintz, and the remaining scraps remained as an addition to decorative appliqués.
Thus, technology migrated from England to other countries, and turned into modern look decorative and applied arts. But to this day, although this technique has become native to many nations, it is still considered a true attribute of the traditional American interior.
It was American craftswomen who created and preserved the tradition of sewing from scraps of fabric, as a result of which this technique has become so popular among other handmade techniques. These two great powers are considered the trendsetters in the spread of this technique, where they learned to make patterns that were quite complex in motifs and designs.
Anglo-American patchwork is becoming more famous over time and as a result it has an increasing number of fans and admirers. Despite the fact that men also became interested in making patchwork and began to apply it on a metal base, canvas, plaster, wood, women craftswomen remained faithful to the real traditions of making this technique and continue to work, as before, with scraps, threads and with a needle.
When starting work, everything needs to be carefully thought through, because even incorrectly selected fabric colors can forever deprive you of interest in continuing to do it creative work. Don’t be afraid to get started, the main thing is to start, and everything else will work out in the process of getting to know this amazing patchwork technique.
But to start working on it, you must first be inspired by the atmosphere of Old England, imagine what you would like to do, prepare a sketch, collect everything necessary materials and do! And no special significance, which product you can start and perform it for the first time, the main thing is your mood and desire.
Patchwork for beginners video
Patchwork masters share their secrets. Master Class
Using English sewing techniques using patterns, we sew bags, blankets, pillows


