Napkins - irreplaceable attributes on the table. But needlewomen consider it from a completely different perspective. For many needlewomen, napkins have become a material for creating beautiful lush flowers. thin, bright paper allows you to show imagination and create unique and stylish jewelry for decoration of any form.
How to make a flower from a napkin with your own hands
Various options with flower arrangements, which are made from ordinary napkins, are popular. Firstly, they are inexpensive, secondly, everyone can make them, even children, and thirdly, the flowers look stylish, original and bright.
Such attributes are indispensable for celebrating birthdays, weddings, anniversaries, and especially children's fun.
Everyone can make flowers from this malleable material. It is enough to study a few master classes, buy suitable napkins and get to work.
DIY napkin flowers: step by step
In order to independently make flowers from napkins, you must:
- Prepare materials. You can use both regular napkins and thick ones (they are brighter).

- To form a flower, you need to decide on its splendor. The more layers of napkins, the more magnificent the finished flower will be.
- Next, fold the napkins in several layers and cut out a circle.

- Thus, you need to prepare blanks. It is important that all circles stick together.

- To fix the blanks, you can use a stapler.

- You should get something like this.

- After that, you can begin to form flowers. To do this, lifting each layer of paper up, squeeze it a little with your fingers.


- After completing such manipulations with each layer of the napkin, lush and beautiful flowers are obtained.

Given the colors and the number of layers of napkins, you can make large and small flowers, lush and not very.
Flowers from napkins: photo
Flowers made from napkins are often used to decorate various celebrations.

Those who like to decorate their home with exclusive elements will certainly like topiary, the main element of which are flowers made from napkins. In addition, it can be a great gift for any holiday.

Romantic natures will certainly like a heart, which can be a great gift for Christmas.

by the most popular item decor that uses paper flowers, . They are often ordered in a specific color to match the color scheme. children's day birth.

As you can see, there are many ways to make unique things out of ordinary napkins. The main thing is to show imagination, perseverance and get down to business.
Most often, each hostess has a whole stock paper napkins. But if not, then there will definitely be a pack. They can be used not only for their intended purpose, but also with the child to make crafts that will delight long years. Crafts from napkins are always popular, because this is a cheap material from which you can make flowers, voluminous figures for a birthday or decoration for a photo shoot. Let's study.
Napkin crafts are always popular
The first needlework from this material began for everyone from kindergarten. Educators scrupulously teach children to cut christmas snowflakes, which decorate the hall before the holiday. Now, already at an advanced age, there are no restrictions for creating such miracles with your own hands.
The following ideas are suitable:
- various flowers from roses to chrysanthemums;
- volumetric inscription or figure for the holiday;
- panel;
- decoration on a dress or decorative plan;
- postcard
- use for decoupage of any product;
- napkin holder;
- basket and more.
There are craftswomen who create real masterpieces from ordinary napkins. It can be a flower that is difficult to distinguish from the real one, it is just as light, airy and beautiful. Some craftsmen make beads out of them, which are used to make necklaces. incredible beauty. And most importantly, no one will definitely have this, and technology allows you to make them strong, and such that they will last for years.
Gallery: crafts from napkins (25 photos)


Butterflies from napkins: crafts for the little ones (video)
How to make a flower with your own hands: step by step instructions
For beginner needlewomen there is a scheme simple flower, which will look great both in a bouquet and as a decor for any room. Walkthrough its manufacture is simple. For him, you will need a pack of bright, preferably plain napkins, threads, thin wire to match, green floral tape. And then do this:
- Without opening the napkin, cut out the largest possible circle from it.
- Insert a piece of wire with a bent end into the center of the circle.
- Raise the petals up, securing them with a thread over the wire.
- Gently pull the petals down and randomly separate them.
- Wrap the wire with ribbon, the flower is ready.
Making a rose
It is not difficult to make a rosette, just some stages of work require more painstaking work. Now it is very fashionable to take photos with huge roses, and not everyone can buy such an ornament, because the master will charge a high price for its manufacture. But if you try, you can make such a flower yourself.

Rose is easy to make
For her, you need to take either very large napkins, or a piece of special paper big size, glue, tape.
The production of the product in stages looks like this:
- Draw a circle so that it touches the edges of the sheet or napkin.
- Select a point on this line, from which you will need to draw a spiral with a center strictly in the center of the circle.
- Cut it out.
- Fold it so that the core is the center of the spiral. Petals will be formed by expanding the spiral.
- Glue the end of the spiral to the bottom petal.
- Fix everything from below with a drop of glue and tape.
- With the help of sharp scissors, give the petals a waviness, cutting out the waves on it.
From these roses you can make a whole bouquet and its size will directly depend on the flowers themselves. The flower template can be changed, leaving it just straight, without waves. Now it is in trend, but you need to focus on the texture of the paper or the color of the napkins.
Making a carnation
This would make a great birthday present for dad. A carnation can have a familiar color or a fantasy one, it all depends on you and the preferences of the recipient.
The schemes for their manufacture are very simple, and are a circle with a torn upper edge, which is fixed according to the principle of the first considered flower. The only thing that you will need to decorate with a floral ribbon is not only the stem of the flower, but also the convex place that hides the head of the wire.

This would make a great birthday present for dad.
Important! To make it more convenient for you to work, you need to prepare yourself workplace, it is best if it is a large table on which all materials and tools will be laid out in advance.
Bouquet of paper napkins: create your own flower arrangement
For a bouquet to be bright and beautiful, it must be made not only from flowers, even if they are different. Be sure to make leaves and blades of grass. They are made in the same way, only in a sheet, you will need to leave a wide part. To do this, take a napkin, similar in color to leaves and grass, and put it on the table diagonally, with the sharp end up. The side corners begin to twist into a tube towards each other. When you make a blade of grass, you need to connect it tightly by twisting the upper and lower ends. And if it is a leaf, then in the middle they leave a space that makes the craft look like a leaf, and only then connect the ends.

Bouquets can be very beautiful
What will your flower composition, you decide. Fantasize, play not only with the shapes of flowers, but with their colors, and your bouquet will be the best.
Master class on making volumetric figures
Your baby's birthday is coming soon, he is two years old, and a decision has been made to make a bright and colorful photo shoot. Fluffy deuce of napkins is exactly what you need. To make it, you will need to take thick cardboard, you can from a box and several packs of napkins, the color that suits your child. The figure can be made in the form of a flat figure or three-dimensional. The latter is more beautiful, but a little more difficult to manufacture.

Fluffy deuce of napkins is exactly what you need
- We draw a deuce of the size that you need on cardboard.
- Let's cut it out.
- Cut out a strip of cardboard that will go to the sides of the number to make it voluminous. It is important to make it thicker from below so that the deuce stands well on the floor.
- We connect the strip and the number with glue or tape.
- From napkins, without opening them, cut off the corners.
- Using a stapler, attach the napkin to the figure, fixing it strictly in the center.
- Pin the next one as close as possible to the previous one. Do this until the entire number is filled.
Making a fluffy heart
Such a heart can be made on wedding photoshoot or as a gift for Valentine's Day. The manufacturing principle is similar to the previous version, with the exception of the shape itself. The flowers decorating the heart can be roses or carnations. Their schemes have been described above. But they do not need to be pulled together along the bottom, but glued in the middle with glue or use a stapler for this. In terms of color scheme, burgundy or pale pink flowers look very harmonious, they can be made separately or together. Gothic black hearts are in trend. Surprise your other half with this gift. A red heart and a box with a ring inside, and your lady will say yes to you.
How to make flowers from napkins (video)
Napkins will become your favorite craft material. Do not do everything yourself, sit down the children and let them help you. It will be not only a useful skill, but also a pleasant communication. Which is very important with the employment of adults. Such moments will be remembered as the best, but isn't that the main thing?
13Happy child 20.11.2017

Dear readers, today I once again want to invite you to get creative. And, of course, it will be great if you actively involve in creative process your children. Children always offer something new and unusual. Such joint creativity is always distinguished by originality and originality. In addition, the process of making crafts together with the child brings them together, makes it possible to talk about something important and intimate. Don't miss this opportunity! And another idea for such creativity is do-it-yourself decor and crafts from napkins, which Anna Pavlovskikh will introduce us to. I give her the floor.
Greetings, dear readers of Irina's blog. I am very glad that my master classes and photos creative works resonate with you. I always read comments with interest and am sincerely glad that people are passionate about creativity. This is very important for me as a teacher and as an artist.
It's great that you work with the kids. This, I think, is an important part of education. How often parents are busy with work, worries, but if, nevertheless, in this bustle you find at least a few hours a week for modeling, crafts, drawing with a child, then these memories will remain with him for life.
Now I bring to your attention crafts from napkins with children with step by step photos making flowers from napkins. Such flowers can decorate both our holidays and weekdays. We will use the simplest and most affordable material - paper napkins of different colors and shades.
Application from napkins
What we need:
- colored cardboard;
- colored paper;
- napkins of different colors;
- PVA glue;
- scissors;
- pencil;
- eraser.
To begin with, on colored cardboard, draw the outlines of the future application. Next, you need to decide what exactly will be done in volume with colored napkins, and what will be done on a plane of colored paper.
To make balls, you need to cut the napkins into squares with a side of about 5 cm. Let the children roll small balls out of these squares with dry hands - they will surely enjoy this exciting process.
In a few minutes you will have a lot of paper balls, and all that remains is to glue them according to the pattern. Apply PVA glue to the desired areas of the picture and glue balls of napkins on them.
Make individual parts from colored paper. You can also cut rectangles from napkins and roll sausage tubes out of them, from which you will get antennae for butterflies, stems for flowers.
I suggest you look at the work of my daughter Svetlana in this technique. Perhaps you will be inspired by some ideas and do similar work with your child.


Bouquets of flowers from napkins with children
How to make flowers from napkins with your own hands? We will need the following materials:
- napkins of bright colors;
- pencil;
- stapler;
- scissors;
- glue stick;
- cardboard for the base or a floral ball.
Such flowers are made with pleasure by children from the age of five. They are made very simply, but they look spectacular. They can decorate greeting card or make a whole bouquet.
Draw circles with a diameter of 4-5 cm on folded napkins. Carefully cut out the circles. Secure the middle of each layered circle with a stapler.
Separate each layer of napkin and crease it up towards the middle. Fluff each layer, form a beautiful flower. Make several of these flowers and collect them on a floristic ball for bouquets or on a cardboard base for a postcard. The card can also be supplemented with colored paper leaves and a beautiful inscription.


Napkin roses
I offer you three options for making a rose from a napkin. Watch and choose the one you like best.
1 option
In order to make a rose, you need one napkin. Cut off the two folded edges of the napkin and take apart all the layers separately.
To make the first petal, it is necessary to fold one layer of the napkin not in half, but so that one part is a little larger. Begin to twist the edge with a fold evenly along the entire length. On both sides, you need to twist the corners of the resulting rectangle.
Make petals from all the separated napkins. Twist the bud from the first petal and continue to wind all the petals in this way, gradually unfolding the petals that are further from the center. Make several of these roses and combine them into one bouquet. Similar compositions can be used for table setting.


Option 2
Lay out the entire napkin, fold the square into a corner. Wrap the lower part of the triangle by one centimeter and continue to fold, leaving a small triangle at the top. Twist the wrapped strip into a spiral. Turn the ponytails remaining from the triangle to the other side - these will be rose leaves.


3 option
Lay out the napkin into one large square. Twist the square with a tube. Step back six centimeters from one end of the tube and twist it tightly - this is the future base of the bud. From the opposite side of the tube, straighten the corner - it will be a rose leaf. Twist the remaining part below the sheet tightly. Open the petals of the bud, twist the center of the bud tighter.


Rose and water lily from napkins for table setting
On holidays, we especially want to see the table beautiful and elegant. Flowers from napkins will help to decorate it with minimal means, but such decor will look very bright, unusual, original.
Rose
Take a small glass and napkins of the same color. Place the corner of the napkin inside the cup and turn the opposite corner of the napkin down. Put the next napkins into a glass with a slight shift in a circle and turn the corner down in the same way.
After investing 12 napkins, remove the finished rose from the glass and put it on the table. Making such a rose will be a real surprise for the child and a worthy decoration of the dining table.


origami water lily
In working with napkins, you can use a technique such as origami with great success. Let's try to make a beautiful water lily using this technology.
Lay out the napkin and fold it diagonally. Unfold and fold the four corners towards the center. Then wrap all four corners to the center two more times.
Turn the napkin over to the other side and repeat this action once. Flip back and turn the petals out of the corners on the underside. Also turn the corners up from the bottom side.


Let's watch a video on how to make flowers from napkins.
Napkin - simple and necessary thing on the table. But not everyone will think about using it in a different way. Look at this little thing from the other side and then you will understand that the thinness of the paper from which it is made, elegant prints and relative cheapness (compared to other materials) make the napkin a unique raw material for creating unique crafts. This is unlimited ground for imagination, because with the help of an ordinary napkin you can create any shape. It's worth starting simple. For example, everyone can make flowers from napkins with their own hands, you just need to familiarize yourself with several techniques, as well as show a little perseverance and patience.
Rose technique

Do-it-yourself flowers from napkins can be made using single-layer or three-layer napkins. Most often, three-layer napkins will have to be divided into layers, then the resulting flower will be more beautiful and neat. In order to create a colored rose, we need 2 single-layer napkins. One of them is red for the bud, the other is green for the stem.
First you need to unfold and straighten the red napkin. Carefully cut off about a third of it. Fold the napkin in half. You need to bend exactly its upper half. Look at the picture and see how it's done. Wrap the top of the strip around your left index finger. Get a blank for the bud. Roll the napkin around the bottom folded edge. One corner will stand out a little. You need to pull it up, then bend it to the side. Spread the bud very carefully with your fingers so as not to crush the petals, but to give the flower a natural shape. To perform this action will require some skill.
For the stem, you will need one single-layer cloth completely unfolded, or one of the layers of a three-layer cloth, previously separated. Wrap the napkin around the rolled end of the bud as shown. In the course of twisting, transform the napkin into a stem. In the middle of the stem, you need to make a leaf, for this, pull the edge of the napkin, and highlight the corner out. Continue twisting the napkin to the end.
After completing all the steps, you can admire beautiful flower which was created by you. The rose flower is ready. You can make several such elegant flowers - this will be an original bouquet that you can even give. If you do not have multi-colored napkins, then you can make the bud and stem of the same color.
Technique "Dandelion"

Do-it-yourself fluffy, multi-layered flowers from napkins are made not only for bouquets, but also for creating applications with a three-dimensional effect. Consider the technique of creating a dandelion. You will need a three-layer yellow napkin, green colored paper, a stapler, cardboard, which will be the substrate for the composition, and a little imagination.
The principle of making a flower
We take a three-layer napkin and divide into layers. We take two layers for a flower and fold them 4 times. Let's put both layers together on top of each other. We fasten the layers crosswise with a stationery stapler, as shown in the figure.
Cut out a circle from a square blank. Along the circumference of the trimmed workpiece, we make cuts at an equal interval from each other (about a millimeter deep). Gently lift the upper thin layer with your fingers and squeeze it to the center. Do the same with the next layers. You can lift each individual layer or two or three layers at a time. The dandelion bud is ready, let's move on to the rest of the flower.
To create a picture, apply your creative vision. Cut out dandelion petals from colored paper, stick to the substrate as your flair tells you, so you get a beautiful, exclusive picture.
Using similar technique, you can make an arrangement of sakura flowers from napkins with your own hands. In this case, you will need to take the multi-colored layers of a three-layer napkin, at a certain moment divide the workpiece into four parts, cut a flower instead of a circle and then continue to work, as shown in the figure.

Technique "Carnation"

You can get another masterpiece if you master the technique of creating fabulously beautiful carnations. If you want to make a red flower, then take a three-layer napkin of the corresponding color.
Tear off a small part about 1 cm wide from the napkin. You need to tear it off, not cut it off. This will give naturalness to the edges of the petals. It is important not to tear off the fold, watch this. Unfold one spread of the napkin as shown. Fold the napkin in the form of a bow with an accordion. With the torn part, tie the bow in the middle, as in the picture.
Next, you need to separate one layer from either side of the bow, do the same with all other layers. The other part of the bow can be cut off and fixed with a stapler, this will be the base of the bud. Thus, you will get beautiful flowers from do-it-yourself napkins.
You can make a composition of multi-colored flowers, do not forget that carnations are white, pink, and delicate tea color.
If at the very beginning of the manufacture of the carnation you do not tear off part of the napkin, fold it in its original form, then, by cutting the corners of the folded strip in a semicircle, you can get a completely different flower. Having experimented with similar moments, you will get many variations of colors from napkins, made not just from improvised material, but also with your own hands.
Using glue, you can attach flowers from paper napkins to a spherical shape, dilute with beads and petals cut out of colored paper or fabric and get fabulous compositions with which you can decorate even the wedding interior in the hall.


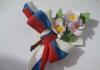
Or you can use this one - a brighter bouquet in a pot. From afar you can not distinguish from real flowers
Such a bouquet will be an excellent decoration for any celebration, and if desired, it can be left forever.
Don't be afraid to experiment with materials. Often, what lies at our fingertips can appear in a new light and please the eye for a long time, just a little effort and creativity is enough.
nadezhda sazonova
Master Class "These magical napkins Designed for the joint creativity of an adult and a younger child preschool age. The master- the class will be interesting to parents, educators, teachers additional education, and just creative people.
Target: develop the ability to work with napkins very carefully and accurately, develop and improve hand motor skills, develop Creative skills children,imagination, help create a festive atmosphere.
move work:
To work you will need the following materials:

1. Paper napkins 2pcs. (2 colors)
2. Scissors
3. Stapler
4. Bamboo (or any other) wand
5. Corrugated green paper colors(strip 2 cm wide)
6. PVA glue
Progress:

We put one napkin for another, add both accordion napkins.

In the middle of the accordion, we put a bracket with a stapler.

We round the edges of the accordion on both sides.

We turn the accordion with the folds up and straighten it, we get a "butterfly".

We begin to separate the layers one by one and collect them towards the center, lifting them from the edges.


If, at the stage of rounding the accordion, tint the edges in the entire "pack" felt-tip pen, get like this petals:


striped corrugated paper we wind it obliquely onto the stick, gluing it onto the stick at the very beginning and at the end.

We cut a strip of corrugated paper about 15 cm long at the edges at an angle and tie it in a knot in the middle of the stick, dropping a drop of glue.

With a drop of glue we attach the finished stalk to the cap flower.

Our wonderful napkin flower ready.

magical napkins helped us make a whole bouquet!
Related publications:
On the Christmas holiday, we are with children in senior group made from an openwork napkin Angel. The craft is simple and easy for kids to do.
Do-it-yourself paper for scrapbooking from a three-layer napkin. I want to offer you a master class on how to make your own scrapbooking paper.
Master class "Angel". First junior group. Vladikavkaz. At Christmas, you always want miracles. So I decided to make an angel and settle.
To draw a sparrow from an ordinary napkin, we need: 1. watercolor or White paper A4 format; 2. gouache; 3. wet wipes;.
What is a master class? this is what the teacher can show to teachers and parents, that "zest" that can be presented creatively in order to.