Making a frame for a picture with your own hands, as well as for a poster, photograph or drawing is quite possible. Moreover, the activity is interesting and even creative.
You probably immediately have doubts that you can really create something worthy that will not spoil your work of art, and that such a frame will not be embarrassing to hang on the wall. And it’s completely wrong to think so. If you are one of those whose hands are certainly not from the back, then everything will definitely work out. You just need a little effort, patience and knowledge, which I will gladly share with you. And the result will not disappoint you. And if it turns out well, it will even be a source of pride for you. It's always nice to look at something you've made with your own hands. So let's get down to business.
There are three main arguments in this regard:
- Firstly, not every locality has framing shops where you can order a frame, which is generally not cheap.
- Secondly, it is not always possible to buy a ready-made picture frame of the size you need. IN otherwise you will have to crop the poster or photograph, which is also not good.
- And thirdly, a product successfully made with your own hands will look more original and will bring you moral satisfaction.
At the beginning, you need to clarify that there are many options for making a frame. But half of them require the necessary equipment, which not everyone has, especially if you don’t do this all the time.
Therefore, we will consider the three most available options.
Making a picture frame from a wooden plinth
What should you stock up on before starting work?
Well, the materials and tools, in general, are not complicated, but you will still need to prepare something in advance.
And so, the materials you will need are a wooden plinth or well-planed bars with an oval edge. Both can be purchased at building materials stores. Long length you don't need it, so it won't cost much at all.

In addition, you will need a small sheet of thick cardboard or fiberboard with a thickness of about 2-3 mm.
You will need wood glue, staples or small nails, stain and varnish.
The tools you will need are a small hammer, a fine-tooth hacksaw, a miter box or square, a tape measure, sandpaper with not very coarse grains and a pencil.
In accordance with the size of your painting, measure out four pieces of plinth with a small margin in length. This is to make it easier to saw off the edges later.
 It’s good if for some reason you have a miter box available. In this case, you can easily carefully saw off the workpieces at the desired angle. If you don’t have one, and this is most likely the case, then you will have to use a square or a protractor. Mark the workpiece at an angle of 45 degrees and carefully saw it off, trying to prevent the wood from chipping.
If you don't have a fine-tooth hacksaw, you can use a metal hacksaw.
Just cut in this case slowly and without pressing, because the narrow blade of the hacksaw can move to the side, and the cut will turn out oblique. Make sure that in this case the hacksaw blade is well tensioned. Then it will wander less.
After sawing, the ends need to be sanded and the wood dust removed with a slightly damp cloth.
Now you need to fasten the pieces together. This can be done in two ways.

In the first case, we coat the ends of the blanks with glue and glue them together on a flat surface. At the same time, we check the correctness of gluing with a square and secure the corners with reverse side frames with brackets for wood. After this, let the glue dry completely.
In the second case, we proceed in exactly the same way, only we fasten the corners not with brackets, but with pre-prepared corners made of cardboard or fiberboard with a side of about 5 cm using nails. You can also use ready-made metal corners or cut them from tin.
When the glue has completely dried, we sand the joints with fine sandpaper and remove dust. After this we cover the frame with stain suitable color. Just try to apply one coat in one pass. Otherwise there will be streaks. Then you will have to cover it with stain one more time.
After a few hours, we varnish the frame, dry it and enjoy the result.
As you can see, making a picture frame with your own hands is not as difficult as it might seem at first glance.
Making a frame from slats with subsequent decoration

To do this, you will need planed wooden slats, which we saw off at an angle of 45 degrees in the manner described above and fastened with corners made of cardboard, fiberboard or metal.
Before nailing, cardboard corners should be coated with glue.

After the glue has dried, we paste the picture frame on the front side with decorative material and paint it in the desired color or varnish it.
Such material can be pieces of brushwood, shells, small flat pebbles, various buttons and much of what comes to your mind. Therefore, you can safely use your imagination. Such frames look quite original, but you just need to take into account the style of your painting or photograph. That is, for a more solid plot you need to choose a more strict decorating material, and for a childish or humorous one, something fun will do.
Anyone can make a picture frame with their own hands using the proposed decoration technology. You just need to show your imagination and approach the process creatively.
Making a frame from foam plinth
Another one is not complicated and interesting way. In this case, we make the picture frame very impressive and reminiscent of a classic baguette. But at the same time, it turns out to be very light and does not create big problems when attached to the wall in the simplest ways.
You can read about how to secure a painting without nails in this article.
 We choose a suitable foam baseboard, which is usually used in conjunction with ceiling tiles. It must be said that the choice of such skirting boards in stores is quite large, despite the fact that foam ceiling tiles are not very fashionable now. We carefully saw off the blanks to the size of the painting. This can be done with a hacksaw or cut with a stationery knife, if you have one that is not too flimsy.
We coat the ends of the blanks with a thin layer of polymer glue and press them firmly against each other on a flat surface until the glue sets.
To ensure that the corners are straight and the joints without gaps, check them before gluing with a square by laying the frame on the table surface.
After the glue has dried, we begin processing the frame. To do this, we use a water-based color. desired color, which is used when painting walls, and cover the frame with a regular brush.
Coloring  It's a good idea to start on the back of the frame to practice and make sure the color you want is the right one.
The picture frame should be painted completely on all sides so that the foam does not show through.
Color painting is a primer coating. Therefore, the final processing should begin. To do this, you will need to stock up on two cans of aerosol paint, brown, if your primer was brown, and golden.
In fact, the color of the primer and paint for it do not have to be brown. It all depends on your preferences and the main tones of your painting. We will take these colors as an example.
And so, after the color has dried, apply a thin layer of brown paint to it. This is done for two reasons. Firstly, the color is water-soluble, so it needs to be coated with a more durable coating. And secondly, the frame, coated with color, has a matte surface. To give it a more attractive look, we cover it with spray enamel.
 The next stage is the final refinement of our frame.
To do this, take a can of golden paint, remove the cap or lid from it, as you understand, and spray the paint into it from a close distance so that a little paint accumulates in it in liquid form, and not sprayed. After this, take a narrow paint brush and apply paint around the perimeter of the frame to the protruding horizontal edges of the plinth closer to the outer edge.
After this, dip the brush quite a bit into the paint.  and apply it with light strokes to the protruding patterns of the frame. Try not to worry too much at this moment and feel not like a painter painting a fence, but like a creator!
That's all. The frame turns out quite nice and very much resembles a real wooden frame. With a little practice, you can make such frames in a couple of hours.
We looked at three ways to make your own picture frame with your own hands. All of them do not require special skill or expensive tools. Which one suits you best, choose for yourself.
If you have a desire to purchase some stylish poster or a good copy of a painting for your frame, then you can read about it in the article. It describes everything in great detail possible options interior paintings.
Latest articles on this topic:

Tatyana Kerbo
Hello friends. Many people are faced with the problem of how to decorate a corner. children's creativity. I want to tell you about a simple and budget-friendly way to make frames for children's drawings or photographs. I made these in my group frames in two formats: for kids A5 (half a landscape sheet, for older preschoolers A4 (landscape or standard copy sheet) It’s labor-intensive to do for the whole group at once, so I advise you to involve parents. You can organize a joint master- class Children will draw, and parents will make frames for them drawings!

For work you will need: a piece of wallpaper, cardboard, glue, a large ruler, scissors.

Apply drawing(sheet of paper of the required size) for wallpaper

Trace along the contour with a pencil or felt-tip pen. If you do large number frames, you can use a sheet of cardboard, then you can draw a sheet without a ruler.

We remove the template and draw another smaller one inside the rectangle (we deviate from the original one by about 1 cm, we also need to draw diagonals in the inner rectangle

Then you need to cut the wallpaper diagonally from the center to the corners (not reaching the larger rectangle).


Then bend the resulting triangles


We bend the outer part of the wallpaper, trying to ensure that the resulting sides of the frame are the same in width, and glue it.


All that remains is to glue the backdrop. I use cardboard from packages of colored paper sets. Then in the finished frame, even if it is empty, you can see a cute drawing. You can use cardboard from regular boxes. Then the frame will be very rigid.. Important: We apply glue on three sides so that you can change works. In the center around the hole for drawing Apply strips of glue on the long and short sides. They are needed to the drawing is not"fell through" inside the finished framework. I showed the gluing lines with a marker. If it’s hard to see, I duplicated it in the center on a napkin

IMG]/upload/blogs/6bc1a82914e9567de04fa91f93f407bb.jpg.jpg That's it. The house for your masterpiece is ready!


You can glue a loop of braid at the back and attach frame with a picture straight to the wallpaper using a simple sewing pin. In our locker room we use ceiling plastic cornices as shelves.
Want to hang on the wall favorite photo, but don't have a suitable frame?
The easiest way is to buy it in a store. However, this is not interesting.
Why not make your own photo frames? This is a useful and creative activity that does not require special tools and materials.
First things first.
Cardboard photo frame: tools
Create beautiful frames without the appropriate equipment it is problematic. Therefore, collect a minimum set of tools. It should include:
large scissors; stationery knife; PVA glue; simple pencil; tape; small scissors; fine-grained sandpaper; ruler.
Note: It is advisable to get a cutting mat; it makes it much easier to mark out the details of the future frame.
If you are not happy with the color of the cardboard for the frame, purchase a can of spray paint. To decorate photo frames, use shells, pebbles, glass, rhinestones, beads, etc.
In addition to the basic tools, the following will be useful: paint brush with soft bristles, spray bottle, water and tongs. They will be needed to prepare the material for use.
Photo frames: preparation of material
The best material to make your own photo frames is cardboard. Why? It is cheap and easy to process. Every home has at least one carton and glue with scissors.
In its raw form, cardboard is of little use for making a photo frame. Its preparation boils down to the following - separate top layer until the corrugated part appears.
Sometimes this is not easy to achieve, because different types Cardboards are made with different amounts of glue and they have different thicknesses.
Find out how to quickly peel off the top layer of cardboard:
- Wet the part of the paper that needs to be removed. Distribute the moisture evenly over the surface using a brush. Wait 2-3 minutes until it is saturated. Using your fingers or a knife, pry up the edge of the layer and try to remove as much of the piece as possible. Cut off the remainder. Clean off the dried glue with sandpaper.
The above method is applicable to big pieces cardboard, for little ones, sometimes just rubbing the top layer is enough.
Note: Spray the water more carefully. If you overdo it, the cardboard will become soggy. IN best case scenario you'll have to wait until it dries. At worst, start the work all over again.
How to make a frame out of cardboard: instructions
First you need to decide what kind of photo the frame is being created for. It is not the content that is important, but the size and orientation of the card (vertical or horizontal). Based on this, proceed:
Step #1. Cut out the base.
Cut out the base of the frame from a large piece of cardboard. Its dimensions should be at least twice the size of the photo. Next you will understand why. Use a ruler and pencil to mark the outlines future details. Then cut it out with scissors.
Step #2. Making a compartment for photography.
In the middle of the base, draw a rectangle slightly smaller than the photo for which the frame is being made. Carefully draw along the outline with a stationery knife and cut out a window.
Cut out a rectangle that will cover the photo hole on the back of the frame. Glue the door with tape on one side.
Step #3. We complete the preparation.
Make some cardboard strips different lengths. Stick four of them around the photo compartment. Use the rest to create the structure of the front part. For clarity, look at the figure below.
To make the frame fit more tightly to the wall, glue triangles at the corners of the back. They compensate for the thickness of the door and allow the photo frame to hang more evenly.
Making triangles couldn't be easier. Cut one out using a pencil and then use it as a stencil.
Step #4. Decor.
Everything we did before had little to do with creativity. It's time to turn on your imagination full blast. Here is one of the options for designing a frame, but this is just an example, you can come up with your own version.
So, to decorate the photo frame we use the same cardboard. Take the prepared material with bare corrugation and cut into ribbons. Divide several of them into elements as shown in the figure below.

Photographs have long become not only an opportunity to remember the past, but also an accessory that allows you to effectively and originally decorate the interior of a room. With their help, you can easily add a “zest” to a room of any style by experimenting with sizes, shapes and materials.
It is the last thing on the list - materials - that make another photo frame unusual and fits perfectly into the interior, so it is important to know how to make a photo frame with your own hands from available materials. The following 10 most non-standard ideas will be a clear answer and example.

Idea 1 – Cardboard and paper
Taking up origami is the easiest way to make a frame with your own hands, because every person has a blank sheet of paper and the ability to use scissors.

To be able to use the available capabilities to their full potential, it is better not to deviate from the approximate algorithm:
- Measure the image (painting, photograph, print) prepared for insertion into the frame.
- Take a sheet of cardboard.
- Outline the image.
- Outline the required width (it is better to take values of at least a centimeter on each side).
- Draw a rectangle extending two centimeters on each side above the original photo.
- Draw an elongated rectangle resembling a tie.
- Cut out all blanks.
- Using glue, tape or a stapler, fasten all the elements.
- Decorate with rhinestones, applique, pattern or fabric.


The decor can be anything, the nature and size of which depends on the strength of the cardboard base and the ability to withstand weight.

If you plan to hang the frame you are creating on the wall, then instead of a stand in the form of a “tie” you need to glue a hook or loop of thread.

Idea 2 – Wine stopper
For the lazy, a simpler and less time-consuming option is suitable. To do this you will need a knife and two corks from a bottle of wine or champagne.

- We cut off a vertical part from each cork, stepping back from the edge no more than two centimeters.
- “Place” the cork on the resulting level base.
- We make two cuts in the middle at a distance of one millimeter.
- We cut a millimeter groove along the entire length.
- We place both blanks at a distance and insert the photo into the cuts.

Among the “advantages” of such a do-it-yourself photo frame, in addition to speed, simplicity, there is also accessibility, so decorate the rack or desk a numerous exhibition of your own memories will not be difficult.

Idea 3 – Tree
The stronger and stronger frame should be made of wood or any other similar building material. But it’s better to take plywood and a picket fence, then step by step instructions next:
- Prepare everything necessary tools(hacksaw, meter, pencil, nails) and materials (board, plywood).
- Outline the dimensions of the future painting and divide the resulting rectangle into four parts.
- Cut out structural elements.
- Using nails and screws, assemble the frame.
- Nail back wall from plywood.
- Sand the surface.
- Cover with paint and varnish.
- Secure the fastening element, which can be a loop, an adhesive backing, a magnet or a “step”.

Miniature and beautiful wooden frames are also made from brushwood: just collect twigs, break them to the desired length, fold them into a rectangle and securely fasten them with glue.


Idea 4 – Seashells
For lovers of the sea and beaches, there is a better option: assemble a frame structure from shells found in the sand.

Everything is simple here: we look for a sufficient amount of material, cover it with varnish and a pattern, make a frame for the picture, fastening the entire structure one by one.

Idea 5 – Popsicle sticks
A non-standard alternative to a paper frame would be a composition made from popsicle sticks or ice cream. To get an unusual accessory, we do the following: take two sticks and place them parallel to each other at a distance, perpendicularly and tightly glue the remaining sticks.


If you take into account the above ideas and algorithms, you can safely display all the photographs in the family archive on open surfaces.

Numerous frames will not clutter up the interior, since each frame will be spectacular, non-standard and original.


DIY photo frames


Beautiful paintings and memorable photographs can be a wonderful addition to the interior of any apartment or house. For decoration, you can use a frame made with my own hands. They should emphasize the advantages of the canvas and the photograph, highlight them and become a continuation of the composition. Next we will tell you in detail how to make a frame for a picture or photographs with your own hands.
Making picture frames – exciting activity, revealing the talent of a designer in the master.
The main aspect that must be observed when making a frame with your own hands is the design and purpose of the room where the product will be placed. When choosing a color scheme, it is important not to overdo it. Since shades that are too bright and saturated will be uncomfortable for visual perception, the finished frame will also not be able to fit into the interior.

The canvas in such a frame will lose all its advantages, fade and lose significance.
Additional information! Try to focus your design on the content of the photograph or painting, as well as its parameters. The more colorful the picture, the smaller and more inconspicuous the frame should ultimately be.
If this has already happened, don’t worry, you can make adjustments to the shape, color and design at any time. This possibility is the main advantage of making a frame with your own hands. Using various available means and design options, it will be possible to transform the picture that was planned to decorate the room.

For small images and photographs there are many interesting ideas on the use of available materials.
Another method is to place the canvas at a non-standard angle, while changing the lighting, or near certain furniture to create a single picture. By making and correcting mistakes or trying different placements, you will achieve excellent results.
What elements can be used to make a frame?
You can make a DIY picture frame from the following available materials:
- tree;
- textile;
- thick paper or various types cardboard;
- plastic and polyurethane elements;
- gypsum.

Before you make a picture frame with your own hands, you should build a clear design concept.
The presented options are not the entire list of resources that can be used in decorating a picture frame and stand for it with your own hands. Based on the selected resource, you may need the following tools:
- jigsaw, hacksaw, scissors;
- measuring instruments;
- markers, pen, pencils;
- elements for connection - small nails, specialized glue;
- miter box;
- varnish, stain, paint;
- finishing accessories.

It is important to remember its purpose to frame the image and serve only as a background for revealing the idea of the composition.
IMPORTANT! It is important to maintain harmony in the combination of framing materials with the image. In this way, a single whole is created, which will turn into an excellent design product for decorating the room.
Below is more detailed information about the manufacturing process depending on the chosen base.
Tree
This material is rightfully considered traditional option for the design of artwork. In most cases, wood framing is made in neutral shades. The shape is given in a simple manner, without complex additional structures, but this process still requires certain knowledge and skills.
The easiest way is to use wooden slats of the required dimensions. According to the dimensions of the image, four blanks are prepared, which are equal in pairs.

To fix the canvas, it is necessary that the frame overlaps the inside of the picture by 5 millimeters.
A more labor-intensive project includes a DIY photo or canvas frame that features glass. For this option, you will additionally need to make a back wall using thin plywood. The external dimensions of the finished product must necessarily be slightly larger than the glass and the photograph itself. If you do not have the necessary knowledge to work with glass elements, we recommend ordering a ready-made sheet from a workshop.
Having calculated the thickness of the glass and the painting, you should deepen the inside of the blanks by this value. Most often, this figure is 2-5 millimeters. Next you need to cut the planks at the correct angle; to do this, use a square and a miter box. Be sure to treat the resulting sections with sandpaper, then connect them with glue in the form of a square or rectangle. The glue will need about 4-5 hours to dry completely.
After final drying, you can begin decorating. Paint or varnish is suitable for this.

Subsequent layers should be applied only after the previous one has dried.
First of all, glass is placed in a wooden frame prepared with your own hands, then it is turned over with the main part down and then the canvas is laid out on the glass. Thick cardboard and plywood must be placed on top of the painting. If the calculations were made correctly, then the backdrop is glued along the entire perimeter of the product. To improve the connection, you can nail small nails in the corners of the framing element.
Polyurethane ceiling plinth
If you have a polyurethane plinth for the ceiling, then you can make a white frame with your own hands from these scrap materials. First of all, take measurements of the workpieces. Next, use a hacksaw to cut the baseboard into 4 parts at sharp angles (45 degrees).

It is important to do this perfectly evenly.
We place special Titan glue on each side of the cut and connect it. A clamp will help make the connection stronger and more durable. Treat the upper surface of the joining area with acrylic paint.
Cardboard
Cardboard is considered the most affordable and inexpensive material for framing. The process with such a basis takes little time and effort, and children and teenagers can handle it.

You can use part of packing box, that is, corrugated cardboard.
First, cut out a cardboard base (rectangular or square), inside of which there should be a window for the picture. Dimensions are determined based on the size of the photograph or painting. In most cases, the frame width is more than 4 centimeters. Next we prepare the back element of the product, which is similar in parameters to the base.
Additionally, you will need a stand if it was planned that the DIY cardboard frame for the picture would be placed on a bookshelf. To do this, cut out a rectangular leg with dimensions of 7*17 centimeters, sharpen it at the end, and bend it about 2 centimeters on the other side.

Paper
If you have wallpaper scraps or plain colored sheets, you can make your own frame from paper or cardboard. The process is similar to using corrugated cardboard.

Be sure to use thick paper, so the framing product will last even longer.
How to make your own picture frame from improvised materials?
Making home decor is not a simple process, but it is fascinating and allows you to add your own unique twist to the interior of any room. After the first successful experiment, any craftsman will not want to stop there.

A do-it-yourself picture frame for a wall made from scrap materials can highlight the content and also make it more comfortable and unusual.
From buttons
Many needlewomen are interested in how to make photo frames with their own hands using buttons. These accessories add brightness and zest. finished product. You can decorate buttons on a base made of paper or cardboard; to do this, you need to additionally cover them with fabric or apply paint. Then you start gluing the multi-colored mosaics.

From old newspapers
Newspaper baguettes are used for the base. To add colorful shades, the ideal option is to use color prints.

To decorate the details, you should lay out sheets of newspaper on the table, roll them into a tight tube, gluing all the paper layers together.
ATTENTION! Try to roll all the parts with the same density. This will make it easier to connect them.
For each side of the frame, you need to prepare about nine blanks. The number depends on the chosen width of the baguette. After 24 hours, the adhesive substance will dry and you can start pruning with right angle(45 degrees) on both sides. For a more correct procedure, use a protractor or miter box.
The parts should be connected at right angles using glue and a tongue-and-groove system. Use toothpicks for the tenon; the groove can be made with an awl.

Use putty to cover cracks in corners.
The finished product must be primed with a mixture that consists of 1 part water and 2 parts PVA and white paint (water-based or acrylic). All components are carefully mixed with the gradual addition of water. The end result should be a mixture with the consistency of liquid sour cream. This solution is applied in 2-4 layers and dried.

To secure a photo or canvas in a DIY newsprint frame, use small nails or stationery tape.
Made from natural materials
An excellent product will be obtained if you use twigs or thin tree branches. For reliable fixation, use organza or thin rope.

If desired, all elements are additionally glued glue gun.
First of all, you need to take 4 bunches of twigs with the same thickness, place them perpendicularly and tie them with organza. You can preserve the natural texture of twigs and twigs by covering all elements with colorless varnish.
Another way is to decorate the base of wooden picture frames with your own hands, namely with dry wooden branches. To do this, you need to take a frame with wide brims, well-dried sticks and a hot glue gun. First, break the branches into elements with a length equal to the width of the base. Next, lubricate the frame with hot glue and place wooden blanks over its entire area.

After drying, the accessory can be used for its intended purpose.
For lovers of green decor, the ideal option would be to use dry moss. The process of decorating with them will take a little time, but the result will delight you with its colorfulness. The moss is placed over the entire area using glue, so you can give a second life to the old base for pictures and canvas.
Using decorative tape
Decorative tape - lightweight and available method modify an old frame or create one with your own hands from cardboard parts. To do this, you should gradually apply strips of tape in the sequence suggested by your imagination. Excess elements are cut off with scissors.

The process only takes a few minutes, but the result will liven up any room.
3D Yarn Frame
To make your own frames on the wall from scrap materials, for example, yarn, you will need a base with smooth edges, PVA, multi-colored threads and scissors.

During design, it is necessary to apply glue and wind the yarn in stages, that is, in small sections.
Gradual decoration will ultimately result in a higher quality product.
ADVICE! For a creative approach, you can string beads and rhinestones onto the thread.
From pallets
Wooden pallets are the easiest way to make a frame with your own hands. All parts are available to everyone, regardless of income. The number of pallets is calculated based on the right size framework. You can fasten the elements using small nails, a wood stapler, or special glue.

Be sure to use two parts for horizontal stripes, this will make the product even more original.
Using wine corks
How to decorate picture frames wine corks with your own hands? It's quite simple. The material must be cut into small rings up to a centimeter in height, then you paint them in any shades and attach them to the base with a glue gun.

After drying, you can place the canvas or photograph.
Eco-frame made of cereals and grains
For decoration ready-made basics They use numerous eco-elements - cereals, grains, shells, sea pebbles.

Such accessories can be left in their natural form or painted to match the interior.
All elements are placed on an adhesive base in in no particular order, sorting in a certain way or creating a pattern.
From magazines and newspapers
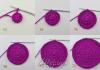
Multi-colored clippings from magazines and newspapers can be used as components for quilling. Small blanks are glued and twisted in a circle.

Such blanks can be mounted on a cardboard or paper base.
With their help, it is possible to make a stand for frames. Let's see how you can make this frame stand? It is important to choose a thicker magazine sheet and cut a rectangular leg. On one side it is pointed to be placed on a flat surface. The second part is wrapped to apply glue and connect to the frame.
Summing up
Making photo frames and canvases with your own hands from cardboard, as well as other available materials, is an exciting and exciting process. Here we have described in detail how to make a frame and stand for pictures and photographs with your own hands from cardboard, ceiling plinth, wooden parts and popular methods for improving such projects.

Experiment, and a decent result will not keep you waiting.
VIDEO: DIY frame decor in Eco style.